Table of contents
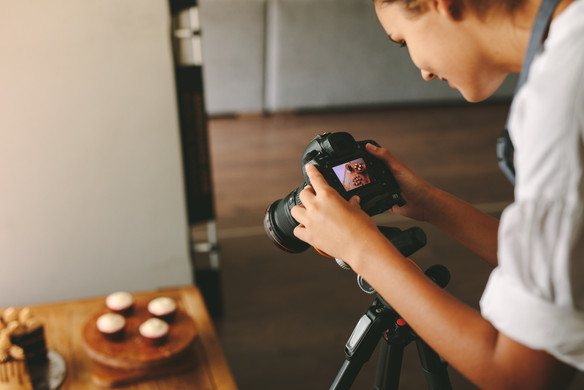
Food photography makes a big difference in both getting people into your restaurant and in what they order online.
According to one study, 67% of consumers consider the quality of a product image as “very important” when making a purchase online. This is an important statistic since more restaurants are shifting towards online ordering and takeout: Square’s Future of Restaurants report found that restaurants expect 62% of their revenue to come from takeout and delivery.
The bottom line is that potential customers will be judging the quality of your food based on the photos available on your website and delivery apps first, before they ever reach checkout. In fact, an analysis of Square data found that 74% of first orders for food and beverage purveyors are for items with images. And if your food photos don’t look great, people may be less inclined to try it — even if it tastes great.
Here’s how to take scroll-stopping food photos for your website and social media.
Food photography 101: Understanding the basics
Great food photography is a result of several important things done right. These include:
Plating
This is the arrangement of your food on the plate. Plating is important because it affects the diners’ perception of a meal. A study found that diners not only prefer more artistically plated food, they also rated it higher than other meals and were willing to pay more for it. So, pay attention to how you pour your sauce or place those leafy greens, and how you compose your overall shot.
Lighting
Lighting can make or break the appearance of your food in photos.
“There is nothing worse than seeing food that looks, for lack of a better word, gross because the lighting is creating more contrast, or lack of lighting is making the food look dingy,” says Danni Siminerio, manager of Square Photo Studio. “Even lighting is key for elevating the look of your food.”
The best lighting for food is indirect, such as a shaded location on a sunny day, which will give your food a bright, even glow.
If you’re working in low-light places, such as restaurants, use a camera with a fast lens. The benefit is that the wide maximum aperture of the fast lens allows more light onto the sensor of the camera so you still get quality photos.
Here are other lighting techniques you can try:
- You can light food from the top or side, but most dishes benefit from supplemental backlighting.
- Illuminate foods from behind to boost the appearance of steam when shooting hot food and beverages.
- Use soft, diffused lighting to dispel harsh shadows, which can make food unappealing.
Camera settings
Whether you are using a smartphone or a professional camera, it is important to get your settings right. Some of the key areas to look out for are:
- White balance: White balance refers to how warm or cool the colors in your photos look. While most digital cameras generally reproduce the actual colors in the subject, sometimes they can produce overly warm or cool colors because photo colors change depending on the light source.
- Be sure to neutralize the white balance and eliminate any unflattering tints cast on your food. We’ve all seen some of those unappetizing shots on people’s social feeds. Look for WB (white balance) in your camera settings and adjust as needed.
- Focus: This refers to how you adjust the lens of your camera to get the greatest detail and sharpness in your photo. Use the aperture-priority (Av) mode on your camera because it allows you to control the depth of field (the distance between the nearest and the farthest objects that are in sharp focus in your photo).
- The aperture of a camera is calibrated in f-stops: Use a low f-stop number if you want to zoom in on small details or blur out a busy background. Increase the f-stop number to bring more elements into the scene — for example, when capturing a full table.
Editing
Your photos will often need a few retouches and adjustments before they are ready. Some of the common adjustments are for sharpness, white balance, saturation and contrast. You could do this using a simple or advanced editing tool like Photoshop.
Consider creating a distinct editing style so your photos feel unique. This will also make your photos instantly recognizable in social media news feeds.
Get more business stories, delivered once a week
Access the best Town Square stories right in your inbox with our weekly newsletter.
How to take mouthwatering food photos
Use freshly prepared food for best results.
Siminerio says the number-one rule of food photography is to use freshly prepared food. “If your food has been sitting out for an hour, it will show in the photos.” The goal is to use food at its best quality so you get the most vibrant colors and won’t need to do too many retouches after the shoot.
If you’re working with mixed foods like salads or sandwiches, Siminerio recommends saving them for last. “If you’re shooting a sandwich, for example, don’t prepare the sandwich until right before you shoot it, otherwise it starts soaking into the bread and creates a less appetizing appearance,” Siminerio advises.
Keep attention on the food.
Your food is the star of the shoot so be sure to use plates and bowls that aren’t distracting. “It’s better to use a solid white matte plate than a shiny or patterned plate — unless that’s what you’re going for,” Siminerio says. If bold colors and patterns are part of your brand, feel free to use them. Avoid too much clutter or other elements that could get in the way, such as food wrappings, styrofoam, or even cutlery.
Find the right angle.
“If you had to pick just one angle for food, that would be the overhead. That’s the standard for anything in a dish,” Siminerio says. Think: salads, pasta, and poke bowls are best shot overhead.
For layered food like sandwiches or a coffee in a mug, a three-quarter angle works nicely since an overhead shot would make it look one-dimensional. Use close-up shots to draw attention to details and textures that would otherwise go unnoticed, such as water droplets on chilled food.
Get professional help.
While you can always take your own photos, getting the service of a professional can bring some pizzazz to your food photos. And you don’t have to spend a fortune. For example, Square Photo Studio is a great option for canned, jarred, and packaged foods. For just $9.95, you get three high-resolution photos taken from different angles, retouched, and optimized for online selling.
Additionally, Square offers common item images, such as a bowl of fruit or rice, that you can add to your online ordering site.
For fresh and more unique dishes, or to capture your cooking process, consider hiring a photographer to come to your location. Find a photographer who specializes in food photography — it is a special skill.
- Search freelance directories like Thumbtack and Upwork. Be sure to ask for samples of their work.
- Search Instagram, where most will display their work.
- Search local media sites or blogs and look for names on the photo credits of images you like. Some of these photographers may be freelancers you can hire.
- Additionally, check out the websites of other local food purveyors and ask them for recommendations if you like what you see.
Stay creative.
If you’re just getting started, it might take a while to get things right. While you should always start with the basics — clean lighting, a good camera, and freshly prepared food — don’t be afraid to experiment. Try different lighting techniques, plating styles, angles, etc. until you discover what works best. And if you ever need help, consider using professional services such as Square Photo Studio.
![]()


