Get Started with Square Shifts
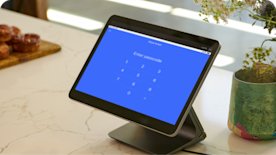
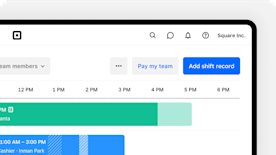
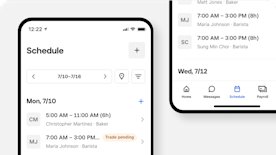
With Square Shifts, you can track your team’s time, manage rotas and track commissions. Your team members can clock in/out at the point of sale or by using the Square Team App, as well as view or print their workday summaries directly from the point of sale. You can also create, manage and publish rotas based on the availability of you and your team.
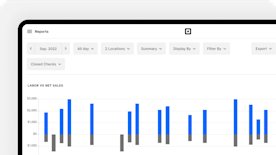
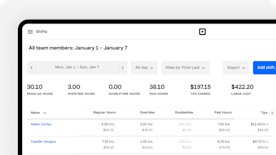
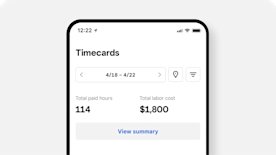
With Square Shift reports, once you’ve set up your team member shifts, you can view your shift reports right from your online Square Dashboard and your team members can keep track of their time worked on the Square Team app.
When using Shifts Plus, you’ll also have the ability to view how your scheduled hours compare to the actual hours your team members worked. In both Workday and Labour Cost, you can view upcoming scheduled shifts as well as alerts for early, late and no-show clock-ins.
Set up Your Team Members
Get started with Square Shifts by subscribing to either the free or paid tier in the Shifts section of your Dashboard. You can then add team members, assign permissions, job titles and wages, and determine if team members are eligible for tips.
Note: Square Shifts Free has a cap of five team members; if you wish to add six or more team members to your account, you’ll need to subscribe to Square Shifts Plus.
To add your first team member:
- Log in to your online Square Dashboard and click Staff > Team > Team Members.
- Click Team member
- Fill in the team member’s Profile. Enter the team member’s name, email address and phone number. The email address and phone number fields are optional. The team member ID is optional, but we recommend filling it in.
- Click Next.
Note: Adding an email address will invite the team member to sign up for Square, receive their personal passcode and access their timecards in the Square Team App. If you are a Square Payroll user, team members can also view their payslips in the Square Team App.
On the Jobs screen, you can assign job titles and wages to track your labour cost and view team members’ time spent performing one or multiple job functions at your business.
- On the Jobs screen, provide a primary job title and pay type (hourly or salary). Note: If the job already exists, click Primary job title to access a drop-down menu of existing jobs.
- Based on the selected pay type, enter an hourly rate or annual salary and weekly hours.
- If the employee will have multiple jobs, click Add another job.
- Click Next.
Note: While adding a job title is required, wage information is optional.
If your team member has additional job responsibilities that require a secondary wage and you’re using Square Shifts, select Add Another Wage to add another job title and pay type. The team member will be able to choose from a job title when clocking in/out in the Square app and the wage for that job will be tracked in your labour cost reporting. For example, a team member can clock in as a Host for part of their shift and then switch to Manager.
On the Access screen, you can assign permissions to the team member. With permissions you can allow your team members to log in to the Square app to accept payments, clock in and out using the Square app or access your online Square Dashboard.
- From the Access screen, select an existing Permission set or click Add permission set. Note: Custom permissions are available to Team Plus paid subscribers. Creating new permission sets is only available through the online Square Dashboard and cannot be done in-app.
- Click Locations to select the location your team member will work from. Note: If you’re using multiple locations and want to give your team member permission for each, toggle on Assign to All Current and Future Locations.
- Create a personal passcode that the team member will use to log in and track time. You can customise this passcode or create it randomly by clicking Generate.
- Click Save & review.
Note: Make sure to keep this passcode for your records and provide it to your team member. Each passcode is unique per team member; this is how they’ll access the Square app on any device paired to your business location.
- From the Navigation panel in your Square Point of Sale app, tap Team.
- Tap the + icon to pull up the Create team member screen.
- Enter the team member’s name, email address and phone number.
- From here, tap Primary job title to assign the team member a job title or tap Create job to assign them a newly created job title.
- Tap the back arrow to return to the Create team member screen and enter the team member’s hourly rate. Note: This field is not required to save your team member’s profile information.
- Tap Permission set to assign your team member to an existing permission set. Note: Team members will automatically be assigned to Team permissions upon creation. Creating and editing new permission sets is only available on Square Dashboard at this time. Shifts Plus subscribers also receive access to a second customisable permission set in addition to team permissions access.
- Tap Personal passcode if you’d like to create and assign a custom passcode to the team member, then tap Done. Note: An automatically generated passcode will be assigned to new team members, but you will always have the option to assign a custom passcode from this section.
- Tap Location to select the appropriate location(s) for the team member and choose to toggle on/off the option to Assign to all current and future locations. Note: The Location section will default to the current location associated with your Square Point of Sale account during the creation of your team member(s).
- After returning to the Create team member screen and confirming that all information is accurate, tap Save.
Once you’ve added team members, you can assign custom permissions that give different levels of access to your online Square Dashboard or your Point of Sale.
In addition to a set of team permissions, Shifts Plus subscribers have access to a second customisable permission set. This custom permission can be assigned to multiple employees and used to give your team access to complete certain shift-related tasks, like approving timecards or managing schedules.
Learn more about creating and assigning team permissions and custom permission sets.
Set Your Work Period
Setting a Work Period enables Square Shifts to report and calculate overtime based on your business’s operations. If your team members are typically clocked in past midnight, set your workday hours to at least an hour past the end of the closing shift. For example, if you’re operating a bar that closes at 02:00 a.m. and team members leave at 03:00 a.m., make the workday hours start at 04:00 a.m. in case of overtime and to ensure their shifts can be viewed in the same workday.
Visit Staff > Shifts in your online Square Dashboard > Settings > Rota.
Set your start of Workweek and Workday.
Click Save.
Review and Set Your Overtime and Breaks
Overtime settings are automatically associated with your area based on your location. You can confirm your location(s) by visiting Account & Settings in your Square Dashboard.
If your team members are working multiple jobs at different wages, overtime is calculated using the weighted average of the total normal earnings divided by total hours worked.
- Log in to Staff > Shifts in your online Square Dashboard > Settings.
- Under Overtime, set a daily, weekly and double-time limit. Make sure to review overtime rules.
- Save.
- Log in to Staff > Shifts in your online Square Dashboard > Settings > Breaks.
- Click Add new break to add your first break.
- Add a name and duration, and select the compensation setting (paid or unpaid) for the break.
- Click Save to confirm the break settings.
- Add up to 3 breaks in total for each of your locations.
To help stay compliant with local labour regulations requiring employee breaks, Shifts Plus allows you to enable settings that prevent team members from ending their breaks early. To get started:
- Log in to Staff > Shifts in your online Square Dashboard > Settings > Breaks.
- Toggle on Block Ending Breaks Early.
3 If applicable, enter a time under Allow Within and toggle on Only This Location or All Locations. - Click Save.
You’ll also have the ability to restrict your team members from clocking-in early for their shift or on days when they’re not scheduled to work. To get started:
- Log in to Staff > Shifts in your online Square Dashboard > Settings > Clock in/out.
- Toggle on Block early and unscheduled clock-ins.
- If applicable, enter a time under Allow within and toggle on Only this location or All locations.
- Click Save.
Note: If you’ve enabled the settings to block ending breaks and clocking-in early, your team member(s) will see a notification in the Team app if they attempt to do so.
To help maintain the accuracy of your timecards, Shifts Plus allows your team members to request changes to their timecards for past shifts. Once the appropriate setting is toggled on, team members can request changes directly from the Square Team app and you can manage the requests through the online Square Dashboard. To get started:
- Log in to Staff > Shifts in your online Square Dashboard and select Settings > Clock in/out.
- Toggle on Timecard editing.
- Click Save.
Note: Account owners and team members with the Respond to timecard requests permission enabled will receive a notification when team members request edits to their timecard(s). These requests can be approved or declined directly from the email notification, Square Team app or online Square Dashboard. Edit requests will expire after 30 days.
Turn on Time Tracking
Once your permissions, team member profiles and shift settings are all set up, it’s time to enable break tracking in the Square app.
Log into the Square app and visit Settings > Time Tracking > toggle Time Tracking on.
If you’ve paired a device to a specific location using device codes, you’ll need to make sure your team members have permission to work at that location. To check, go to Team in your online Square Dashboard and select the team member name to make sure the correct locations are selected under Permissions.
Turn on Tip Pooling
With Shifts Plus, you can use tip pooling to equally divide each credit card tip across all team members clocked in at the time of the transaction. Tip pooling ensures equitable and timely tip payouts for your team and removes any alternate and complicated workflows you currently use to distribute tips manually – giving you more time for other aspects of your business.
To get started:
Go to Staff > Team in your online Square Dashboard.
Select the team member you want to edit to open their team member profile.
Click Edit under the “Job and compensation” section.
Toggle on or off Tip eligible for each role.
After confirming that you applied tip pooling eligibility to all team members, you can turn tip pooling on. To do so:
Go to Staff > Shifts in your online Square Dashboard.
Select Settings > Tips.
-
For your tip distribution method, select one of the following:
Tip directly: Transaction tips are attributed to the team member who collected the tip.
Pool tips per transaction: Transaction tips are split equally among all tip-eligible team members clocked in at the time of the transaction. This distribution method works best if you want to reward your team based on the tips earned during their specific shift.
Pool tips by hours worked: Transaction tips from sales are split among tip-eligible team members based on their hours worked. You can specify whether to split tips based on a 24-hour workday or across a 7-day workweek. Splitting tips by workday works best if you want to reward team members who may not work their entire shift interacting with customers, while splitting tips across a workweek better accounts for tip variability across a wider time frame.
Pool tips by percentages: Tips are split by a user-defined percentage at the end of each workday or workweek among tip-eligible jobs. Tip-eligible team members with the same job will receive tips based on hours worked, and tip percentage amounts assigned to each job must add up to 100%.
Select a timeframe to apply to your tip distribution settings, either a 24-hour workday or a 7-day workweek.
Choose whether you want to apply tip pooling to Only this location or All locations, as well as an effective date. Note: The effective date can be up to two weeks in the past.
Click Save.
You have the option to toggle on or off Distribute unattributed tips equally, which is only relevant if you’ve selected Pool tips per transaction as the tip distribution method. If the setting is toggled on, tips received when no one is clocked in will be equally distributed among all tip-eligible team members who clocked in on that workday.
If applicable, toggle on Declare cash tips. Tip-eligible team members will then be required to indicate the cash tips they earned for their shift before they clock out or switch roles at the point of sale or on the Team App. Your shift reports, such as Workday, Labour cost and Timecard CSV reports, will also include cash tips entered by your team and the cash tip data will be adjustable.
Once you follow the steps above, credit card tips will be split among all tip-eligible team members within a 24-hour workday or across a seven-day workweek. Any changes made in the middle of a pay period won’t apply to transactions retroactively.
Note: Make sure you check your state and local laws regarding tip pooling, notice and recordkeeping requirements.