


Please update your browser.
Download the latest version of a supported browser below to get the most out of this website:
Retail Sell more and stay stocked with a POS designed for retail
Keep your inventory in check
Spend less time tracking stock and more time selling. Stay in control with intuitive inventory management tools.


Always know what’s in stock
Your stock updates in real time across locations and channels, so you never oversell or run low unexpectedly.
Get a clear view of inventory history
See every sale, restock, and adjustment in one place, making it easy to spot trends and stay ahead of shortages.

Manage inventory in bulk
Easily organize, update, and receive inventory across multiple items at once.
Simplify purchase orders
Create purchase orders and vendor profiles to easily order, track, and receive inventory.

Print barcode labels
Create and print barcode labels using supported label printers, dimensions, and templates.

Count inventory on the go
Use your iPhone or iPad camera to update, review, and confirm inventory counts with a dedicated stocktake tool.
Simplify checkout, everywhere
Keep lines moving and give shoppers the flexibility to shop how, where, and when they want.


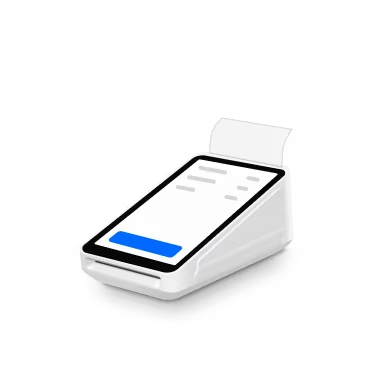
Take payments
Accept all major payment types, including Afterpay1 and digital wallets with Tap to Pay on iPhone or Tap to Pay on Android.2

Boost sales with discounts
Create manual or automatic discounts to attract customers — no extra steps needed at checkout.

Offer refunds and exchanges
Issue full or partial refunds and process exchanges with just a few taps.

Sync all of your sales
Stay in control with in-store sales, online orders, and inventory connected automatically.
Know what’s selling — and why
Make confident decisions that drive sales, cut losses, and keep your shelves stocked with what sells.


Understand how your customers shop
Get insights into how, when, and where each item or category is selling with detailed sales reports.
Monitor inventory costs
Stay on top of costs and profitability with built-in cost of goods sold (COGS) tracking.

Track inventory sell-through
See how inventory moves relative to sales, helping you make smarter purchasing decisions..

Spot slow-moving stock
Identify aging inventory so you can adjust pricing, optimize turnover, and free up cash flow.
Operate more efficiently with the help of AI
Set up quickly with automated tools and seamless integrations that help you run smarter.


Build your catalog
Import items in bulk, scan barcodes to add individual products, or enter details manually.

Use AI to streamline setup
Generate item descriptions and create professional product photos with AI-powered tools.

Enhance your workflows with accessories
Use compatible label printers, scanners, and accessories that keep your business running smoothly.

Connect the apps you need
Integrate your favorite third-party apps or discover new ones in our marketplace.
Pick a plan for any stage
No locked-in contracts. Upgrade or cancel anytime.
Square Pro
Get custom pricing
If you process over $250,000 per year, talk to our team to see if you’re eligible for custom pricing and processing fees. You can also ask about hardware discounts, onboarding and implementation support, technical specialists, and account management.
Manage all sides of your retail business
Build an online store
Sell online and offer in-store pickup, shipping, and local delivery.


Bring in new clients
Let your customers share your business through digital and physical gift cards.


Keep customers engaged
Run email and text message marketing campaigns to drive repeat sales.

Offer flexible payments
Send digital invoices in seconds via email, SMS, or a shareable link.

Manage and pay your team
Schedule shifts, track your team’s hours, and run payroll.

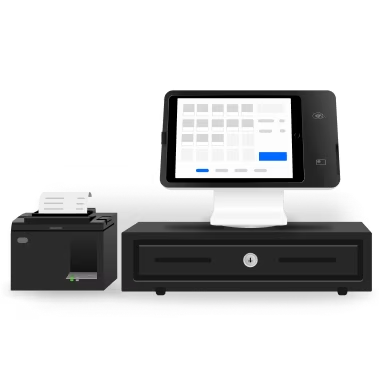
Add hardware that works how you do


“Because we're such a large company, having Square organize all the items behind the scenes gives us the freedom to interact with our clients, help the local community, and continue to grow in the ways that we really want.”

Hank Gregg
Market at Grelen
Somerset, VA
“Upgrading to Square for Retail a few years ago was a huge help in keeping track of inventory, ordering and sorting by vendor, and generating very detailed reports. Knowing more about our business has made us smarter and more efficient business owners.”
Logan Mitchell
Collins & Coupe
San Diego, CA
“As a grocer with multiple locations, Square for Retail has been fantastic. The inventory management at a location level is absolutely critical … The ability to transfer inventory between locations is a tool we use constantly.”
Mat Pond
The Epicurean Trader
San Francisco, CA
“There was very minimal training impact to our businesses. Other platforms can be clunky and take days, and time is money. Square alleviated that problem.”
Jimmy Brower
Sun of the Desert
Twentynine Palms, CA
“I have to credit Square Loyalty for really helping drive a lot of success for us. I think it’s quite easy and intuitive for people to sign up and to utilize their points. It feels very polished, and it’s exciting for people to see how many points they have.”
Jory Edmunds
Phylum
Palm Springs, CA
FAQ
How do I switch from my current retail POS solution?
It’s simple and fast to sign up for Square. If you currently use Lightspeed Retail, Shopify POS, or another similar retail POS system, Square will likely fit your needs with a user-friendly interface. Just select your plan, sign up, and import your inventory. You can easily transfer your existing inventory with bulk import.
You can rely on transparent pricing and no long-term contracts. And if you need help, Square Support is here for you.
Can I upgrade my plan?
You can upgrade from the Free plan to the Plus plan by subscribing to it here. You’ll be able to utilize all existing features, and you’ll only have to set up the added functionality included with your upgrade. After your 30-day free trial, you’ll be given the option to pick your plan. If you don’t choose one, you’ll automatically be downgraded to the Free plan.
To upgrade to the custom Premium plan, contact our sales team.
Can I downgrade my plan?
You always have the option to downgrade your subscription from Plus to Free in your Dashboard. When you downgrade, you’ll see messaging in your Dashboard letting you know which features you’ll lose, like certain smart inventory management features, multi-location stock management, and barcode label printing. You can see and compare plan features on our pricing page.
You can also pause your subscription at any time from your Dashboard. When you pause a subscription, you will not be billed. You can unpause at any time and your account will be ready for you without losing your past data.
What is a retail POS system?
A retail POS system helps you manage every part of your store by combining hardware and software for in-store and online sales, inventory, and staff and customer management. It connects your checkout counter, back office, and online store so transactions, stock levels, and customer data stay in sync across every channel.
Key features include:
Intuitive tools that help your team serve customers quickly and reduce checkout errors.
Connected tools that help you manage in-store and online sales, returns, and exchanges from one system.
Real-time tracking tools that help your team stay on top of stock.
Actionable tools that help you see what’s selling, when, and where to make smarter decisions.
Tools that help you sync your POS with eCommerce platforms for a unified shopping experience.
Ability to track purchase history, reward loyal shoppers, and create personalized promotions.
With Square, you can connect your checkout, inventory, and team in one platform — giving you more time to focus on your customers and grow your business.
Sign up and start selling
1Late fees may apply. Eligibility criteria apply. See afterpay.com for more details.
2Available on iPhone XS or above running the latest version of iOS. Android is a trademark of Google LLC. Tap to Pay on Android is available on compatible Android devices. The Contactless Symbol is a trademark owned by and used with permission of EMVCo, LLC.
3Square, the Square logo, Square Financial Services, Square Capital, and others are trademarks of Block, Inc. and/or its subsidiaries. Square Financial Services, Inc. is a wholly owned subsidiary of Square, Inc.
All loans and Savings accounts are issued by Square Financial Services, Inc., a Utah-Chartered Industrial Bank. Member FDIC. Actual fee depends upon payment card processing history, loan amount and other eligibility factors. A minimum payment of 1/18th of the initial loan balance is required every 60 days and full loan repayment is required within 18 months. Loan eligibility is not guaranteed. All loans are subject to credit approval.
Savings accounts are provided by Square Financial Services, Inc. Member FDIC. Accrue annual percentage yield (APY) of 1.00% per folder on folder balances over $10. APY subject to change, current as of 2/18/2025. No minimum deposit is required to open an account. Accounts will not be charged monthly fees. Accounts are FDIC-insured up to $2,500,000. Pending balances are not subject to FDIC insurance.
Square Checking is provided by Sutton Bank, Member FDIC. Square Debit Card is issued by Sutton Bank, Member FDIC, pursuant to a license from Mastercard International Incorporated, and may be used wherever Mastercard is accepted. Accounts are FDIC-insured up to $250,000. Funds generated through Square’s payment processing services are generally available in the Square checking account balance immediately after a payment is processed. Fund availability times may vary due to technical issues.
4Custom pricing may be available if you process more than $250K per year. Discounts on optional add-ons. Eligibility required. Contact sales.