System updates

We’re experiencing issues that may affect your Square services. We’ll continue to update our status page with more information.

Home>Team Management

Get Started with Square Timecards

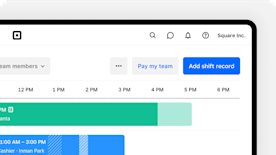
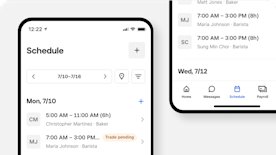
If you’re using Team Management, Square Appointments or Square for Retail, you can keep track of the hours your team members work with Square Shifts. Your team members can clock in/out at the point of sale or by using the Square Team app, as well as view or print their workday summaries directly from the point of sale. You can also create, manage and publish schedules based on the availability of you and your team. Learn more about Shift Scheduling with Team Management.

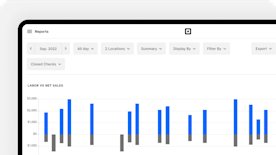
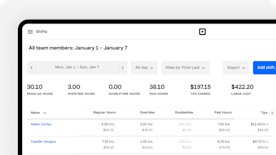
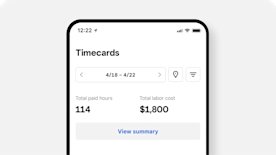
With Square Shift reports, you’ll save time calculating team member hours with automatic overtime and double-time calculations that are easily exported to your computer as a .CSV file. Once you’ve set up your team member shifts, you can view your shift reports right from your online Square Dashboard, and your team members can keep track of their time worked on the Square Team app. When using Team Plus, you’ll also have the ability to view how your scheduled hours compare to the actual hours your team members worked. In both Workday and Labour Cost, you can view: upcoming scheduled shifts, as well as alerts for early, late and no-show clock-ins.

Navigation Updates

Since its initial launch, Team Management has significantly expanded its functionality beyond time tracking to include features like Shift Scheduling and Tip Pooling. As part of the recent updates with Team Management and Team Plus, we renamed the Timecards section of your online Square Dashboard to Shifts.

You will still have access to timecards. The only change to your current workflows will be to go to the Shifts section of your online Square Dashboard instead of Timecards when you need to take actions related to timecards, shift scheduling and tip pooling. This update provides more clarity on the full labour management offering of Team Management and will allow for additional features in the future. Read the sections below to learn more about what you can expect from the new Shifts section.

Set Your Work Period

Setting a Work Period enables Square Timecards to report and calculate overtime based on your business’ operations. If your team members are typically clocked in past midnight, set your workday hours to at least an hour past the end of the closing shift. For example, if you’re operating a bar that closes at 2 a.m. and team members leave at 3 a.m., make the workday hours start at 4 a.m. in case of overtime and to ensure their shifts can be viewed in the same workday.

  1. Visit Staff > Shifts in your online Square Dashboard > Settings > Schedule.

  2. Set your start of Workweek and Workday.

  3. Click Save.

Review and Set Your Overtime and Breaks

Overtime settings are automatically associated with your state based on your location. You can confirm your location(s) by visiting Account & Settings in your online Square Dashboard.

If your team members are working multiple jobs at different wages, overtime will be calculated using the weighted average of the total normal earnings divided by total hours worked.

Set overtime rules

  1. Log in to Staff > Shifts in your online Square Dashboard > Settings.
  2. Under Overtime, set a daily, weekly and double-time limit. Make sure to review your province’s overtime rules.
  3. Click Save.

Set up break tracking

  1. Log in to Staff > Shifts in your online Square Dashboard > Settings > Breaks.
  2. Click Add new break to add your first break.
  3. Add a name and duration, and select the compensation setting (paid or unpaid) for the break.
  4. Click Save to confirm the break settings.

Add up to three breaks in total for each of your locations.

Block ending breaks early

To help stay compliant with local labour regulations requiring employee breaks, Team Management’s paid plan, Team Plus, allows you to enable settings that prevent team members from ending their breaks early. To get started:

  1. Log in to Staff > Shifts in your online Square Dashboard > Settings > Breaks.
  2. Toggle on Block Ending Breaks Early.
  3. If applicable, enter a time under Allow Within and toggle on Only This Location or All Locations.
  4. Click Save.

Prevent early/unscheduled clock-ins

You’ll also have the ability to restrict your team members from clocking in early for their shift or on days when they’re not scheduled to work. To get started:

  1. Log in to Staff > Shifts in your online Square Dashboard > Settings > Clock in/out.
  2. Toggle on Block early and unscheduled clock-ins.
  3. If applicable, enter a time under Allow within and toggle on Only this location or All locations.
  4. Click Save.

Note: If you’ve enabled the settings to block ending breaks and clocking in early, your team member(s) will see a notification in the Square Team app if they attempt to do so.

Timecard editing

To help maintain the accuracy of your timecards, Team Plus allows your team members to request changes to their timecards for past shifts. Once the appropriate setting is toggled on, team members can request changes directly from the Square Team app, and you can manage the requests through the online Square Dashboard. To get started:

  1. Log in to Staff > Shifts in your online Square Dashboard, and select Settings > Clock in/out.
  2. Toggle on Timecard editing.
  3. Click Save.

Note: Account owners and team members with the Respond to timecard requests permission enabled will receive a notification when team members request edits to their timecard(s). These requests can be approved or declined directly from the email notification, Square Team app or online Square Dashboard. Edit requests will expire after 30 days.

Turn on Time Tracking

Once your permissions, team member profiles, and shift settings are all set up, it’s time to enable break tracking in the Square app.

Log in to the Square app and visit Settings > Time Tracking > toggle Time Tracking on.

If you’ve paired a device to a specific location using device codes, you’ll need to make sure your team members have permission to work at that location. To check, go to Team in your online Square Dashboard, select the team member name to make sure the correct locations are selected under Permissions.

Turn on Tip Pooling

With Team Plus, you can use tip pooling to equally divide each credit card tip across all team members clocked in at the time of the transaction. Tip pooling ensures equitable and timely tip payouts for your team and removes any alternate and complicated workflows you currently use to distribute tips manually – giving you more time for other aspects of your business.

To get started:

  1. Go to Staff > Team in your online Square Dashboard.

  2. Select the team member you want to edit to open their team member profile.

  3. Click Edit under the ‘Job and compensation’ section.

  4. Toggle on or off Tip eligible for each role.

After confirming that you applied tip pooling eligibility to all of your team members, you can turn on tip pooling. To do so:

  1. Go to Staff > Shifts in your online Square Dashboard.

  2. Select Settings > Tips.

  3. For distribution method, select Tip directly, Pool tips per transaction or Pool tips by hours worked.

    1. Tip directly: Transaction tips are attributed to the team member who collected the tip.

    2. Pool tips per transaction: Transaction tips are split equally among all tip-eligible team members clocked in at the time of the transaction. This distribution method works best if you want to reward your team based on the tips earned during their specific shift.

    3. Pool tips by hours worked: Transaction tips from sales are split among tip-eligible team members based on their hours worked. You can specify whether to split tips based on a 24-hour workday or across a 7-day workweek. Splitting tips by workday works best if you want to reward team members who may not work their entire shift interacting with customers, while splitting tips across a workweek better accounts for tip variability across a wider time frame.

  4. Choose whether you want to apply tip pooling to Only this location or All locations.

  5. Click Save.

You also have the option to toggle on or off Distribute unattributed tips equally, which is only relevant if you’ve selected Pool tips per transaction as the tip distribution method. If the setting is toggled on, tips received when no one is clocked in will be equally distributed among all tip-eligible team members who clocked in on that workday.

If applicable, toggle on Declare cash tips. Tip-eligible team members will then be required to indicate the cash tips they earned for their shift before they clock out or switch roles at the point of sale or on the Team App. Your shift reports, such as Workday, Labour cost and Timecard CSV reports, will also include cash tips entered by your team, and the cash tip data will be adjustable. 

Once you follow the steps above, credit card tips will either split equally among all tip-eligible team members clocked in at the time of transaction, or split among all tip-eligible team members based on their hours worked within a 24-hr workday. Note: Be sure to check your provincial and territorial laws regarding tip pooling, notice and record keeping requirements.

Learn more about: Team Management

Can't find what you need?