System updates

We’re experiencing issues that may affect your Square services. We’ll continue to update our status page with more information.

Home>Online Booking

Waitlist with Square Appointments

With a Square Appointments Plus or Premium subscription, you can use Waitlist to fill schedule gaps caused by last-minute appointment cancellations or reschedules. 

Note: Waitlist for class bookings is not available.

Enable Waitlist  

  1. From your Square Appointments Dashboard, go to Online Booking > Settings.

  2. Under Waitlist, toggle on Enable Waitlist on your online booking site. This setting will apply to all locations.

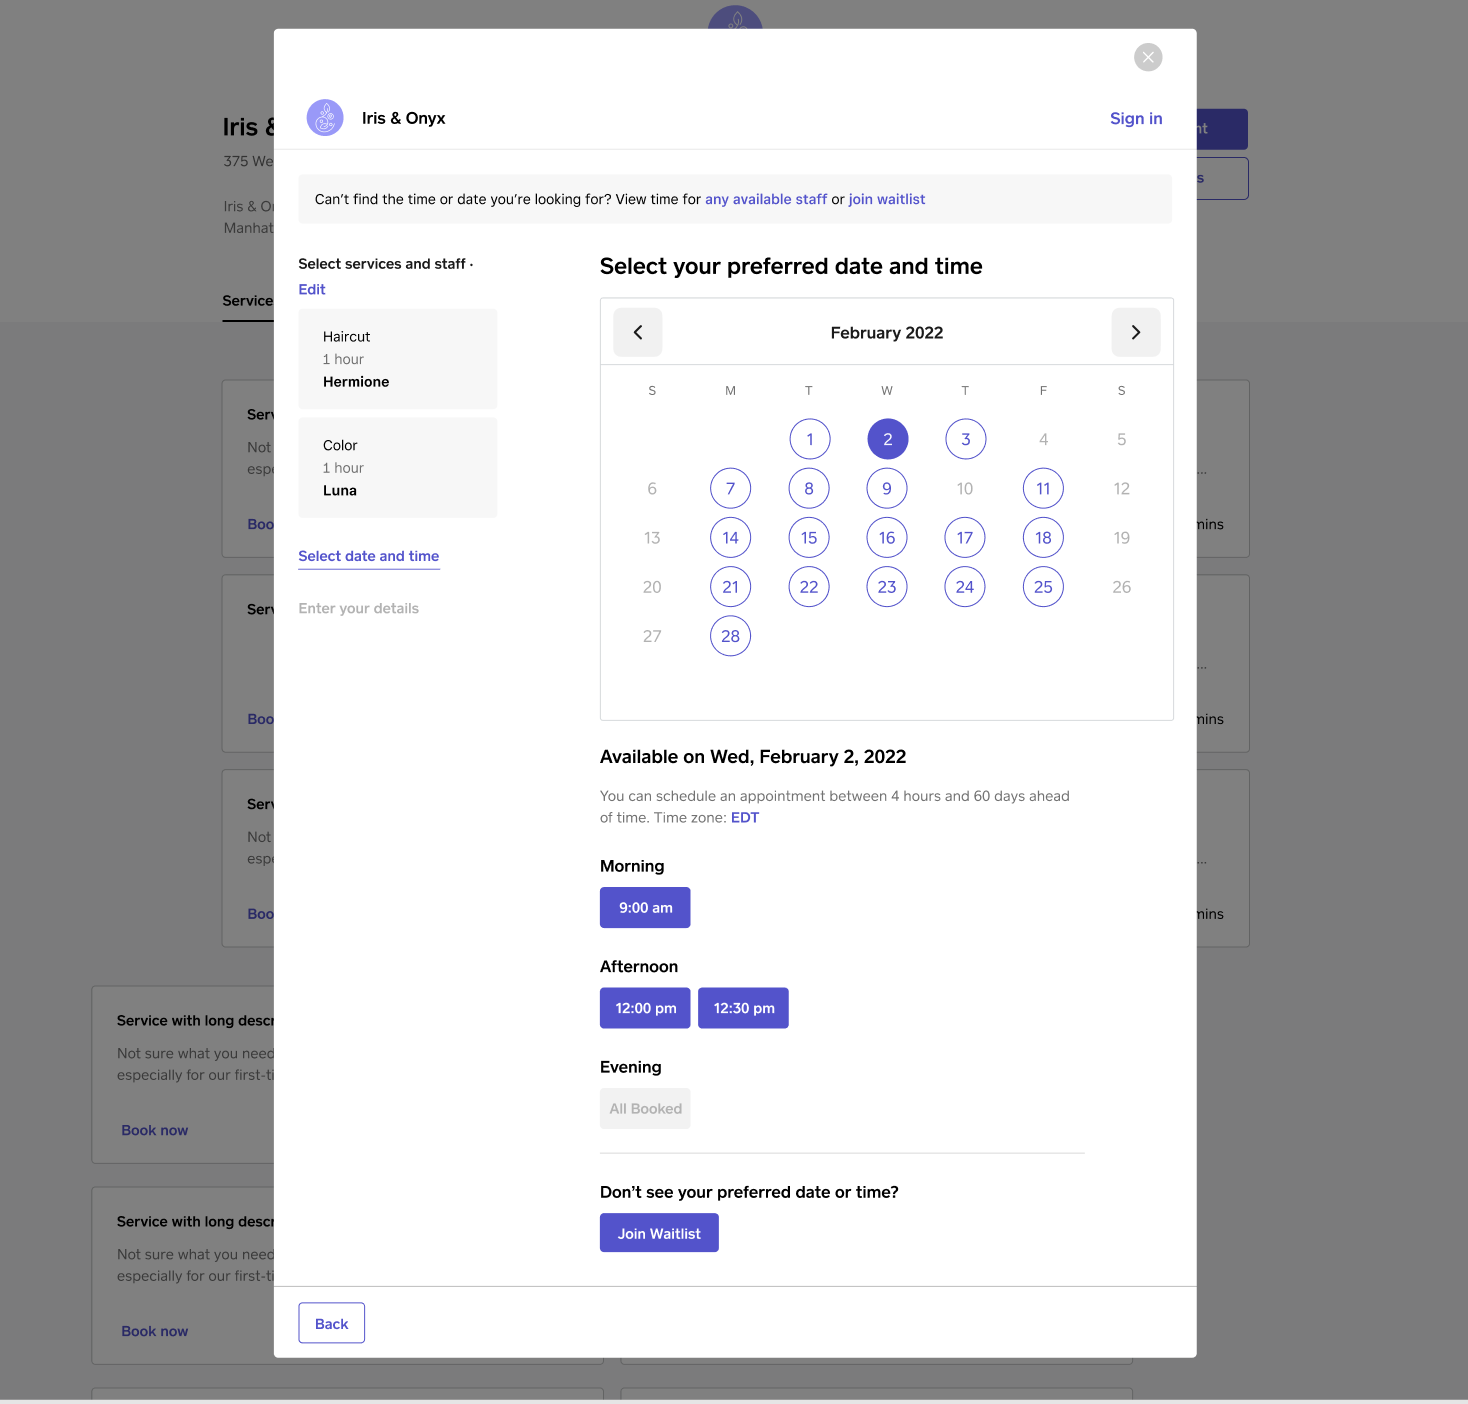
Once the waitlist is enabled, the prompt “Don’t see your preferred date or time? Join Waitlist” will display to clients on your online booking page.

Learn more about creating a Square Online booking site from Appointments.

View Your Waitlist

You can view your full waitlist and waitlist entry details by going to your online Square Dashboard and selecting Appointments > Waitlist

To view your waitlist from the Square Appointments app, select ≡ More > Waitlist

Note: The link and applet will only display for staff that have the “Manage all staff calendars” permission enabled. Learn more about adjusting staff availability and permissions

Waitlist Details

On the Waitlist page in your online Square Dashboard, you can view waitlist entries for a specific location through the location selector. Once you select a location, you will see a list of waitlist entries with the following:

  • Date added: the date the client was added to the waitlist

  • Client name 

  • Service & Staff

  • Duration: total duration of all services

  • Waitlist preferences, which include: 

    • Client notes: notes the client entered when joining the waitlist through the online booking site.

    • Staff notes: notes for staff members.

    • Customer availability preferences.

Customer contact information

Customers are required to enter contact information for the waitlist, including: 

  • First name 

  • Last name 

  • Email address

  • Phone number 

If customers do not provide a first or last name, you will see “Unknown” for those fields on the waitlist entries. If customers do not provide an email address or phone number, those fields will remain blank.

Manage Your Waitlist

Add and Edit Staff Notes

You can add or edit staff notes to communicate client information with staff members.

From your online Square Dashboard:

  1. Select Appointments > Waitlist

  2. Find the waitlist entry you want to edit and click ••• by the entry.

  3. Select Edit.

  4. In the waitlist details, enter your note in the Staff note field.

  5. Click Save.

From your Square Appointments app:

  1. Tap ≡ More > Waitlist.

  2. Find and tap the entry you want to edit.

  3. Tap ••• in the upper left.

  4. Scroll and find the Staff note field and enter your note.

  5. Tap Save.

Once a staff note has been added, you can edit the note by following the same steps and selecting Edit Staff Note.

Filter by Services and Staff

On the Square Appointments app for iOS, you can filter your waitlist view by service and staff. You can clear all filters at any time.

Note: This feature is not available on Square Dashboard or the Square Appointments app for Android devices.

Filter by Staff Member

Filtering by staff member shows waitlist entries where at least one requested service’s staff preference is set to that staff member.

You can filter by multiple staff and “Any Available” at the same time. 

Filter by Service 

Filtering by service shows waitlist entries with that requested service. You can filter by multiple services at the same time.

Note: When multiple services are selected, we'll try to find a slot where the customer can book ALL of those services. If multiple services are available, customers can join the waitlist once for each service they'd like to book.

Sort by Newest and Oldest Added

On the Square Appointments app for iOS, you can sort clients by newest added and oldest added. If requests have the same date preference, you can sort by the order of which was added first. 

You can sort clients by newest added and oldest added. If requests have the same date preference, you can sort by the order of which was added first. 

To show requests sorted by earliest date preferences:

  1. Log in to your Square Dashboard and click Appointments > Settings > Online Booking.

  2. Under Waitlist > Sort > Select ”Newest Added” or “Oldest Added”.

Note: This feature is not available on Square Dashboard or the Square Appointments app for Android devices.

Message Clients

You can use Square Messages to message your clients directly from your waitlist to notify them of an opening if the client has messaged you at least once first. To initiate a new conversation with a client, you will need a Square Messages Plus subscription. 

From your online Square Dashboard:

  1. Select Appointments > Waitlist

  2. Find the waitlist entry you want to message and click ••• by the entry.

  3. Select Message.

From your Square Appointments app:

  1. Tap ≡ More > Waitlist.

  2. Select the waitlist entry for the client you want to message.

  3. Tap ••• in the upper left and select Message.

Note: To avoid overwhelming customers with messages when their schedule is being changed, we won't notify your customers about a new opening if we've already notified them in the past six hours.

Add a Client to the Waitlist

From your online Square Dashboard: 

  1. Select Appointments > Waitlist.

  2. Select Add

  3. Enter the client details, select the services requested, and click Save.

From your Square Appointments app:

  1. Select ≡ More > Waitlist.

  2. If you have no waitlist requests, select Add to waitlist. If you have existing waitlist requests, tap the plus icon (+).

  3. Select Add Customer to add an existing customer or create a new customer.

  4. Select Add Service.

  5. Add at least one availability preference.

  6. Add additional notes, if needed.

  7. Tap Save.

Edit or Remove a Waitlist Entry

From your online Square Dashboard:

  1. Select Appointments > Waitlist.

  2. Find the waitlist entry you want to edit.

  3. Click ••• by the entry and select Edit or Remove

From your Square Appointments app:

  1. Tap ≡ More > Waitlist.

  2. Find and tap the entry you want to edit or remove.

  3. Tap ••• in the top right and select Edit request or Remove

  4. Tap Save to confirm your changes.

Edit Client Availability Preferences 

To add a client to the waitlist, you are required to provide at least one availability preference option, which must include both a date and time preference. You can add up to five availability preference options.

To adjust your preferences:

  1. Select “edit” on each availability option. 

  2. A “delete” button will only appear on available options if more than 1 option is added.

Note: Date and time preferences can overlap between availability preference options.

Date Preference 

With the date availability preference, you can select any date, a specific date, or a date range.

Time Preference

With the time availability preference, you can select any time, before a time, after a time, or between two times 

  • Selecting “Any time” disables the single “Time” field displayed.

  • Selecting “Before” or “After” enables the single “Time” field displayed.

  • Selecting “Between” makes two enabled time fields display.

Note on Timezone: Availability preferences are shown in the timezone used when the waitlist entry was created. For example, if the customer joined the waitlist in PST and your business timezone is in EST, the customer’s waitlist entry will show their preferences in PST.

Receive Waitlist Notifications

When a client is added to the waitlist, whether through the online booking site or added directly, the client will receive a notification that they’ve successfully been added to the waitlist.

Depending on your notification settings, staff listed on the waitlist entry will also receive a notification that a client has joined the waitlist.

Manage Waitlist Automation Settings

Automated Notifications 

For schedule openings that occur when an appointment is canceled, rescheduled, or marked as a no-show, you can choose to automatically notify customers whose availability matches the opening.

To turn on automatic schedule opening notifications

  1. Log in to your Square Dashboard and click Appointments > Settings > Online Booking.

  2. Under Waitlist, toggle on "Send my clients a notification when an opening occurs.”