Home

Connect accessories to your restaurant point of sale

Who is this article for?
This article is for business owners connecting compatible accessories to their Square for Restaurants point of sale or updating their hardware settings and preferences in the Square Restaurants POS app.

Before you begin

Once you set up your point of sale device with Square for Restaurants, you can connect compatible third-party accessories, like a printer or barcode scanner. Learn more about accessory compatibility or purchase accessories compatible with Square in Square Shop.

If you haven’t added a point of sale device yet, learn how to set up your point of sale with Square for Restaurants.

Connect and manage accessories

You can connect and manage your accessories from your Restaurants POS.

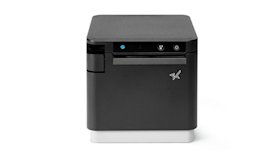
Printers

You can connect printers by Ethernet or USB cable, Wi-Fi, Bluetooth, AirPrint, or Static IP.

Connect a printer via Ethernet cable

  1. Connect one end of the cable into the rear panel of the printer and plug the other end of the cable into the wireless router’s Ethernet port.
  2. Open your Restaurants POS app on the device to which you want to connect and tap Account > Settings > Hardware.
  3. Under Connect and manage, select Printers.
  4. Tap Create a printer profile.
  5. Enter a Printer name.
  6. Under Printer model, tap Select printer.
  7. Under Use this printer for, select and customize one of the options: Receipts, In Person Order, Online Order, Order Ticket Stubs, or Void Tickets.
  8. Tap Save.

Connect a printer via Wi-Fi

To pair a printer via Wi-Fi, make sure your printer is connected to your Wi-Fi network. Once you confirm your printer is connected, you can connect your printer to your point of sale

  1. Open your Restaurants POS app on the device to which you want to connect and tap Account > Settings > Hardware.
  2. Under Connect and manage, select Printers.
  3. Tap Create a printer profile.
  4. Enter a Printer name.
  5. Under Printer model, tap Select printer.
  6. Under Use this printer for, select and customize one of the options: Receipts, In Person Order, Online Order, Order Ticket Stubs, or Void Tickets.
  7. Tap Save.

Connect a printer via USB cable

  1. Plug your supported USB receipt printer into a power source.
  2. Plug the USB cable from your printer into the USB hardware hub.
  3. Open your Restaurants POS app on the device to which you want to connect and tap Account > Settings > Hardware.
  4. Under Connect and manage, select Printers.
  5. Tap Create a printer profile.
  6. Enter a Printer name.
  7. Under Printer model, tap Select printer.
  8. Under Use this printer for, select and customize one of the options: Receipts, In Person Order, Online Order, Order Ticket Stubs, or Void Tickets.
  9. Tap Save.

Connect a printer via Bluetooth

  1. Turn on your printer.
  2. Open your iPad or Square device settings and select Bluetooth.
  3. Turn on Bluetooth on your device and select your printer. If prompted for a PIN, enter 1234.
  4. Open your Restaurants POS app on the device to which you want to connect and tap Account > Settings > Hardware.
  5. Under Connect and manage, select Printers.
  6. Tap Create a printer profile.
  7. Enter a Printer name.
  8. Under Printer model, tap Select printer.
  9. Under Use this printer for, select and customize one of the options: Receipts, In Person Order, Online Order, Order Ticket Stubs, or Void Tickets.
  10. Tap Save.

Your connected printer should display automatically. If you don’t see your printer, try connecting your printer via Bluetooth again.

Connect an AirPrint printer

  1. Open your Restaurants POS app on the device to which you want to connect and tap Account > Settings > Hardware.
  2. Under Connect and manage, select Printers.
  3. Tap Connect AirPrint printer.
  4. Under Use this printer for, select and customize one of the options: Receipts, In Person Order, Online Order, Order Ticket Stubs, or Void Tickets.
  5. Tap Save.

Connect a printer using a static IP address

  1. Open your Restaurants POS app on the device to which you want to connect and tap Account > Settings > Hardware.
  2. Under Connect and manage, select Printers.
  3. Tap Advanced printer setup and select Epson Printer or Star Printer.
  4. Enter the Static IP Address and tap Done.
  5. Under Use this printer for, select and customize one of the options: Receipts, In Person Order, Online Order, Order Ticket Stubs, or Void Tickets.
  6. Tap Save.

If you have trouble connecting your printer to your point of sale, troubleshoot your printer.

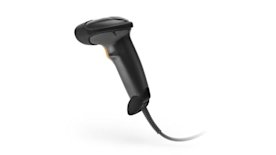
Barcode scanners

  1. Open your Restaurants POS app on the device to which you want to connect and tap Account > Settings > Hardware.
  2. Under Connect and manage, select Barcode scanners.
  3. If your Bluetooth scanner doesn’t automatically connect, tap Connect a Bluetooth scanner.
  4. Scan the barcode that appears with your scanner to connect the device.
  5. Open your iOS settings and select Bluetooth.
  6. Make sure Bluetooth is turned on and select the device named Socket CHS.

If you have trouble connecting your barcode scanner to your point of sale, troubleshoot your barcode scanner.

Cash drawers

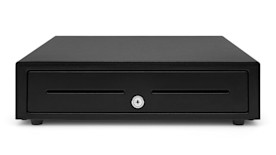
To link your cash drawer to your point of sale, you can connect it to a supported receipt printer that has a peripheral drive connector using an interface cable. Most receipt printers, except mobile Bluetooth printers, generally have a peripheral drive connector. Once you connect your cash drawer to your printer, you can connect it to your point of sale.

  1. Open your Restaurants POS app on the device to which you want to connect and tap Account > Settings > Hardware.
  2. Under Connect and manage, select Cash drawers.
  3. Connect your cash drawer and tap Test Cash Drawer.

If you have trouble connecting your cash drawer to your point of sale, troubleshoot your cash drawer.

Next steps

Learn more about Square for Restaurants account and settings from one of these Support Center articles: