Manage invoice templates and settings
About invoice templates and settings
You can customize your invoices to align the appearance and settings with your business. You can create default templates to use when creating a new invoice — invoice templates automatically fill in your invoice information.
Before you begin
You can do the following from Square Dashboard:
Select custom invoice layouts
Save and reuse custom invoice templates
Add custom fields to any invoice or invoice template
You can add business logo and brand colors without a paid subscription.
Create and manage templates
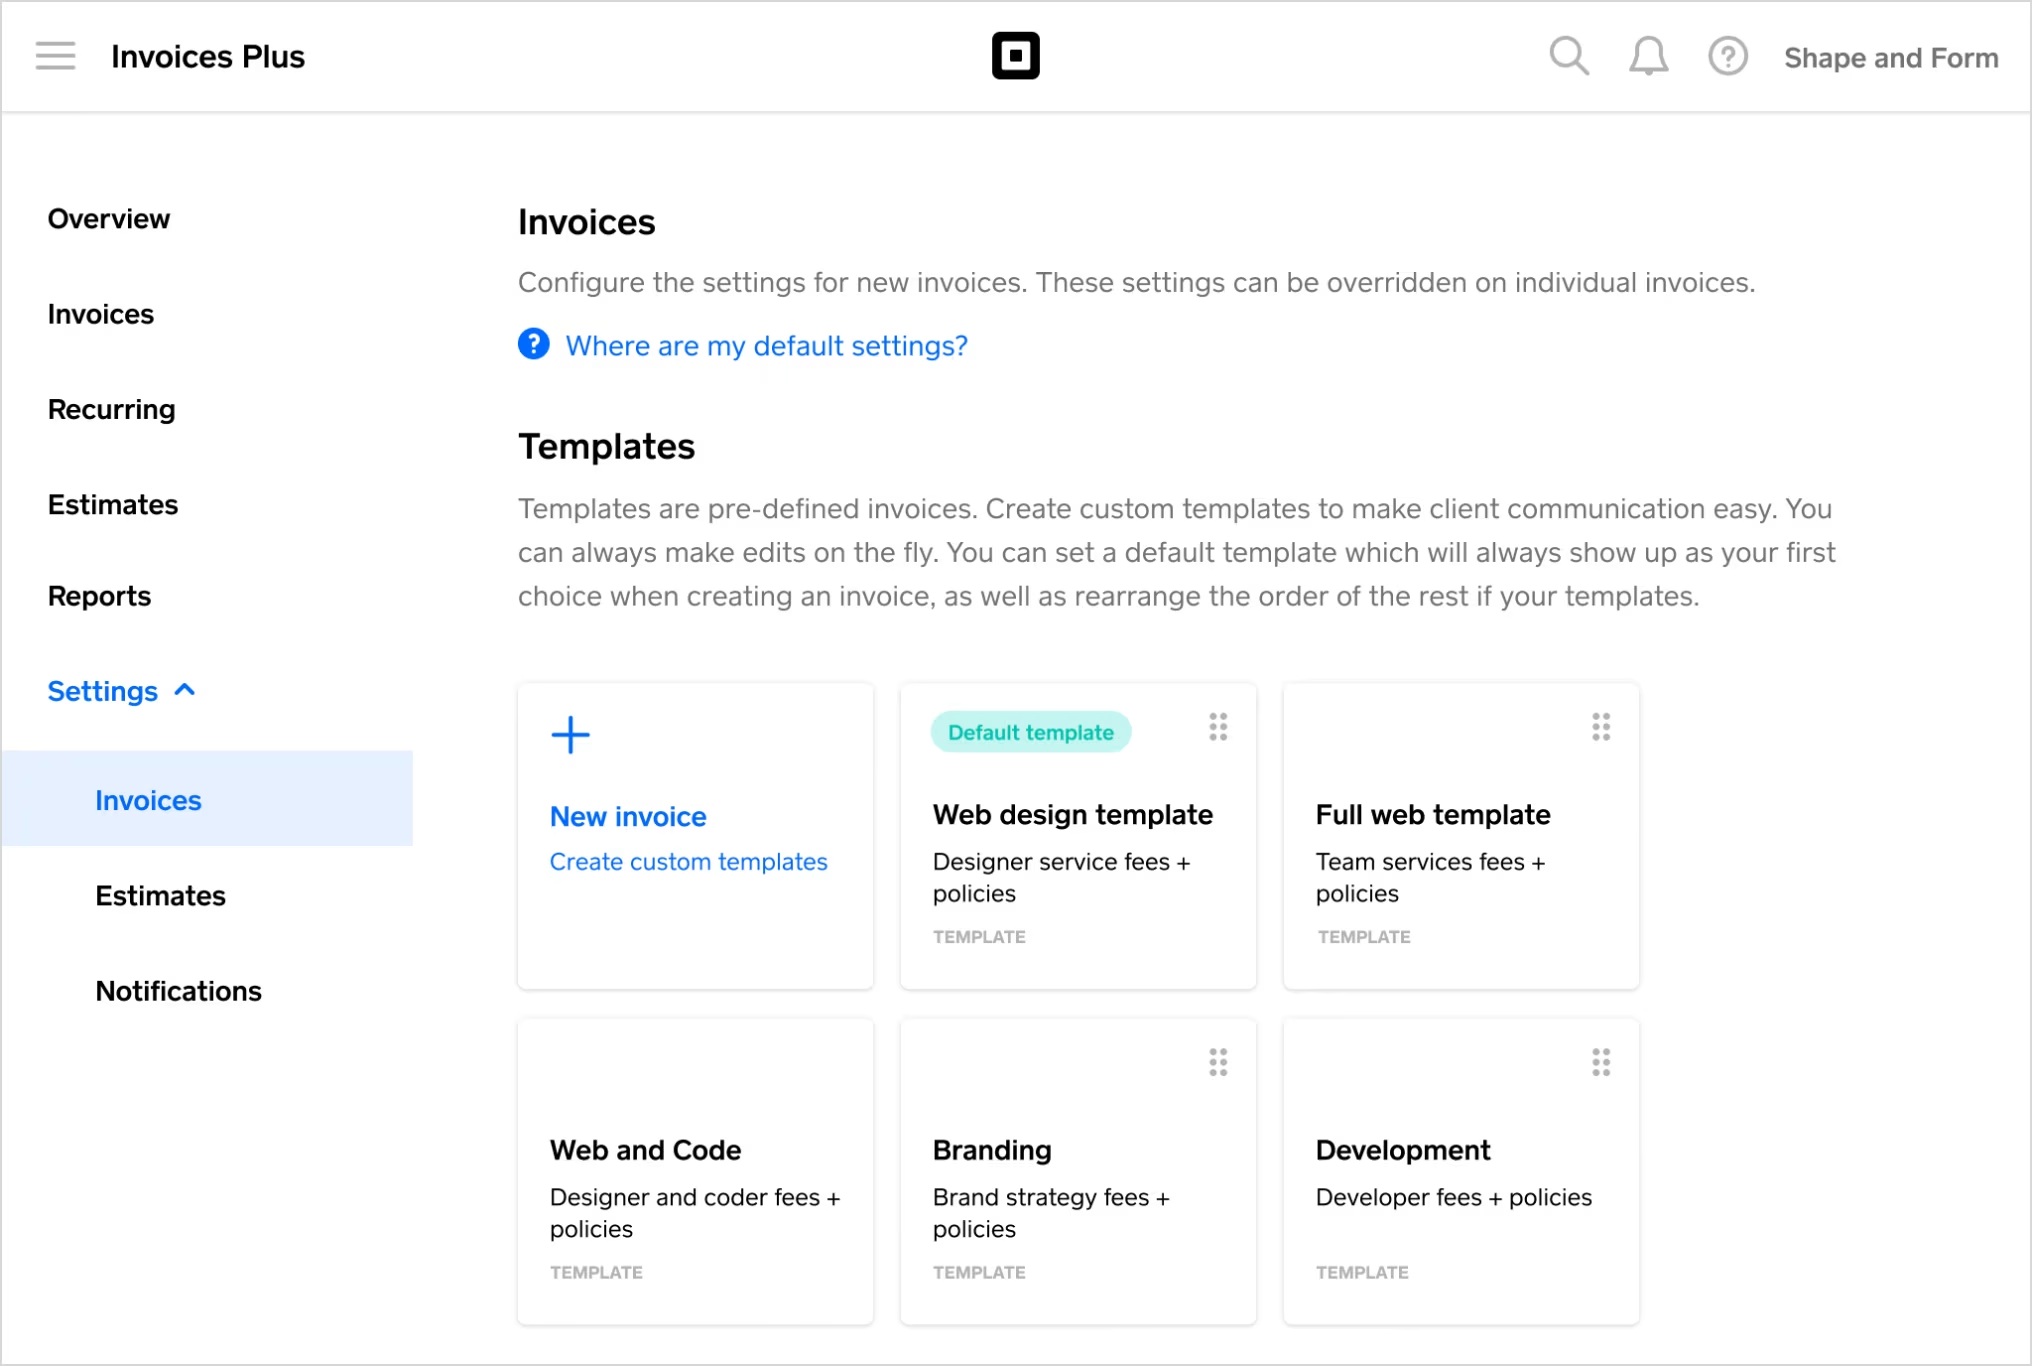
Build templates with pre-selected items/services, payment options, or notes that you can reuse for similar jobs or sales.
You can create up to 100 templates for your business, and once you’ve created multiple templates, you can set a default invoice template for your business that will always appear as the first option when you start creating a new invoice.
You can only create invoice templates from your Square Dashboard. To do so:
- Sign in to Square Dashboard and go to Orders & payments (or Invoices & Payments or Payments) > Invoices.
- Select + New Template and name the template. The template name is only visible to you.
- Provide invoice template details, such as:
- Invoice title, which is visible to your customer.
- A message to your customer.
- Frequency – select either one-time or recurring.
- For one-time invoices, select a send date. Choose from sending immediately or in seven, 14 or 30 days from when you created the invoice.
- For recurring invoices, provide schedule details, such as the start and end date, when the invoice is due and whether to allow automatic payments.
- Add line items that will be automatically included on the invoice template.
- Choose your payment options and the method you’ll use to share your invoice, such as email, text message, or manually via payment links.
- Once you fill in all of the template details, click Preview to see how the invoice will look to your customers.
- Click Save Template.
Changes you make to items from your Item Library will not carry over to the items included in your template. You can include updated item information in your template by removing the item and adding it back to the template after making changes in your Item Library. Learn more about how to create and manage items.
Once you create multiple templates, you can choose one template that will serve as your default template when you create new invoices. Your default template will take the place of any previous invoice settings. To set a default template:
- Sign in to Square Dashboard and go to Orders & payments (or Invoices & Payments or Payments) > Invoices.
- From Templates, select the invoice template you want to use as your default and click Set as default.
To remove an invoice template from your account:
- Sign in to Square Dashboard and go to Orders & payments (or Invoices & Payments or Payments) > Invoices.
- Select the template that you want to delete, and click Delete.
Invoice settings
Configure the settings for new invoices. These settings can be overridden on individual invoices.
Update your logo, brand color and business information from your Square Dashboard by going to Settings > Account & settings > Payments > Receipts.
Enable inventory management for invoices in Items Settings. From here you can toggle Adjust inventory levels through invoices on/off to automatically decrease stock levels for items in an invoice once it has been paid. Applies to selected locations.
Learn how to set up inventory tracking.
Customize each of your team member’s permissions and access to creating invoices in Team Management.
Learn how to create and edit permission sets.
Estimate settings
Configure the default settings for new estimates. These settings can be overridden on individual estimates. To do so:
- Sign in to Square Dashboard and go to Orders & payments (or Invoices & Payments or Payments) > Invoices > Estimates.
- Under Estimate settings, update the default settings.
- Click Save.
Automatically convert estimates to invoices after the customer accepts. This will convert the estimate to an invoice using the delivery method of the estimate. To do so:
- Sign in to Square Dashboard and go to Orders & payments (or Invoices & Payments or Payments) > Invoices > Estimates.
- Under Converting defaults, toggle Automatically convert estimate to invoice when customer accepts on/off.
- Click Save.
Learn how to create and send invoice estimates.
Customization settings
Customize the look and feel of your business to help stand out to your customers by enhancing your brand. These changes will apply to all future estimates and invoices you send. With each unique template you create, you can:
To select the layout you’d like to apply to your invoice PDFs when printing or downloading an invoice:
- Sign in to Square Dashboard and go to Customization.
- Under Layouts, choose original, modern, or classic.
- Click Preview to see the customer’s view and click Save once you’re done.
Along with the Settings tab, you can also update branding from your Square Dashboard by going to Orders & payments (or Invoices & Payments or Payments) > Invoices > Settings > Customization. Select which logo you would like displayed within Invoices: framed or full.
- Framed: Simple designs work best for the framed layout such as the logo you use for social media, and will show along with your business name.
- Full: These display well and will take up the full space of the invoice.
Recommended dimensions are at least 1280 px x 648 px for high resolution or a 2:1 ratio.
Updates to your logo, brand color and business information can be made in Account & Settings of Square Dashboard.
Customize the language that appears on your invoices and estimates so that it matches the way you talk to your customers about your work. You can update terminology that appears on invoices and estimates:
- Item(s): Choose the word that best describes the types of things you’re charging. For example, a hair salon could use ‘Service’ and a clothing store could use ‘Item’ or ‘Product’.
- Customer: What your customers will be called on invoices and estimates; customer, client, or recipient.
- Quantity: For example, a consultant could use ‘Hours’ and a clothing store could use ‘Quantity’.
- Service date: The date associated with the goods or services you’re charging for; service date, event date, or fulfilment date.
- Price: The cost per unit that you’re charging; price, rate, or unit price.
- Deposit: Describe payments required to reserve goods or services; deposit, retainer, or down payment.