
Release notes
Vol 17 | 19 November 2026 | v 7.34
Location group pricing, mobile label printing, kitchen routing, and more
- Add custom descriptions for businesses within an organisation
- Add a custom link and QR code to receipts
- Connect Square shifts and team data with Rippling
- Print barcode labels from Square Handheld, Square Terminal and Android devices
- Find eligible items for rewards and coupons in Kiosk Lite
- Route modifiers to specific kitchen display system (KDS) stations or printers
- Assign kitchen categories to route items to specific printers
- Add a photo when creating an item from an unknown barcode
- Use Multi-Account Suite to group member locations and set item prices by location group.
- Delete unused printers from printer details
Add custom descriptions for businesses within an organisation
What's changed: Operator merchants can add a custom description to each business in the organisation. Descriptions appear under each business name on the organisation page and appear in search and reporting. Only the operator merchant can see merchant descriptions.
Why it matters: Many merchants in an organisation may have similar business names. With custom descriptions, operators can more easily distinguish between accounts.
Access: Available to sellers with Square Multi-Account Suite. Descriptions are managed from the organisation page in Dashboard. Operator team members with full access or the organisation management permission manage merchant descriptions.
Learn how to add custom descriptions for businesses in an organisation:
Add a custom link and QR code to receipts
What's changed: Sellers can add a custom link to their receipts, along with an optional caption. On printed receipts, the link appears as a QR code with the caption below it. On digital receipts, it's a tappable link. The setting is off by default and is turned on for each location.
Why it matters: Receipts go home with customers, so a QR code or link on a receipt gives them a way to leave a review or visit the business's website.
Access: Sellers must have payments activated to use this feature. In Square Dashboard, go to Settings > Account & Settings > Payments > Receipts. Turn on the receipt link setting, enter a URL, and add an optional caption. URLs must use HTTPS and cannot exceed 255 characters. Captions have a 50-character limit. The link and QR code appear only on the seller's own receipts.
Learn how to add a custom link and QR code to receipts: Article
Connect Square shifts and team data with Rippling
What's changed: Sellers can integrate Square Shifts with Rippling to sync workforce and scheduling data between the two platforms. Rippling's AI tool can also pull Square sales data to generate staff schedules based on sales patterns. New hire information and termination events created in Rippling are sent to Square. Shifts data from Square can be sent to Rippling for payroll processing.
Why it matters: When payroll and scheduling sit in separate systems, staff records and hours need to be entered in both. Connecting the two means a new starter entered once reaches both, and the hours behind a pay run arrive without a second entry.
Access: Find the integration in the Square App Marketplace and the Rippling App Marketplace.
Learn how to connect Square and Rippling: Article
Print barcode labels from Square Handheld, Square Terminal and Android devices
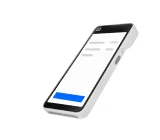
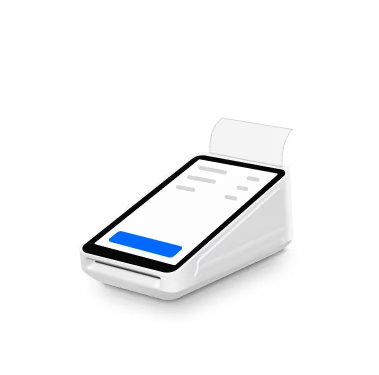
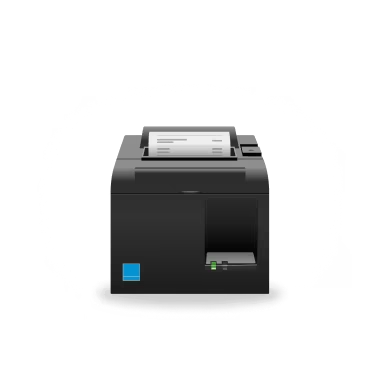
What's changed: Square Handheld, Square Terminal, and Android phones and tablets can connect to a label printer over USB or Wi-Fi, joining Square Register. Zebra printers on Wi-Fi require the Zebra Wireless Upgrade Kit.
Why it matters: Restocking happens across the store, so team members can print labels right where they're working, whether that's the stockroom or the sales floor.
Access: Available to retail sellers. In Point of Sale, open the Inventory applet and select Print Labels.
Learn how to print barcode labels from Android devices: Article
Find eligible items for rewards and coupons in Kiosk Lite
What's changed: When a customer chooses a reward or voucher during order review and the cart doesn't have a qualifying item, Kiosk Lite shows which items are eligible. If only one item qualifies, the kiosk opens it so the customer can choose its options. If the cart already qualifies, the reward or voucher is applied. This works with loyalty rewards, saved vouchers, and voucher codes.
Why it matters: Customers don't always know which menu items a reward or voucher covers, so showing the eligible items lets them redeem it on their own without asking staff.
Access: Available to food and beverage sellers using Kiosk Lite. During order review, customers select a reward or saved voucher from Rewards, or enter a voucher code.
Learn how customers redeem rewards and coupons in Kiosk Lite: Article
Route modifiers to specific kitchen display system (KDS) stations or printers
What's changed: You can route items to KDS screens or kitchen printers based on their modifiers. For example, a burger with a side of chips can appear at the fryer station. By default, each screen or ticket shows the item and all its modifiers for context. You can also turn on modifier highlighting to make routed modifiers stand out, hide unrelated modifiers, and make the item name less prominent.
Why it matters: Modifiers are often prepared at a different station from the parent item, so routing them separately ensures the order reaches the correct stations without duplicate menu items or manual coordination.
Access: In Square Dashboard, go to Settings > Device management > Devices and select a KDS device, or go to Settings > Device management > Profiles > Printer profiles to select a printer profile. Open its routing settings, then use the Modifiers tab to choose which modifiers route to that KDS or printer. These settings can also be changed directly on the KDS or POS devices.
Learn how to route modifiers to KDS stations and kitchen printers: Article
Assign kitchen categories to route items to specific printers
What's changed: Printers can route items by kitchen category, not just by an item's reporting category. Kitchen categories group menu items by where they're prepared, so a salad category can print at one prep station, while a burger category prints at another. Kitchen categories work with or without a Kitchen Display System (KDS).
Why it matters: Items in the same reporting category are often prepared at different stations, so routing by kitchen category sends each item to the right printer without reorganising reporting.
Access: In Square Dashboard, go to Settings > Restaurant settings > Kitchen settings > Kitchen routing categories. Create a category and add items. Then go to Settings > Device management > Printer profiles and choose a profile. Open Categories & modifiers to print, select the relevant categories on the Kitchen categories tab, and save.
Learn how to set up kitchen categories and printer routing:
Add a photo when creating an item from an unknown barcode
What's changed: When a scanned barcode isn't in the catalogue, sellers can create the item on the spot. The new-item screen includes an image tile for taking a photo or choosing one from the device's photo library. When Square finds a matching product in its database, a suggested image fills the tile.
Why it matters: Photos make items easier to spot on the item grid and in a Square Online store, so adding one while the item is being created means it has an image from the start.
Access: In Square for Retail or Point of Sale on iOS or Android, scan an unknown barcode at checkout or in Receive stock, tap Create item, then tap the image tile to take or choose a photo.
Learn how to add a photo when creating an item from a barcode scan:
Use Multi-Account Suite to group member locations and set item prices by location group.
What's changed: In Multi-Account Suite, operator merchants can group their member merchant locations together into location groups, and set item prices according to those location groups.
Why it matters: For large organisations with multiple locations, this streamlines catalogue management. Prices often vary according to factors such as region, so grouping locations and setting prices once for the group removes the need to edit each location one item at a time. As locations are added to or removed from location groups, item prices are automatically updated to reflect those changes.
Access: Available globally to organisation operators using Multi-Account Suite. Operators can create location groups from the organisation management page in Square Dashboard and assign price overrides to multi-account location groups through the item editing flow.
Learn how to use Multi-Account Suite to group member locations:
Delete unused printers from printer details
What's changed: On Android and iOS, sellers can delete an unused printer previously synced to Square from the printer details screen. The delete option appears only when the printer is not connected on the current device and has no profiles linked at the location.
Why it matters: Unused printers clutter the printer list and are easy to confuse with printers a location actually uses. Sellers can remove those entries without losing the profiles they still need.
Access: Available to food and beverage sellers on Android and iOS. Requires permission to edit printer profiles and an internet connection. Select the printer in your printer settings, then tap Delete and confirm. You can delete a printer only if it isn't connected to the device you're using and has no printer profiles assigned to it at that location. Deleting a printer here is different from using Forget in Square Dashboard.
Learn how to delete unused printers in Point of Sale: Article