View, receive, and adjust inventory
About inventory management
Efficient inventory management helps streamline operations, reducing the time and costs associated with stocking, reordering, and warehousing. It ensures that products are available when customers want to buy them. You have two main stock actions that you can take from your point of sale app:
Receive stock: When you receive stock, you can add stock units by individual item or across multiple items in bulk.
Adjust stock: You can adjust stock levels and attribute reasons, such as loss, theft, or damage.
From the Stock overview page on Square Dashboard, you can also bulk edit prices across multiple items. Learn how to Bulk edit and update items.
Before you begin
You can receive, adjust and count your inventory from your Square Dashboard, point of sale app on iOS devices, Square Terminal, Square Stand, and Square Register.
If your items aren't appearing in the Stock Overview section of your Square Dashboard, make sure that stock tracking is enabled. To do so, go to Items & Services > Items > Item library > Click on the item > Scroll down to tracking > Turn on Tracking > Receive stock > Done.
View your current stock levels
You can view your current stock levels with retail mode enabled in the Square Point of Sale app from the Square Retail POS app, or Square Dashboard.
- Sign in to Square Dashboard and go to Items & services > Inventory management > Stock overview.
- Filter by one or multiple locations, Category, Inventory or Vendor to view your stock on hand by item.
- Click the On Hand field for an item to bring up a popover to make stock adjustments.
- Click the (…) in line to take various actions, adding to purchase order, adding to transfer order and editing low stock alert.
- Click Actions to print labels, export library, or view item library.
Filter your inventory by category and location
- Open your point of sale app, then tap Inventory > Stock Overview.
- Tap the three horizontal lines to bring up the Filters screen to filter your search results. From here, you can filter by category and location, as well as sort by Lowest stock first, Highest stock first, and Alphabetical.
- Tap Apply once the appropriate filters are selected. From here, you can view current stock counts and take various actions like receiving stock, adding vendor information, and adding unit costs.
View inventory levels for a specific variation
- Open the app and tap Inventory > Stock Overview.
- Use the search bar to find an item by name or SKU, or use a compatible barcode scanner.
- Tap the item, and Item details such as default vendor and unit cost will be listed at the top of the screen, followed by Stock on Hand per location.
Adjust stock for an individual item
You can receive and adjust stock for an individual item from your Square Dashboard, with retail mode enabled in the Square Point of Sale app, or from the Square Retail POS app.
From your Square Dashboard, you can receive and adjust stock of specific variations for items with variations, or add stocks for an item without variations.
For an item without variations:
- Sign in to Square Dashboard and go to Items & services > Item library.
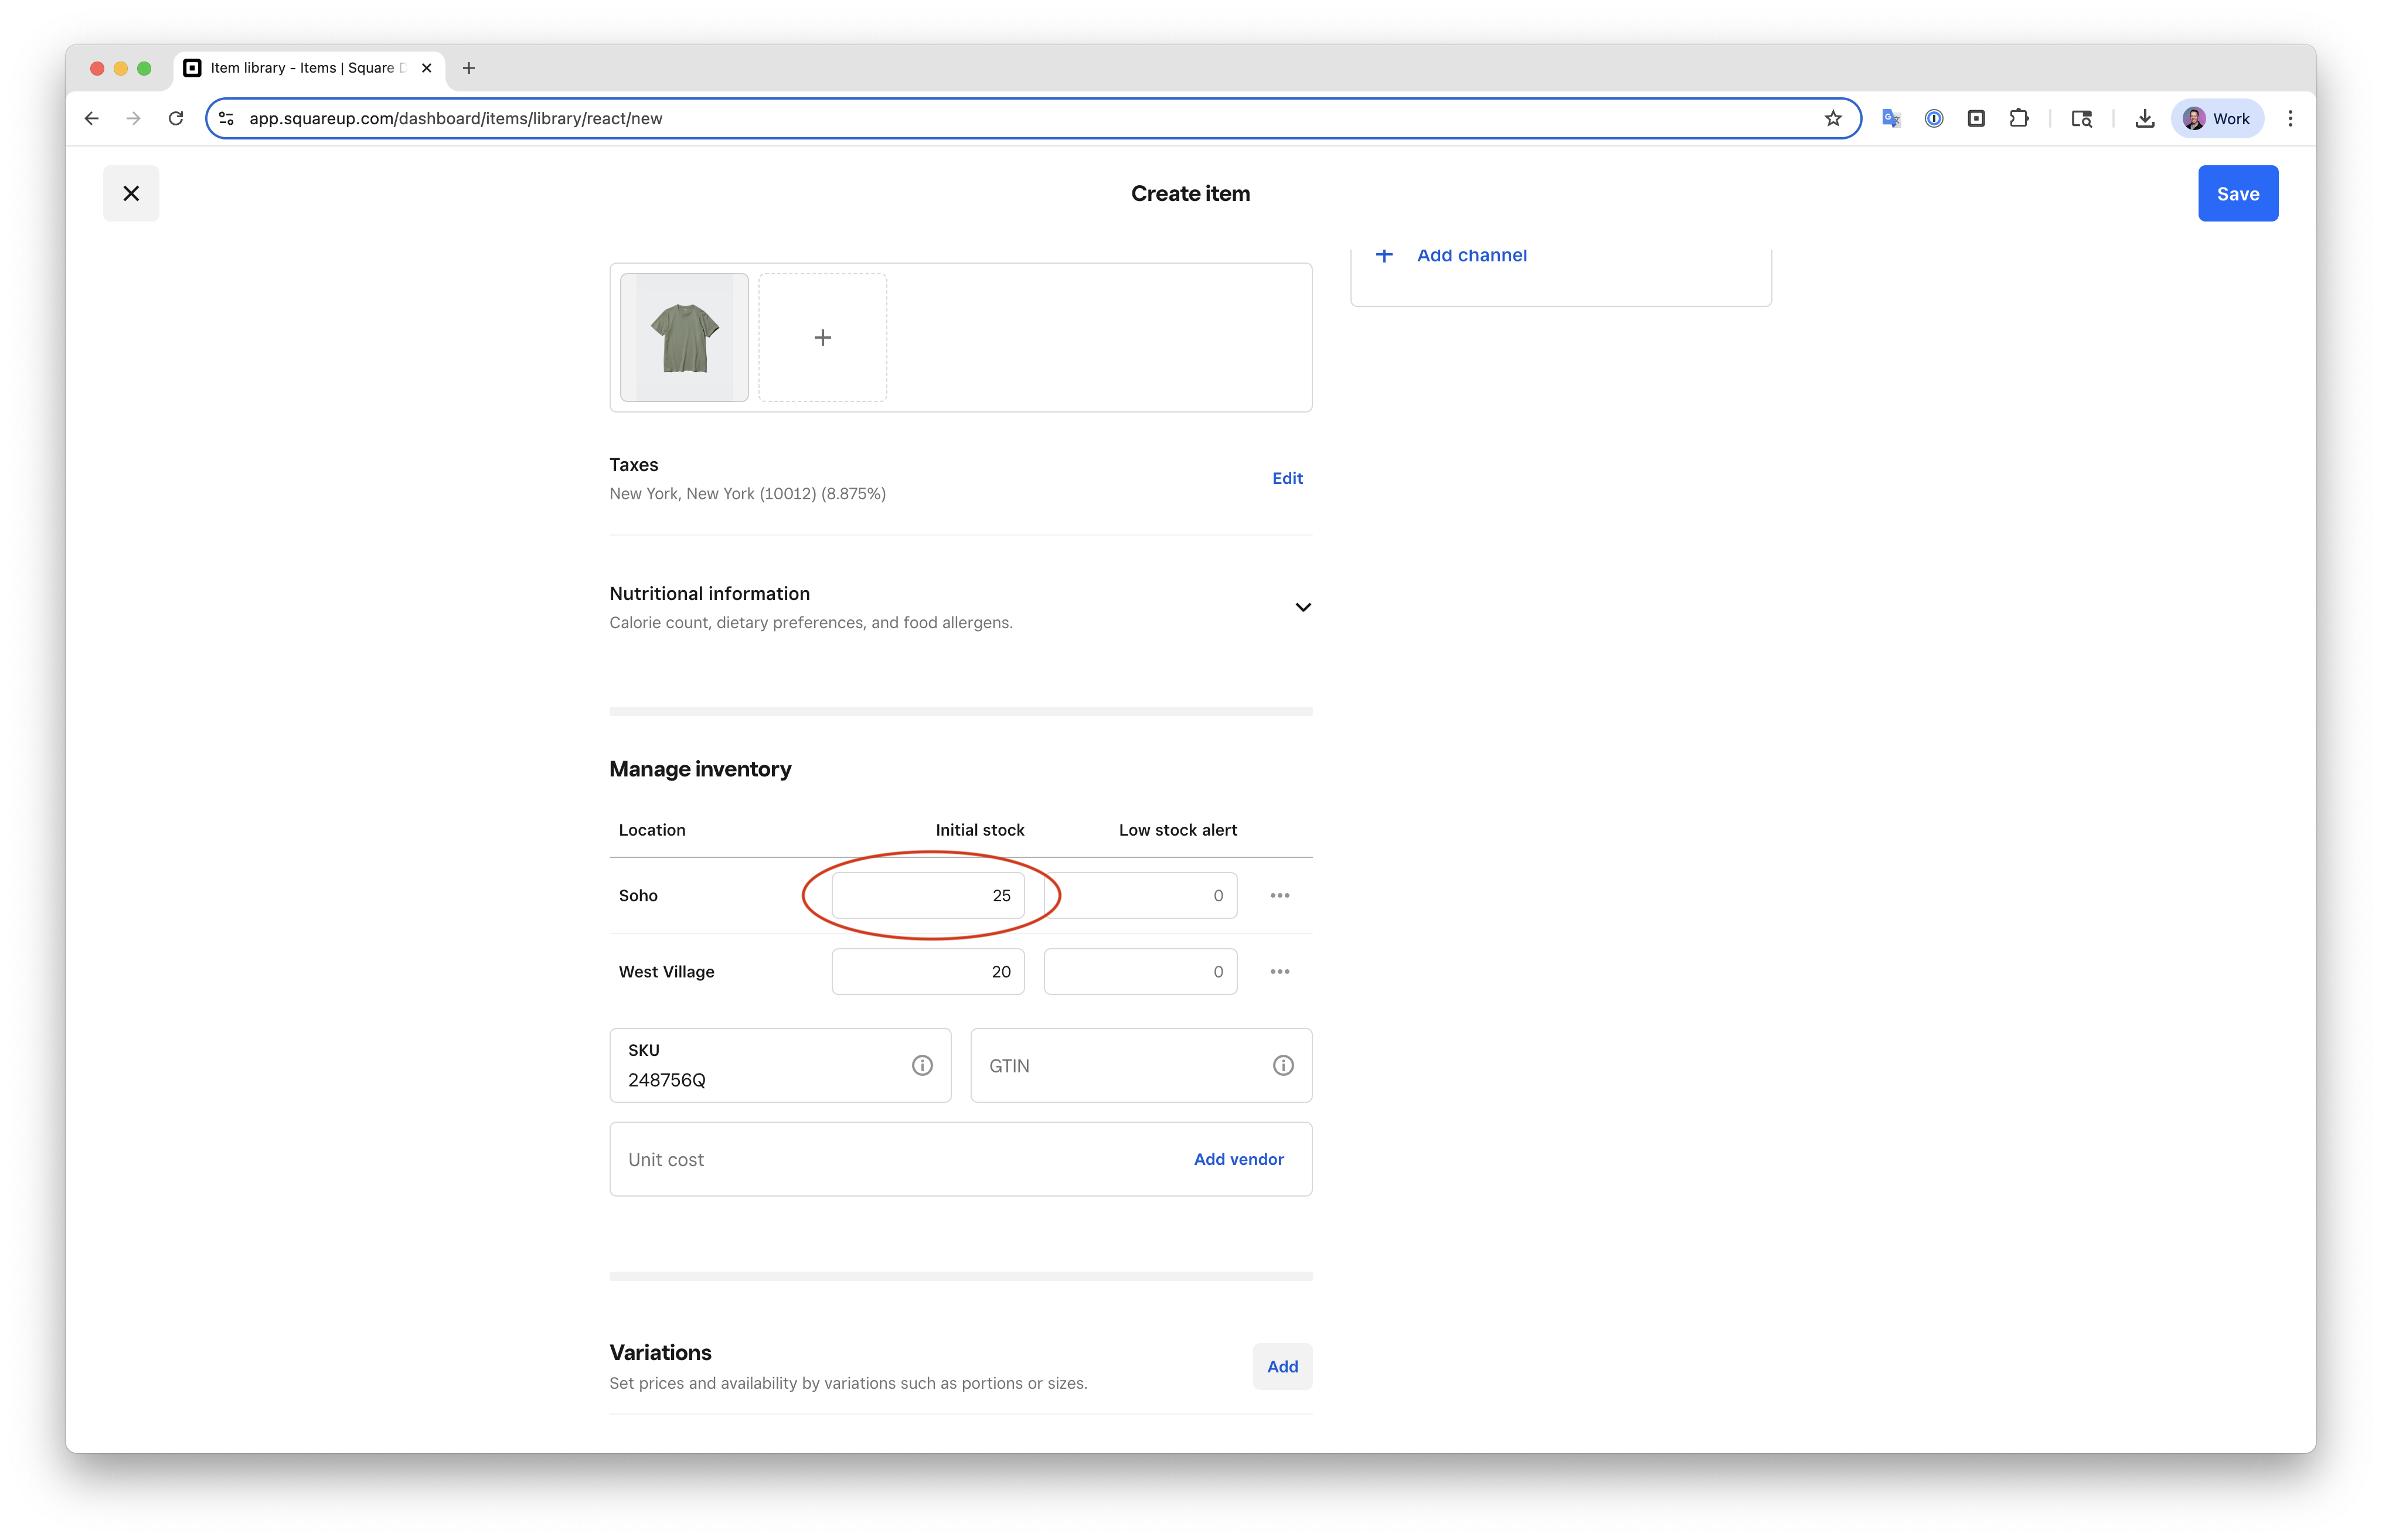
- Select an item to open the ‘Edit Item’ view. Scroll down go to the Manage Inventory section.
- Click On hand to open the inventory popover.
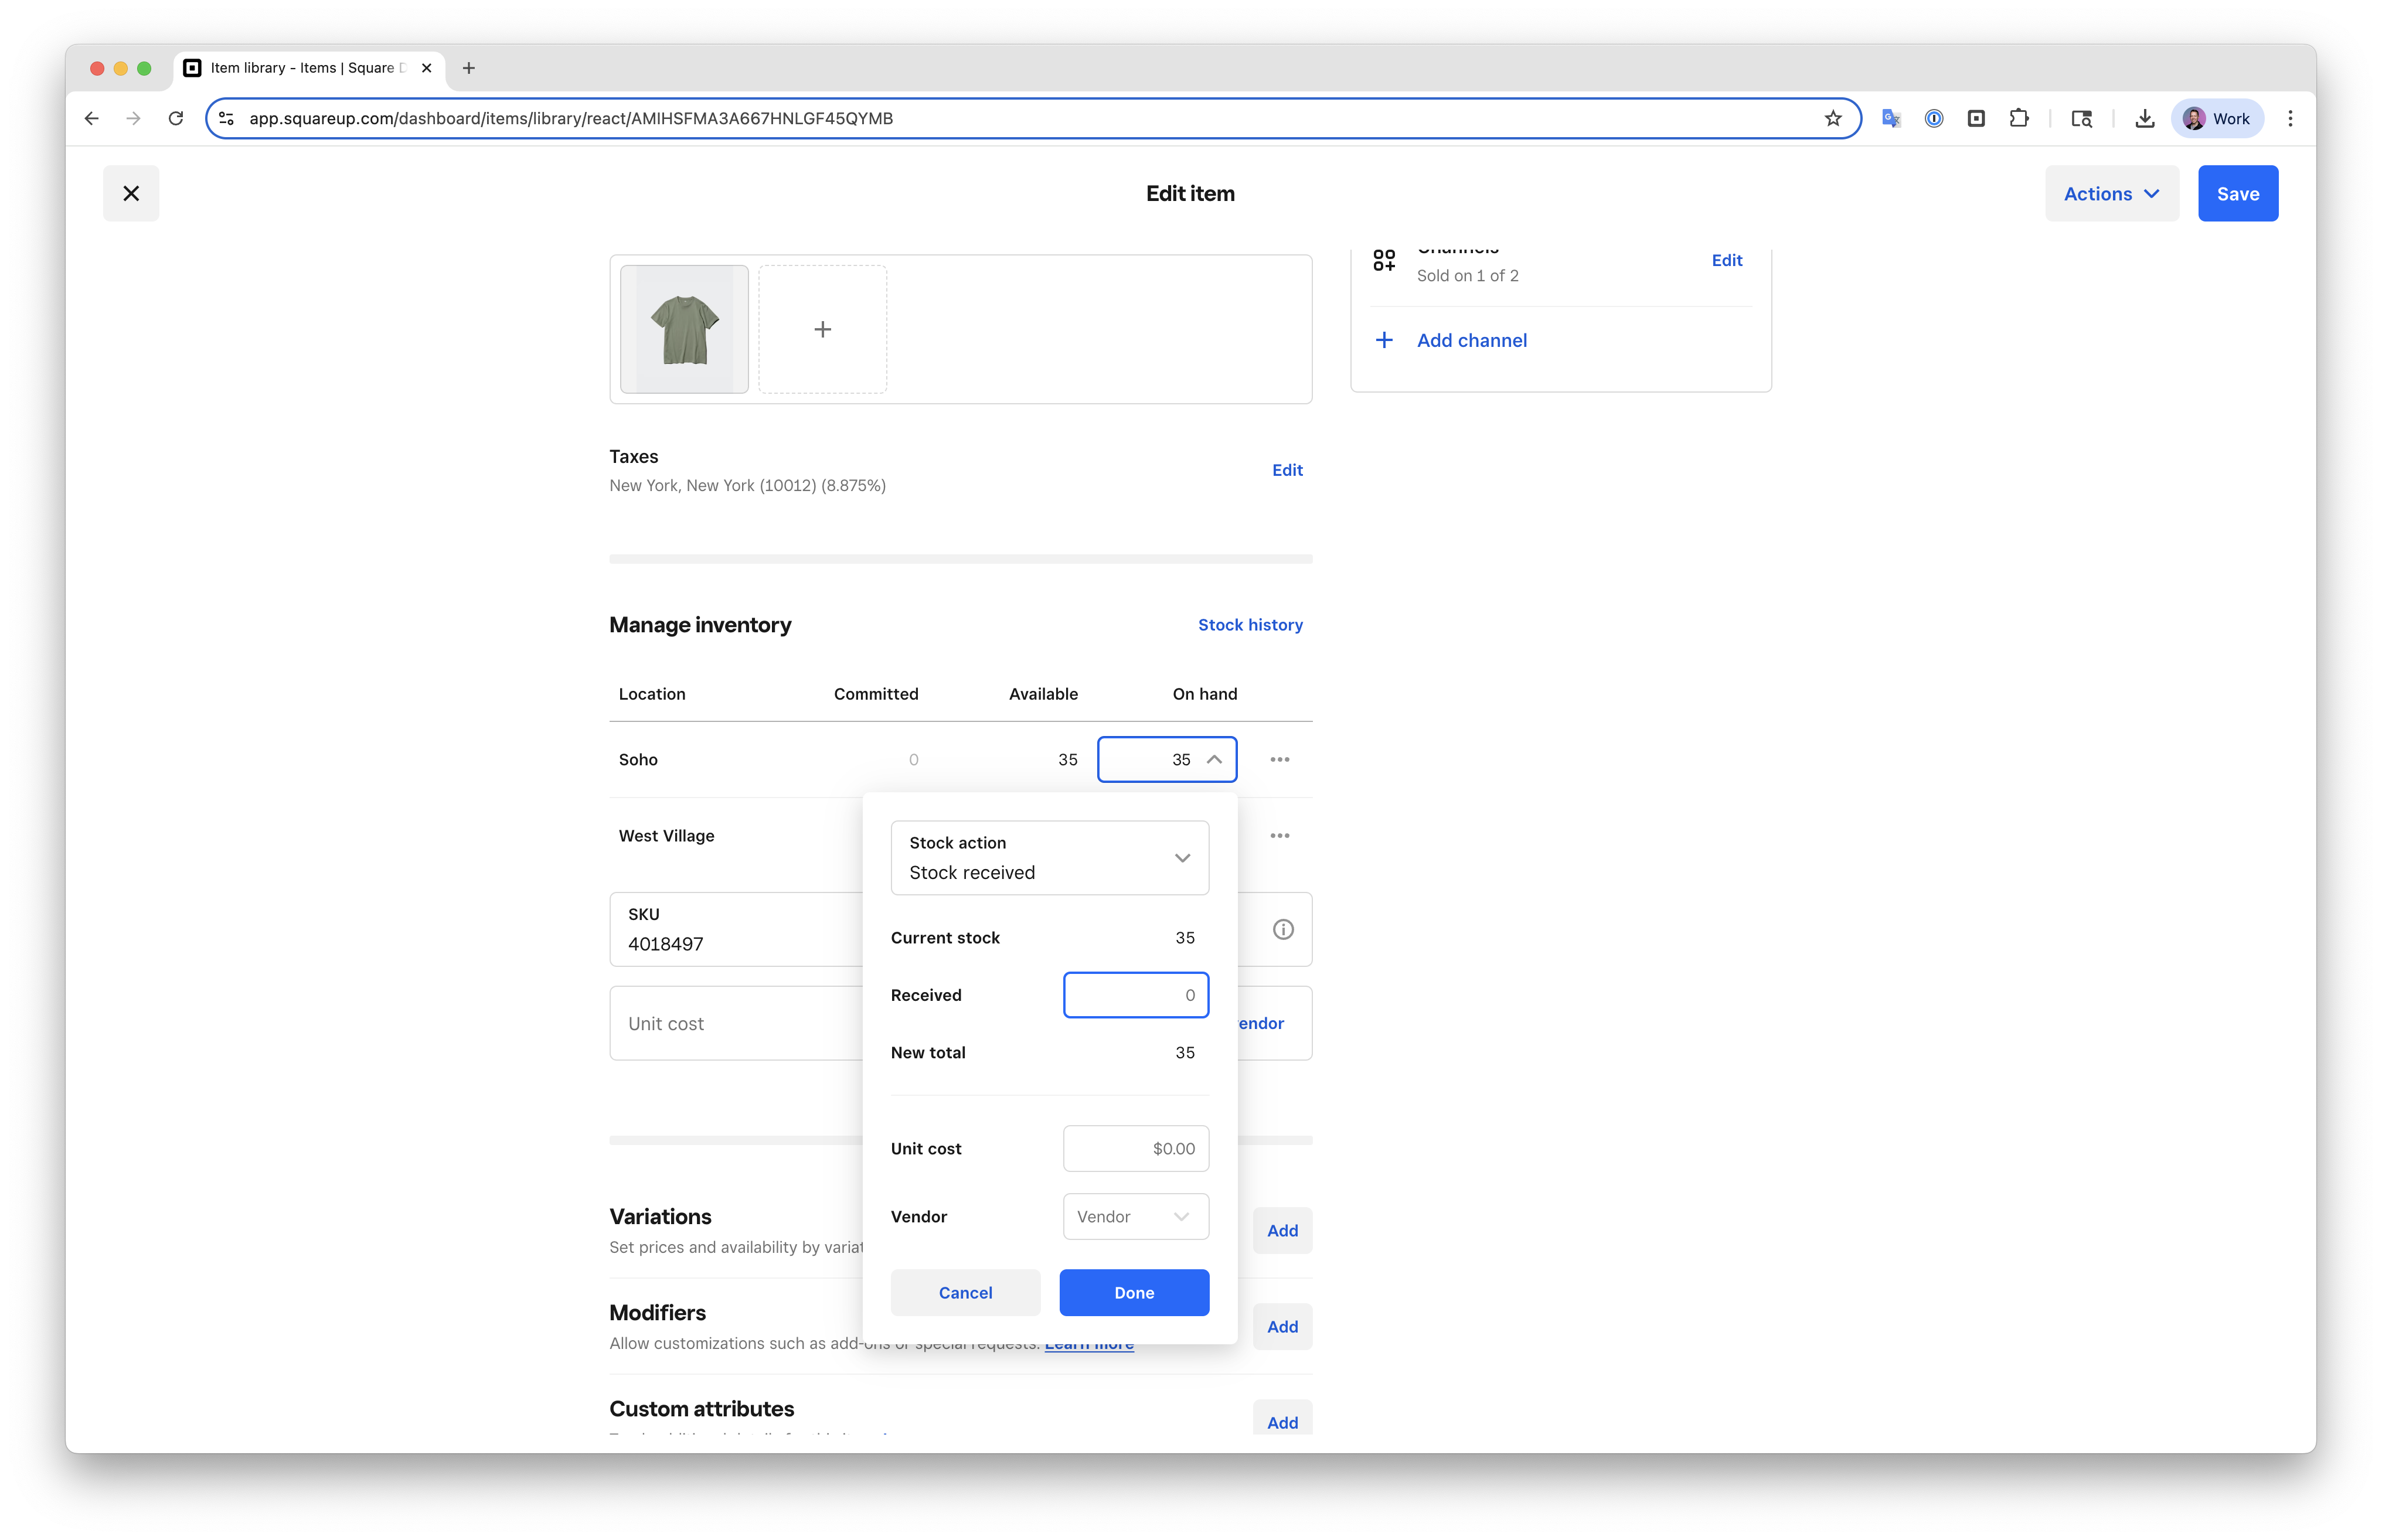
- Select your stock action (Stock received, Inventory recount, Damage, Theft, Loss, or Restock return) and input your stock adjustment.
- Click Done then click Save to return to your item library.

For an item with variations:
- Sign into Square Dashboard and go to Items & services > Item library.
- Select an item to open the ‘Edit Item view’. Scroll down to the Variations section.
- If the inventory is shown in the Variations section, click Available for a given variation. Otherwise, click on the variation name, then click Inventory.
- Select Inventory then click On hand column to open the inventory popover.
- Select your stock action (Stock received, Inventory recount, Damage, Theft, Loss, or Restock return) and input your stock adjustment.
- Click Done then Save.
You can receive and adjust stock for an individual item with retail mode enabled in the Square Point of Sale app or from the Square Retail POS app.
- Open your point of sale app and tap Inventory > Stock Overview.
- Locate and tap the item you need.
- Tap Manage Stock > Stock received and enter the updated stock amount.
- Tap Save.
Adjust stock in bulk
You can receive and adjust stocks in bulk with retail mode enabled in the Square Point of Sale app or from the Square Retail POS app and from Square Dashboard.
- Sign in to Square Dashboard and go to Items & services > Inventory management > Stock overview.
- Scroll through your variants list, filter on Location, Category or Stock, Vendor(s), or use the search bar.
- Select the item to manage or update.
- Click the On hand field for an item to make stock adjustments.
- Select a reason from the Stock action drop-down menu.
- Update the inventory/stock level, and add the Unit cost and/or Vendor, if needed.
- Click Done > Done.
- Click the (•••) in line to take various actions like receiving stock, managing stock, adding to purchase order, adding to transfer order and editing low stock alert.
- Click Actions to print labels or view item library.
Receive stock in bulk
You can also receive stock in bulk with retail mode enabled in the Square Point of Sale app or from the Square Retail POS app using a compatible barcode scanner. Learn how to connect a barcode scanner to your point of sale.
Make sure your barcode scanner is connected.
Open your point of sale app, then tap Inventory > Stock Overview > Receive stock.
Add items to the list manually, or by scanning barcodes. Scanning a barcode more than once will incrementally increase the quantity counts, though quantities can also be adjusted manually with the keypad.
Tap Next.
Review all item information and add vendor information and unit cost, if applicable tap Confirm.
Exiting the screen while receiving stock will not save the scanned inventory added. If you’re receiving hundreds of new items, make sure to periodically commit your work by saving all the items and their counts.