Create and manage projects with invoices
About Square Invoice projects
With Square Invoices, you can create projects to keep track of digital files and upload attachments in one workspace. You can link invoices, recurring series, estimates and contracts for quick access. You can also add private notes and ideas as you work.
Before you begin
You can create and manage projects from your Square Dashboard and the Square Invoices app.
If an invoice is linked to a project that also has a related estimate, the estimate will also be automatically linked to the project.
You can add the Estimated or Project value fields to measure how much you’ll make on this project. You can also add a Win confidence percentage to measure how likely you’ll book this project. Both fields are optional but can help you prioritize your work.
Create invoices projects
- Sign in to Square Dashboard and go to Orders & payments (or Invoices & Payments or Payments) > Invoices > Projects. You can also go to Overview > Create a project.
- Click Create project.
- Add customers associated with the project.
- Enter the project name, project phase, date and time, start date (optional) and end date (optional), description. You can also add an optional estimated value or win confidence. Click Create.
- Add an optional location, then click Create.
- Tap Projects then (+) to create a new project.
- Add customers associated with the project.
- Enter the project name, phase, project start date (optional) and project end date (optional). You can also add an optional project value or win confidence.
- Tap Save.
Projects can be automatically created when you create new estimates. This helps you track your work without extra steps.
- Sign in to Square Dashboard and go to Invoices > Estimates.
- Click Create estimate, then find the Automatically create a new project for this estimate toggle.
- Turn on to automatically create projects, or turn off for manual control.
Note: You can create projects even when dates aren’t yet known—simply leave the date fields blank and add them later when details are confirmed.
Manage invoice projects
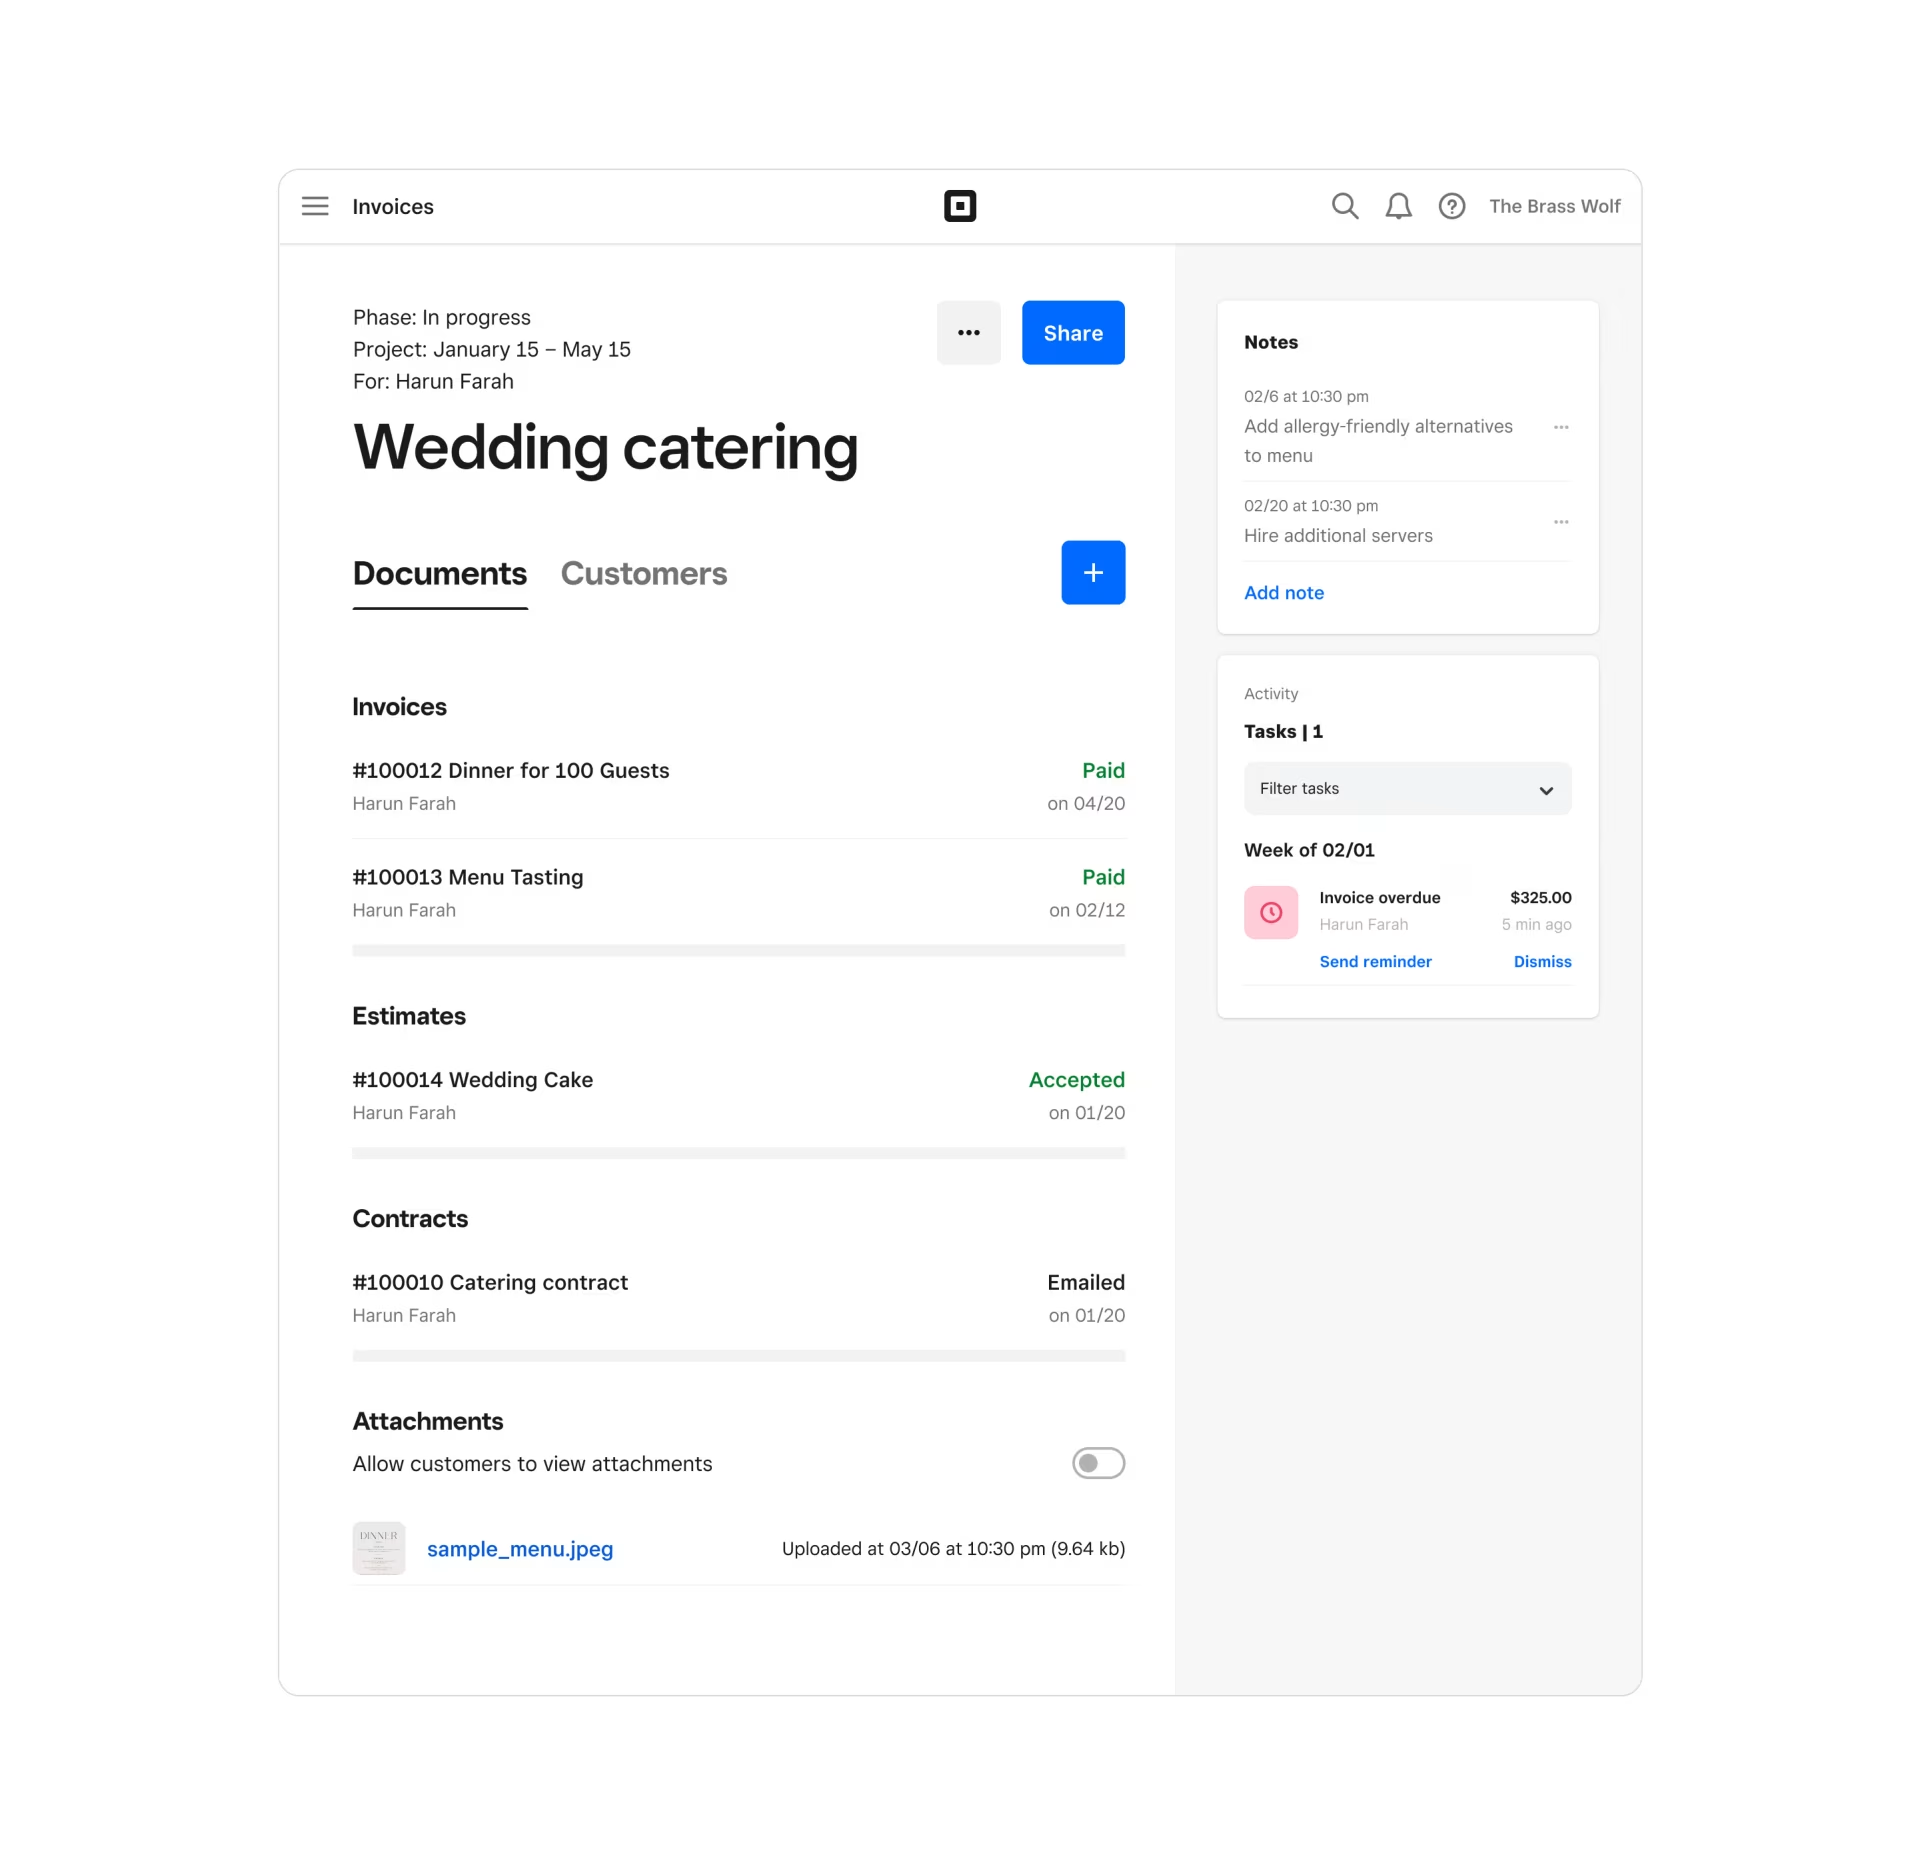
Once you’ve created projects, you can manage them from the project workspace on your Square Dashboard or Square Invoices app.
- Sign in to Square Dashboard and go to Orders & payments (or Invoices & Payments or Payments) > Invoices > Projects.
- Select the project then click (+) to add new or existing invoices, recurring series, estimates, or contracts. You can search by title, ID, or status.
- Click (+) to add any optional attachments.
- Click Add note to add an internal note to the project.
- View an activity log of the project. You can filter by all, overdue, failed, or accepted.
- You can also click (•••) to Edit project, Mark project: Complete, or Delete project.
Note: Once you Confirm deletion, the project will no longer be accessible.
- From the Files tab, tap (+) to Create new invoices or estimates or Add existing invoices, estimates, recurring series, or contracts.
- From the Notes tab, tap (+) to add a note. Tap Save.
- From the Customers tab, tap Share to share the project link.
You can also tap (•••) to Mark project: Complete, Edit project details, or Delete project.
Organize project phases

From the Projects tab of your Square Dashboard and Square Invoices app, you have access to a pipeline board tracker so you can better track leads and payments. You can click View as to change between Board or List views. With either view, you can categorize projects into different segments, including Inquiry, Proposal, Booked, In Progress and Complete.
Projects display up to three document attachments with status indicators, and show a “More” indicator when you have additional documents attached.
Sort your projects to see the most relevant work first:
Recently updated: See your most active projects first (default sorting).
Date: Projects with dates appear first, followed by projects without dates.
Name: Alphabetical sorting.
You have three options to change a project phase:
Change in-line in the project list view.
When creating or editing a project, there’s a drop-down menu.
Drag and drop project tiles across phase columns in the pipeline/board view.
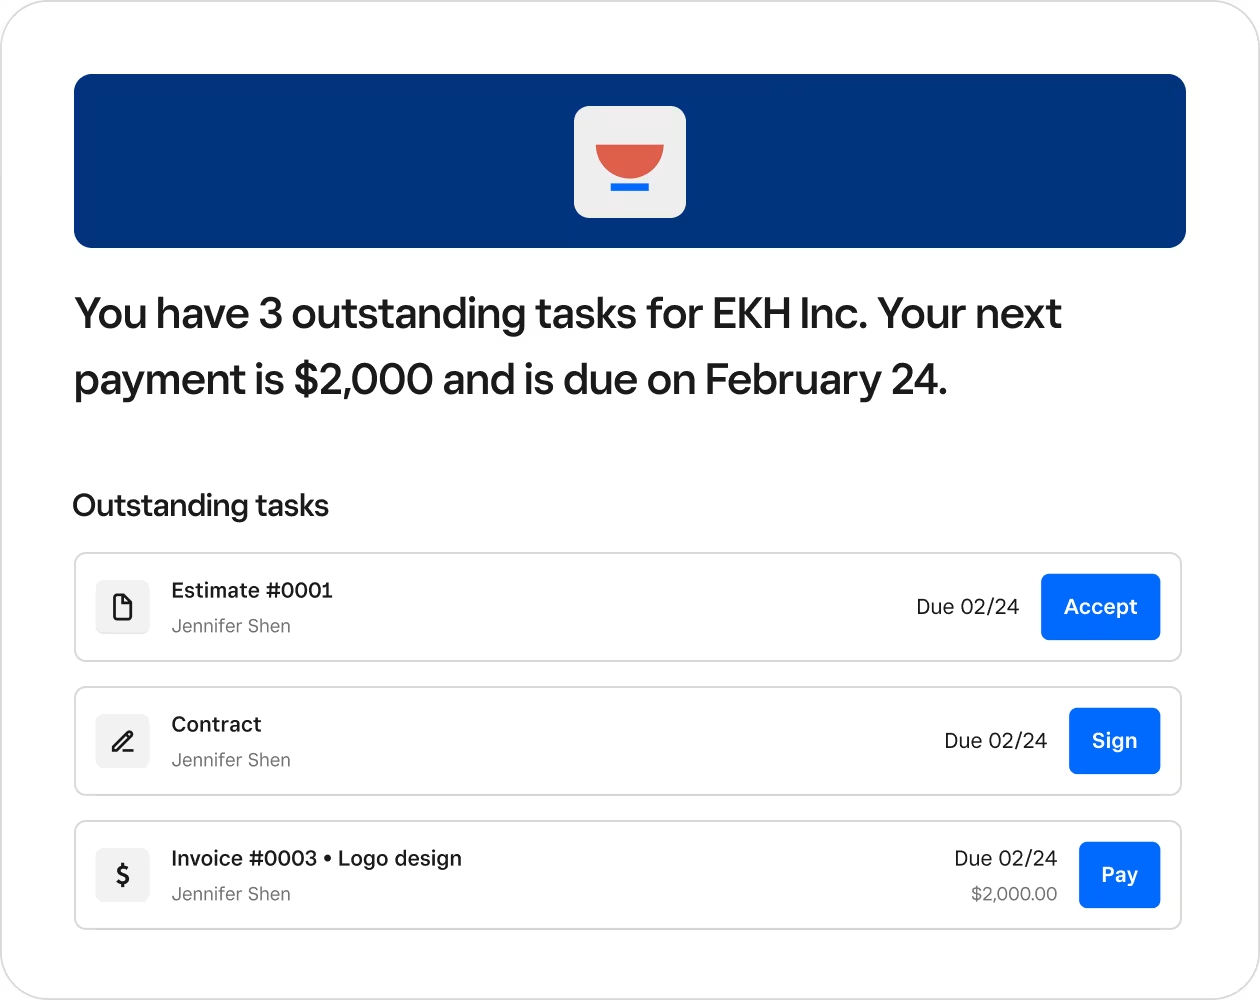
Share project link
Sign in to Square Dashboard and go to Orders & payments (or Invoices & Payments or Payments) > Invoices > Projects.
Open the project.
Select Customers and ensure there is a primary recipient. You can only add additional customers before sharing from your Square Dashboard. To do so, navigate to Project overview and click Edit. From the Edit project screen, search by the customer’s name or email, then click Save.
Select Share.
Add an optional note, then select Share.
You can only add additional customers before sharing from your Square Dashboard. To do so, navigate to Project overview and click Edit. From the Edit project screen, search by the customer’s name or email, then click Save.
When sharing a project, you can select Require customer sign-in to view project, which means your customer will have to verify their identity to access the project. This feature adds an extra layer of security, which is particularly important if sharing confidential or sensitive information.
After the project is shared, customers can reach out to you directly using the “Text us” button. Learn how to manage “Text us” button.
Manage customers
To change the primary customer or remove a customer before sharing:
Sign in to Square Dashboard and go to Orders & payments (or Invoices & Payments or Payments) > Invoices > Projects.
From the project, click Edit or (•••) > Edit Project.
If there are multiple customers, click Primary ✓ next to the new primary customer.
To delete, hover over the customer, click the trash can icon and click Remove.