Manage Online Orders with Square
With Square, you can accept online orders from your Square Online site, integrate with an eCommerce partner or work with a developer to integrate with our Orders API. When you start accepting online orders, you can track and manage multiple fulfilment types from both the online Square Dashboard and Square POS app.
Check out our Manage Online Orders with Square FAQs to learn more. You can also learn more about getting started with Square Online and managing your shipments from your Square Dashboard.
Integrate an eCommerce Partner
In addition to Square Online, you can integrate with integration partners such as Deliverect, Uber Eats, Doshii and Menulog to organise and manage all your delivery partners from one screen. View all online ordering and delivery platforms.
You can view Square’s partnership integrations from the App Marketplace online:
- Go to Apps in your online Square Dashboard.
- Click Visit App Marketplace.
- Go to your online Square Dashboard > Orders > Order Partners.
- Click Get Started for the ordering partners you’d like to integrate with your Square account.
- You can also connect to partners through the Square App Marketplace.
- To start accepting orders, you’ll need to complete the setup flow for each integrated partnership.
Note: Please check the integration partner’s website for more information on their pricing.
Order Overview
Each online order falls into one of the following fulfilment states:
Status | Description |
---|---|
Active | All orders that need to be accepted, or orders in progress (i.e. not completed). |
New | All orders awaiting action. If auto-printing is enabled on your Square POS app, new orders will print as they come in. |
In Progress | Orders being prepared. |
Ready | All orders ready for pickup (by customers or couriers). |
Completed | All completed or cancelled orders. |
The status of an order will be in red if the order is 'at risk' of being late. This is determined by looking at the prep time, collection time and the time the order was placed. You can set these timelines from the Settings tab in Square Online.
For example, if an order is placed at 10:00 for collection at 10:30 and there’s a prep time of 35 minutes, the order status will be marked in red as the order is at risk of not making the collection time. Orders marked in green are not at risk of being late.
Order Types
In addition to the order status, you’ll also see a breakdown of orders by Type. For example, if you have active orders coming in from Square Online you’ll see both online ordering platforms listed.
Each order will fall into one of the following fulfilment types, to help you manage your orders at a glance: Local Delivery, Shipment, Collection, Click and Collect or Digital.
Note: If you do not have active orders for a particular platform, you will not see it listed. Orders will appear top-down, newest to oldest.
Manage Orders Online
Whether you’re using Square Online or one of our eCommerce ordering partners, you can sell online and manage your customer orders directly from the Orders tab of your online Square Dashboard.
For easy visibility, all new orders will be highlighted green. Once the order is read and order details are viewed, the highlighting will disappear and you can continue to fulfil your incoming orders. You can filter the orders by order status or fulfilment method.
If a customer purchases an item from Square Online, they can have it delivered via your courier from a brick and mortar location. To manage delivery orders:
- Go to Orders in your online Square Dashboard.
- On the overview page, you’ll see a list of your orders. You can use the filters to view Active, Completed or All Orders. For more targeted results, sort by the order or fulfillment date. Once you’re ready, select on an order.
- To alert your customer to the order being made, select Mark in Progress. You can then make delivery arrangements with your courier.
- When you have finished preparing the order, move it to the Prepared state by selecting Mark as Ready.
- When your courier arrives and picks up the order, move the order into the Completed fulfillment state by selecting Mark as Complete. This ends the tracking of the order.
- Direct your courier to deliver the customer’s order via the information printed on the order ticket.
If a customer purchases an item from Square Online, they can pick it up from a brick and mortar location. To manage pickup orders:
- Go to Orders in your online Square Dashboard.
- From here, you’ll see a list of your orders. You can search by customer contact information (name, phone number or email address), order ID or use the filters to view Active, Completed or All Orders. For more targeted results, sort by the order or fulfillment date. Once you’re ready, select an order.
- If you’re ready for your customer to pick up an order, select Mark as Ready.
- Once your customer picks up their item(s), locate the order and select Mark Picked Up.
Curbside pickup is a quick and easy way for you to implement convenient and contactless commerce. Customers can place their order in-app (through Square Online or another partner integration) and track the status of their order. Customers can arrive curbside to your business to collect their order. You will know when your customer has arrived via an alert in Order Manager, or your customer may call or text you. To manage curbside orders:
- Go to Orders in your online Square Dashboard.
- You’ll see a list of your orders. You can use the filters to view Active, Completed or All Orders. For more targeted results, sort by the order or fulfilment date. Once you’re ready, select an order.
- Select Mark as in progress to allow for fulfillent in the kitchen/retail store.
- When the order is delivered to the customer curbside, mark the order as Completed.
If you’re selling physical items in your store, you’ll need to decide shipping locations and how much to charge. To manage shipment orders:
- Go to Orders in your online Square Dashboard.
- Locate and select the New order to view the order details. You can also search by the customer contact information (name, phone number or email address) or order number.
- Select Mark as In Progress.
- Once you’ve completed the order, you can update the status by selecting Add Tracking Information.
- Add the shipping carrier and include a tracking number. Note: When you add the carrier and tracking number from your Square Dashboard, the information will not appear in your Square Online Overview page. However, if you add the shipping information on your Square Online Overview page and you’re subscribed to paid version of Square Online, the carrier and the tracking number will populate in your Square Dashboard.
- Once you’re all set, select Save.
Delivery Orders
- UPS is currently the only courier option.
- UPS bills you monthly for any labels you use. There’s no charge to create or print a label, so you’ll only be billed for packages you deliver.
- At this time, you can only create labels for domestic orders with the origin and destination in the US.
- It’s currently not possible to print a packing slip or save custom package dimensions.
- You’ll need to manually enter package weight when creating a label.
With Square’s UPS integration, you can purchase and print delivery labels. You can connect an existing UPS account or create a new one, but you’ll need to set up UPS directly from your Square Dashboard before creating labels in the Square POS app. To set up UPS:
- Go to the Orders tab of your online Square Dashboard.
- Select a new delivery order to view the order details.
- Click Actions > Create delivery label.
- Follow the prompts to connect an existing UPS account or create a new one.
- Go to the Orders tab.
- Select the order you want to deliver.
- Under Actions, select Create delivery label to start the label creation workflow and update the order status to In Progress.
You can print your label immediately after you purchase or print it later from the order detail view. To print a purchased delivery label:
- Select the order to open the order details view.
- Click Actions and select Print delivery label.
With UPS connected, you can create labels for delivery orders within the Square POS app.
- From the navigation bar at the bottom of your screen, tap Orders.
- Tap the order you want to dispatch for delivery.
- Tap Create Label to start the label creation workflow and update the order status to In Progress.
If your customer has selected delivery as their fulfilment method, you can edit their delivery address if the order is in ‘New’ or ‘In Progress’ status. Note: You can only edit the address if the delivery has not been sent or before you’ve created a packing slip. If you have multiple deliveries for the one order, you can still edit the delivery address but it will only affect unfulfilled items.
To edit:
- Go to Orders on your online Square Dashboard.
- Select the order you wish to edit.
- Click •••, then click Edit delivery address.
- You can also click the address hyperlink directly under ‘Deliver to’ on the side panel.
You can print a packing slip for delivery orders with or without creating a delivery label. Packing slips automatically include the following information:
- Your business name, address, website and phone number.
- Your logo image.
- The customer’s name and delivery address.
- The order number and date.
- The name and any variations or modifiers for items included in the order.
To print a packing slip:
- Go to the Orders tab.
- Click on a new delivery order to view the details.
- From the Actions menu, choose Print packing slip.
- The packing slip opens in a new browser window, where you can print or save it as a PDF.
For orders created through Square Online, you can also choose which items to include on the packing slip if you’re only delivering part of the order. Orders created outside of Square Online include all items on the packing slip.
Print Order Tickets
Connect a printer to your device to print order tickets for customers or send order tickets to your kitchen. If you accept collection orders with the Square POS app on an iPad, you can also automatically print remote order tickets.
You can also print single items per order ticket with orders received from your Square Online website and via Self-serve ordering.
Manage Orders from the POS App
You can also manage online orders and order settings directly from the Square POS app.
Orders
- From the navigation bar, tap Orders. If you don’t see Orders, tap ≡ More > Orders.
- From the Order Manager screen, you can see each order listed, along with the time elapsed since the original order was placed.
- Tap an order to bring up the details page and tap Mark as In Progress. The order status will update to In Progress.
- When you’re ready for the order to be collected, tap Mark as Ready.
- Once the order leaves your business, tap Mark as Picked Up.
Manage location prep times for Square Online collection and delivery orders directly through the your Point of Sale app (version 5.91 or newer):
- From the navigation bar, tap Orders. If you don’t see Orders, tap ≡ More > Orders.
- Tap the clock icon at the top right of the Order Manager screen to view your Order Timing settings.
- Tap the prep time drop-down menu and select your desired location prep time. Tap Save.
Once it’s done, the incoming orders will start using the updated prep time. Orders received before you updated your prep time settings won’t be affected.
Note: Prep times do not apply to Self-Serve Ordering (i.e. QR code) orders.
You can temporarily add 15 minutes to a location’s prep time during busy periods to give yourself more time to complete your active and incoming orders. To do so:
- From the navigation bar, tap Orders. If you don’t see Orders, tap More and select Orders.
- Tap the clock icon on the Order Manager screen to view your Order Timing settings.
- In the ‘Prep time’ section, toggle on Busy Mode.
- Select how long you want Busy Mode to be on: 15 minutes, 30 minutes or 1 hour. While Busy Mode is on, 15 minutes will be added to your current location’s prep time.
- Tap Save.
Once enabled, you can see the remaining time in Busy Mode on your Orders page. Here, you can also select Exit Busy Mode to resume your regular prep times or select Extend to extend the duration of Busy Mode.
Note: Busy Mode can also be extended from the Order Timing settings page by selecting Extend > Save.
During busy shifts with more orders coming in than expected, you may want to delay the collection time so that the delivery person or customer knows they can pick up their order at a later time. Delay orders as soon as you know you can’t make the expected time to avoid waiting customers or couriers. Order delays are accepted per service and integration type, so check with your integration that you can delay your orders if needed. To adjust the ready/dispatch time for an order:
- From the Order Manager on your online Square Dashboard, select an order that you would like to delay.
- For orders that can be delayed, you will see a right pointing arrow next to the time. Select Edit.
- Select from a pre-selected list of time intervals (by 15 minute increments) or select Other to manually select a time period.
- Tap Save and we will send the update to the integration (where your customer ordered) and then integration will let the customer/courier know that the order is delayed.
Please bear in mind that some orders cannot be delayed – check with your integration provider to see if it’s possible.
Pause online orders to prepare your active and upcoming orders, then resume Square Online orders when you’re ready. To temporarily stop incoming online orders from Square Point of Sale (version 5.93 or later):
- From the navigation bar, tap Orders. If you don’t see Orders, tap More and select Orders.
- Tap the clock icon on the Order Manager screen to view your Order Timing settings.
- In the Pause Orders section, select Pause for collection or delivery orders. Tap Save.
- Choose when you want to resume online orders and tap Save.
You can see the remaining pause time and resume online orders instantly from the Orders tab.
You’ll see each order listed, along with the time elapsed since the original order was placed.
- From the navigation bar, tap ≡ More.
- Tap Orders to see each order listed, along with the time elapsed since the original order was placed.
- Tap an order to bring up the details page and tap Mark as In Progress.
- When you’re ready to dispatch your customer’s items, tap Marked as Dispatched. Confirm the items included in the order. Enter the package tracking number and select a courier, or tap Skip Tracking.
You can view historical completed orders in the Completed tab at any time.
From the Orders tab of your Square POS app, you can print a packing slip to include with delivery orders. To print a packing slip:
- Tap ≡ More > Orders.
- Tap the order you want to dispatch for delivery.
- Select More actions > Print packing slips.
- Select your printer, then tap Print.
Note: For orders created through Square Online, you can also choose which items to include on the packing slip if you’re only dispatching part of the order. Orders created outside of Square Online include all items on the packing slip.
From your Square Dashboard, you can mark multiple orders as complete at once to make sure your orders are accurate and up to date. To do so:
- Go to the Orders tab.
- Click Edit Orders and select each order that you would like to edit.
- Click Mark as complete for orders that have been completed.
- For dispatched orders, you’ll be prompted to provide a tracking number and courier name for each order > press Save. Click Skip if you do not want to provide this information.
- Click Done editing once your orders are updated.
Once your orders are updated, you’ll see the Status column update accordingly.
Settings
To update your preference for notifications and ticket printing from the app, tap ≡ More > Settings, and scroll down to Orders. You can update:
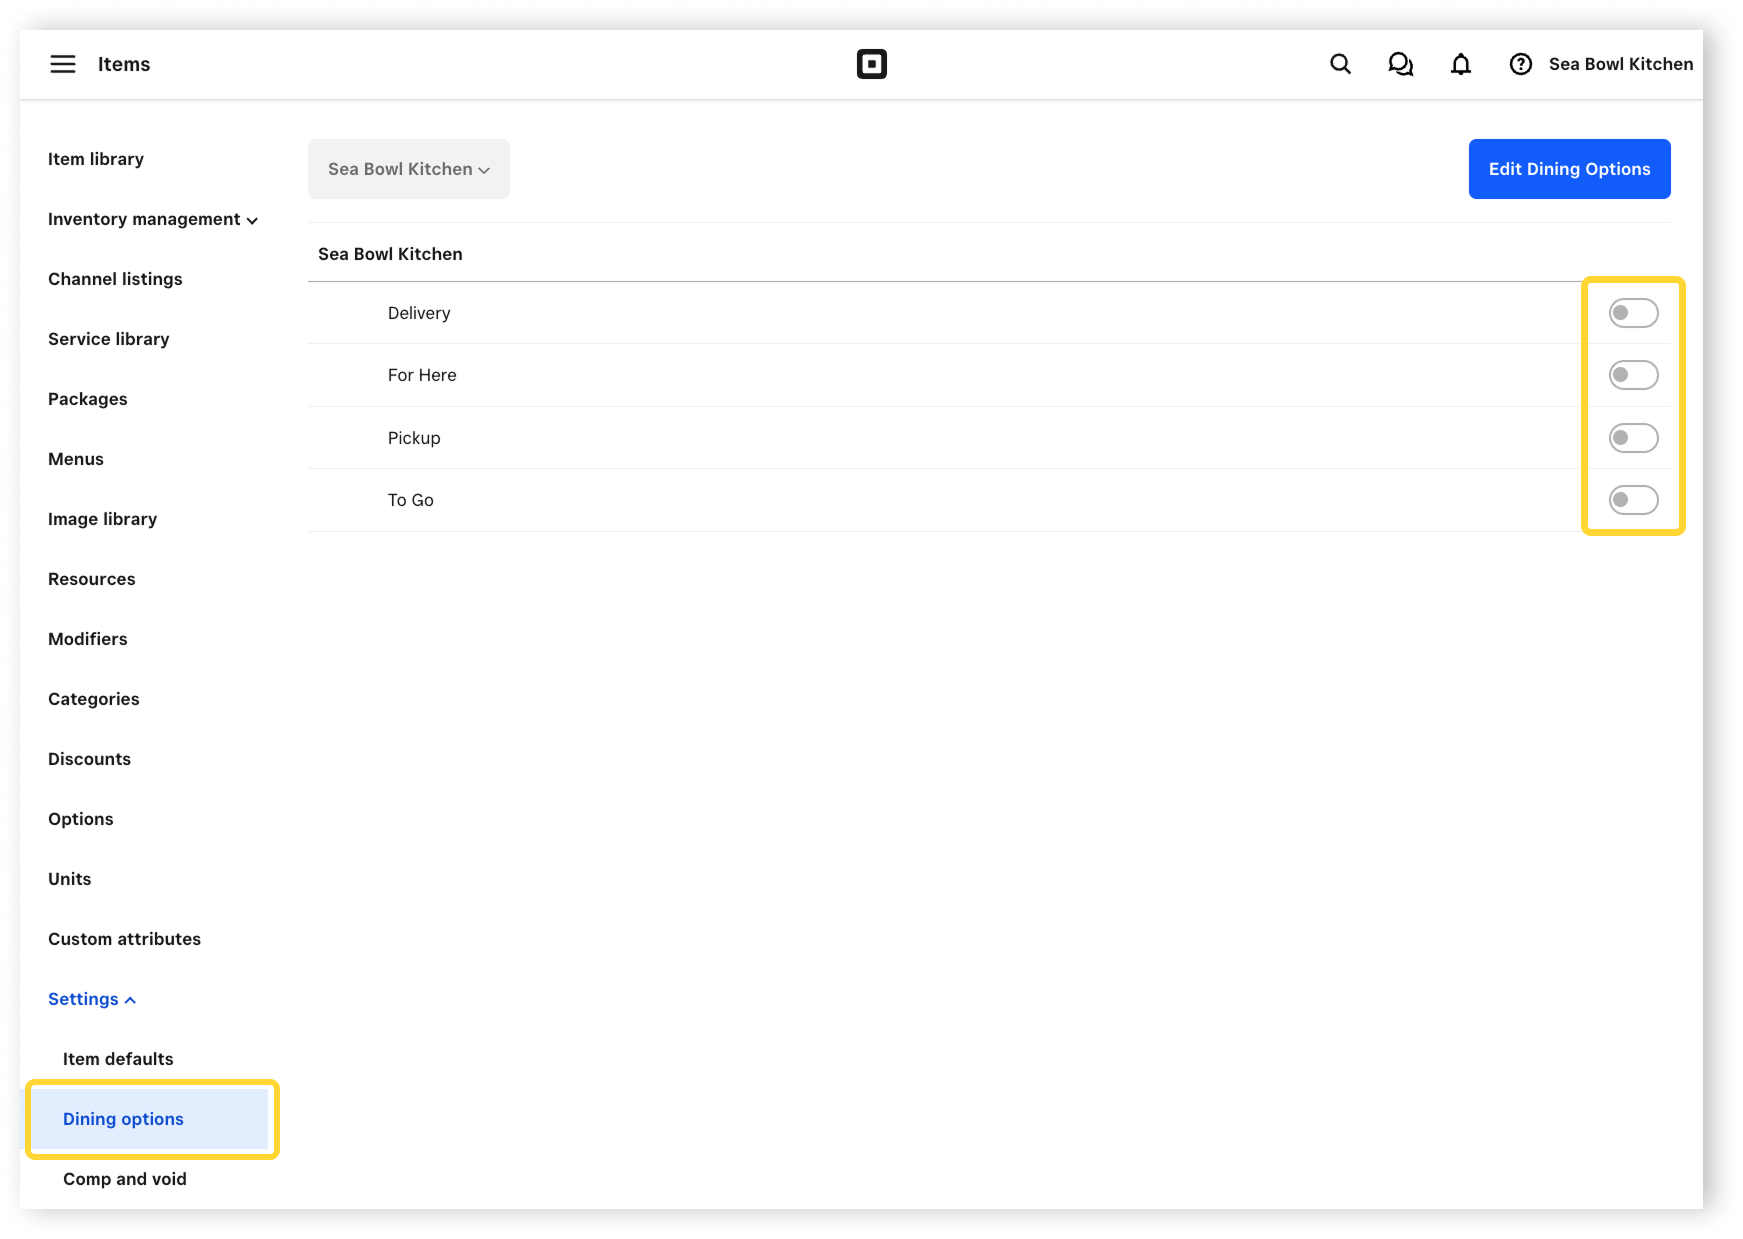
- Order Creation: Create orders for in-store or curbside pickup. All Dining Options must be turned off in Square Dashboard.
- Alerts: You can allow notifications when an order is received or when your customer has arrived for curbside pickup.
Setting up a printer station will have slightly different directions for Android and iOS. Please review the directions for your device below. To set up a printer station on iOS and Android devices:
- From the navigation bar at the bottom of your screen, tap ≡ More.
- Select Settings > Hardware > Printers.
- Create a new printer station or update the settings on an existing printer station.
- Tap Printer and select your printer. To test your connection, tap Test Print.
- Under Use this printer for, navigate to Online Order Tickets.
- Toggle on Use this printer for online order tickets and select categories you want to print. You can also toggle on Automatically Print New Orders so you don’t miss a new order.
Keep in mind: New order notifications will not push if you have the POS app minimised.
Manage Orders on Square Terminal
Through Square Terminal you are able to manage your orders directly from your hand-held device. You can view and filter your orders by status or type, update order progress and have your orders printed from the Square Terminal’s built-in printer.
Learn more about managing orders on Square Terminal.
Manage Orders on Square for Retail
Once you set up Square Online for your Square for Retail Free or Square for Retail Plus account, you’ll be able to sell online and manage your customer orders directly from your Square for Retail app. Learn how to accept and manage orders directly from the Square for Retail app.
Order Reporting
If you use multiple ordering channels, you can filter your sales reports and transaction details from your online Square Dashboard by Source – gain insights into your most popular ordering platforms and keep your reporting organised with just a couple of clicks.
To view reporting information by source:
Go to Reports in your online Square Dashboard.
In the Display By and Filter By section of your reports, you’ll see the option to Display by Source.
Select the ordering channels you’d like to review.
To view order source from your transactions:
Go to Transactions in your online Square Dashboard.
You’ll see the source filter at the top of the page. Click to select specific sources.
Once you apply the Source filter, you can combine other filters, like Locations, Team Member or timeframe to drill down and customise your reporting view.
Learn more about reporting with Square.
Activity Log

An activity log displays important events that occurred throughout your order’s timeline. You can use this log to understand when and what specific changes to the order took place. The Square Point of Sale app will display a basic view – for a detailed view of Order Details, visit your online Square Dashboard. To do so:
Go to Items & orders > Orders from your online Square Dashboard.
This will open the Orders Overview page. A list of orders from up to 30 days ago will be displayed here. Click on one of these orders to view additional details about the selected order.
From the side panel, scroll down to Activity Log.
Activity Descriptions
The Activity Log displays a time-stamped log of important events that have occurred on the selected order. These events are:
Note: It may take a minute for newly created events to be displayed in the Activity Log.