Set up and manage your online ordering profile
About online ordering profiles
Online ordering profiles offer a branded online presence for food and beverage businesses at no extra cost (processing fees apply), functioning with the ease of a mobile app without the commissions or fees typically associated with marketplace platforms. Online ordering profiles use your menus and menu items to build an online catalog that customers can browse and purchase from. With online ordering profiles, you can:
Quickly set up and personalize your profile, including your menu and branding.
Make your menus available during certain times of the day (think breakfast, lunch, dinner, etc.) to accommodate your menu hours.
Promote your profile by sharing your link or QR code on various platforms such as Google, social media, or even your countertop.
Enable customers to place instant, secure orders using Cash App, credit, or debit, with Cash App users benefiting from one-tap checkout with their saved payment details.
Allow customers to redeem discounts, promo codes, and gift cards during checkout.
Set up and apply taxes and service charges.
Preview your ordering profile on mobile in real time as you make changes.
Manage which menus are available for online ordering and see their status at a glance.
Enable items to automatically inherit your location's fulfillment methods (pickup, delivery) so you don't need to configure fulfillment on each item individually.
Before you begin
You can create and share your online ordering profile and customize your ordering settings from a single page in Square Dashboard, including:
Branding: Logo and brand color
Basic information: Profile name and Cashtag
About: Business description
Pickup and delivery options
Checkout options: Tipping, customer notes, and enhanced payment verification.
Taxes
Service charges
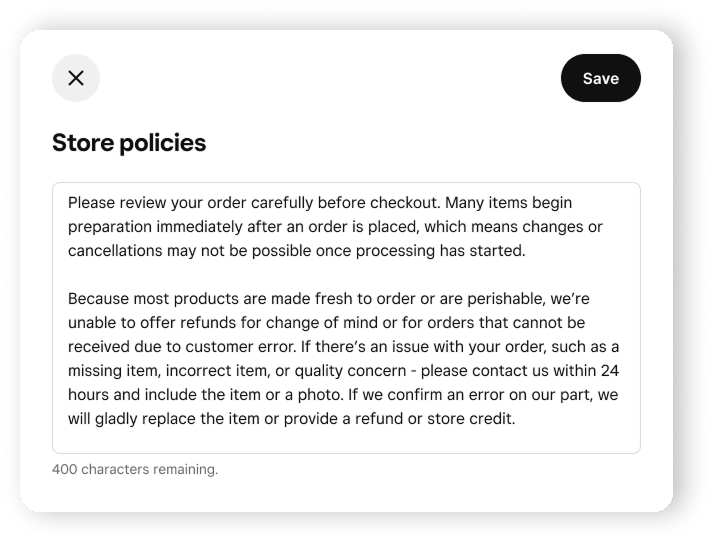
Store policies
Item fulfillment methods (per-item override option)
Online ordering profiles are only available to food & beverage sellers.
Before you create your online ordering profile, you need to create a menu. Learn how to create and update menus.
Step 1: Create your online ordering profile
Sign in to Square Dashboard and go to Online > Ordering profile.
If your location has a valid address, pickup fulfillment will be set up automatically. You can also set up your location and other online fulfillment methods manually by clicking Add/Confirm location.
Preview your online ordering profile by clicking on your link or reviewing the live preview. The persistent mobile preview on the right side of the page shows how your profile looks to customers in real time as you make changes.
Review your menus to confirm they are assigned to your ordering profile and have items available for online ordering.
Once you’re ready to go online, click Enable ordering.
Step 2: Manage online ordering profile settings
Sign in to Square Dashboard and go to Online > Ordering profile.
Set up and customize the following options:
Set your logo and the primary color shown on your ordering profile:
- Under Branding, click Edit.
- Under Add logo, click + to upload your logo.
- Click Save.
- Under Brand color, click + to choose a color.
- Click Save.
Edit your profile name and Cashtag:
- Next to Profile name, click Edit.
- Enter the name you want shown on your profile > Save.
- Next to Cashtag, click Edit.
- Enter the unique business handle you want to show on Cash App and in your ordering profile URL > Save.
Note: Cashtag changes are limited to two updates.
Include a description about your business shown in your ordering profile:
- Under About, click Add or Edit.
- Enter a description of your business and click Save.
- Learn how to set up pickup options for your online ordering profile.
- Learn how to set up delivery options for your online ordering profile.
Set up tipping:
- Turn Order tipping on to set up tipping for orders placed through your ordering profile.
- Click Edit and choose Percentage and dollar tips or Percentage tips only.
- Enter your preferred tip amounts and set the default.
- If you selected Percentage and dollar tips, you can click Edit tip settings to customize how tips are given to your team members. Learn how to set up tip pooling.
- Click Save.
Set up additional checkout options:
- Turn Allow customers to leave notes on/off.
- Turn Enhance payment verification on to require customers to complete an extra security step when payment seems suspicious.
To help protect your business from fraud, payments made with a card linked to Cash App are processed using 3D Secure (3DS). Learn how to use 3D Secure with Square Risk Manager.
Click Edit to manage sales tax for online pickup and delivery orders.
The Apply automatically generated tax rates settings for online delivery and pickup orders are automatically activated. Learn how to create and manage sales tax settings.
Click Edit to manage service charges for online orders. Learn how to apply service charges.
Step 3: Manage item fulfillment methods
By default, items use your location's fulfillment methods (pickup, local delivery, self-serve ordering, shipping). You can verify or change this setting from the item editor.
Sign in to Square Dashboard and go to Items > Library.
Select the item you want to update.
In the item editor, scroll to the Fulfillment section and click Edit or Add next to Online fulfillment methods.
Verify that the Use location default toggle is turned on. When enabled, the item inherits your location's active fulfillment methods automatically.
To override fulfillment for a specific item, turn off Use location default. A checklist appears where you can select individual methods (pickup, local delivery, self-serve ordering, shipping) for that item.
Click Done to save your changes.
Note: The Use location default toggle is on by default for new items. You only need to change it if you want specific items to use different fulfillment methods than your location.
Step 4: View and share your online ordering profile
You can view and share your QR code, Cashtag, and online ordering profile link.
Sign in to Square Dashboard and go to Online > Ordering profile.
-
Click the up arrow icon next to Ordering Profile.
Click and drag your QR code to share it. You can also copy your QR code.
Copy your online ordering profile link to share.
Click Close.
Step 5: Set up your profile with Google (optional)
Syncing your business information with Google allows customers to easily discover and order directly from your ordering profile using Google Search and Maps—all at no extra cost.
By setting up and syncing a Google Business Profile with Square, you can seamlessly manage your Google presence directly from your Square Dashboard. Be sure that you have a physical location as Google requires a physical location to create a Google Business Profile. Online-only businesses that sell virtually are not eligible to sync their virtual locations to Google.
- Sign in to Square Dashboard and go to Online > Channels.
- Under Google, click Connect.
- Choose the Google account to connect with Square and click Get started.
Make sure your Square locations match the location information in Google.
- Sign in to Square Dashboard and go to Online > Channels.
- Under Google, click Manage.
- Click Locations and details.
- Under any locations that need review, click Review. Follow the steps to review and confirm location details.
- If prompted, choose your verification method from SMS, Call, or Email.
- Enter the verification code you receive and click Verify.
You can edit your location details in Square at any time and they will sync with Google.
- Sign in to Square Dashboard and go to Online > Channels.
- Under Google, click Manage.
- Under “Order with Google,” toggle on Online ordering profile.
- Optionally toggle on Set as preferred ordering link on Google. Doing this can help bring you more traffic and avoid high marketplace fees.
- Click Save.
As part of Order with Google, we will send Google your:
- Online ordering profile URL
- Online ordering menus with item pricing
If you decide to connect your Square account to your Google account and sync your Square locations with Google Business Profile, we will send Google any of the following information that you’ve entered in Square:
- Business name
- Business description
- Business address & location coordinates
- Business category
- Business type (mobile or physical)
- Business hours
- Business phone number
- Business website links
- Business logo
You can review, edit, and delete this information ahead of time or while setting up your Google connection. You can also stop sharing data with Google you’ve already shared at any time.
- Sign in to Square Dashboard and go to Online > Channels.
- Under Google, click Manage.
- To stop sharing your online ordering profile URL and menus with Order with Google:
- Under “Order with Google,” toggle off Online ordering profile. This will turn off Order with Google for all of your current and future locations with an online ordering profile.
- To stop sharing business information with Google Business Profile:
- For one location: Click Locations and details and disable sync for that location.
- For all locations: Click Google account, then click Disconnect.
Step 6: Set up discounts, promo codes, and gift cards (optional)
You can allow customers to redeem discounts, promo codes, and gift cards during checkout. Learn how to do the following:
-
To offer automatic discounts on orders placed through your online ordering profile, you must apply the automatic discount to Online from the discount settings. Discounts applied only to Square Point of Sale and other integrations will not be reflected in your online ordering profile.
View or change your Cashtag
Sign in to Square Dashboardand go to Online > Ordering profile > Settings > Basic info.
Locate your Cashtag.
Update your Cashtag if needed.
Turn off or pause online orders
You have two options to pause online ordering:
- Sign in to Square Dashboard and go to Online > Ordering profile.
- Toggle Ordering on to pause or resume online orders.