Set up delivery options for your online ordering profile
About online ordering profile delivery orders
Connect your business with professional courier services through Square’s delivery partners to offer your customers the convenience of placing delivery orders directly through your online ordering profile. Adjust your delivery settings to customize the order experience, making sure it aligns with your business needs for both your staff and customers.
Before you begin
You can customize the following delivery settings for orders placed through your online ordering profile from your Square Dashboard:
Prep time
Lead time
-
Delivery time
Ordering hours
Charge service fee
Minimum order amount
Scheduled downtime
Order timing
Large order limit
Ticket printing
Before you can customize your delivery settings, you need to do the following:
Create an online ordering profile. Learn how to set up and manage your online ordering profile.
Update your menu availability and item visibility to appear on your ordering profile. Learn how to create and update menus.
Set up delivery for your ordering profile
Sign in to Square Dashboard and go to Online > Ordering profile.
-
Scroll to Delivery and go to the location you want to allow delivery from.
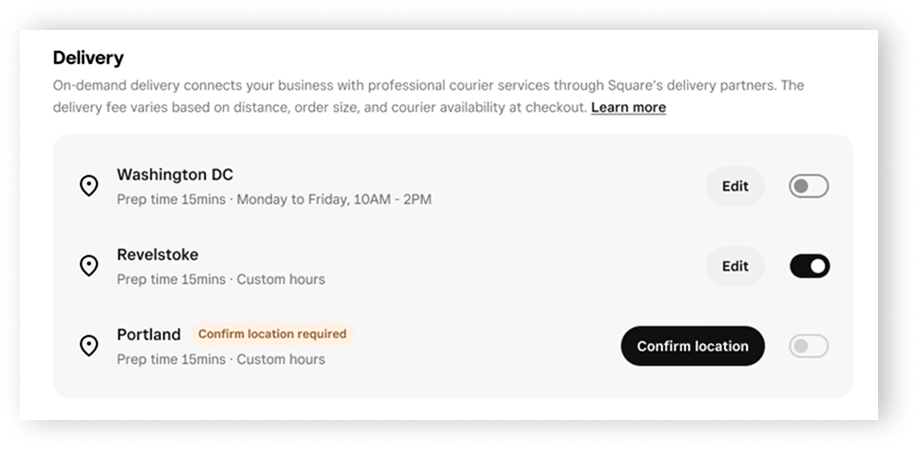
If applicable, click Confirm location.
Turn the switch on to enable delivery.
Click Edit next to the location name.
Set up and customize the following options:

Set the number of days in advance your customers must place delivery orders, if applicable.
- Turn Require orders in advance on.
- Select the drop-down menu and choose the number of calendar days.

Note: If you also allow order scheduling, the lead time cannot exceed the ordering scheduling window.
Set delivery ordering hours:
- Turn Use location hours on to make the delivery ordering hours the same as your location hours.
- Turn Use location hours off to make the delivery ordering hours different from your location hours. Adjusting these location hours will only change the hours for delivery orders placed through your ordering profile.
Charge service fee:
- Turn Charge service fee on.
- Select the drop-down menu to choose a dollar amount or percentage service fee.
- Enter the dollar or percentage number.
This service fee is charged in addition to the delivery fee. You keep the amount charged, minus standard processing fees.
Set minimum order amount:
- Turn Minimum order amount on.
- Enter the minimum dollar amount eligible for delivery.
Select one of the following options:
- Buyer pays entire delivery fee: The customer is charged the full delivery fee at checkout.
- Free delivery over amount: You pay the delivery fee for orders that meet or exceed the threshold you set. Enter the minimum order amount that qualifies for free delivery.
Add dates when delivery ordering will not be available:
- Click Add time and select a date range.
- Click the Repeat drop-down menu and choose Don’t repeat or Repeat yearly.
- Click Save.

After you add a scheduled downtime date, you can do the following:
- Click + Add time to add more scheduled downtime dates.
- Click the pencil icon to edit the created downtime date.
- Click the trash can icon to delete the downtime date.

- Turn Cut off time on to enter a time the order needs to be placed by. Orders placed after the cut off time will be scheduled for the next day.
- Turn Allow order scheduling on to set the number of days ahead customers can schedule delivery orders. Note: The number of days cannot exceed the number of days you set for lead time.
- Turn Limit order per delivery window on to set the number of orders that can be picked up for delivery in a 15-minute window.
- Turn Set an item or price limit for orders on.
- Select Item limit or Price limit.
- Enter the maximum number of items (up to 100) or price in dollars that can be added to an order.
- Notifications will appear for the following when your customers place orders:
- Their cart reaches the limit
- Their cart goes over the limit. They’ll need to remove items in order to checkout.
