Get Started With Tap to Pay on iPhone
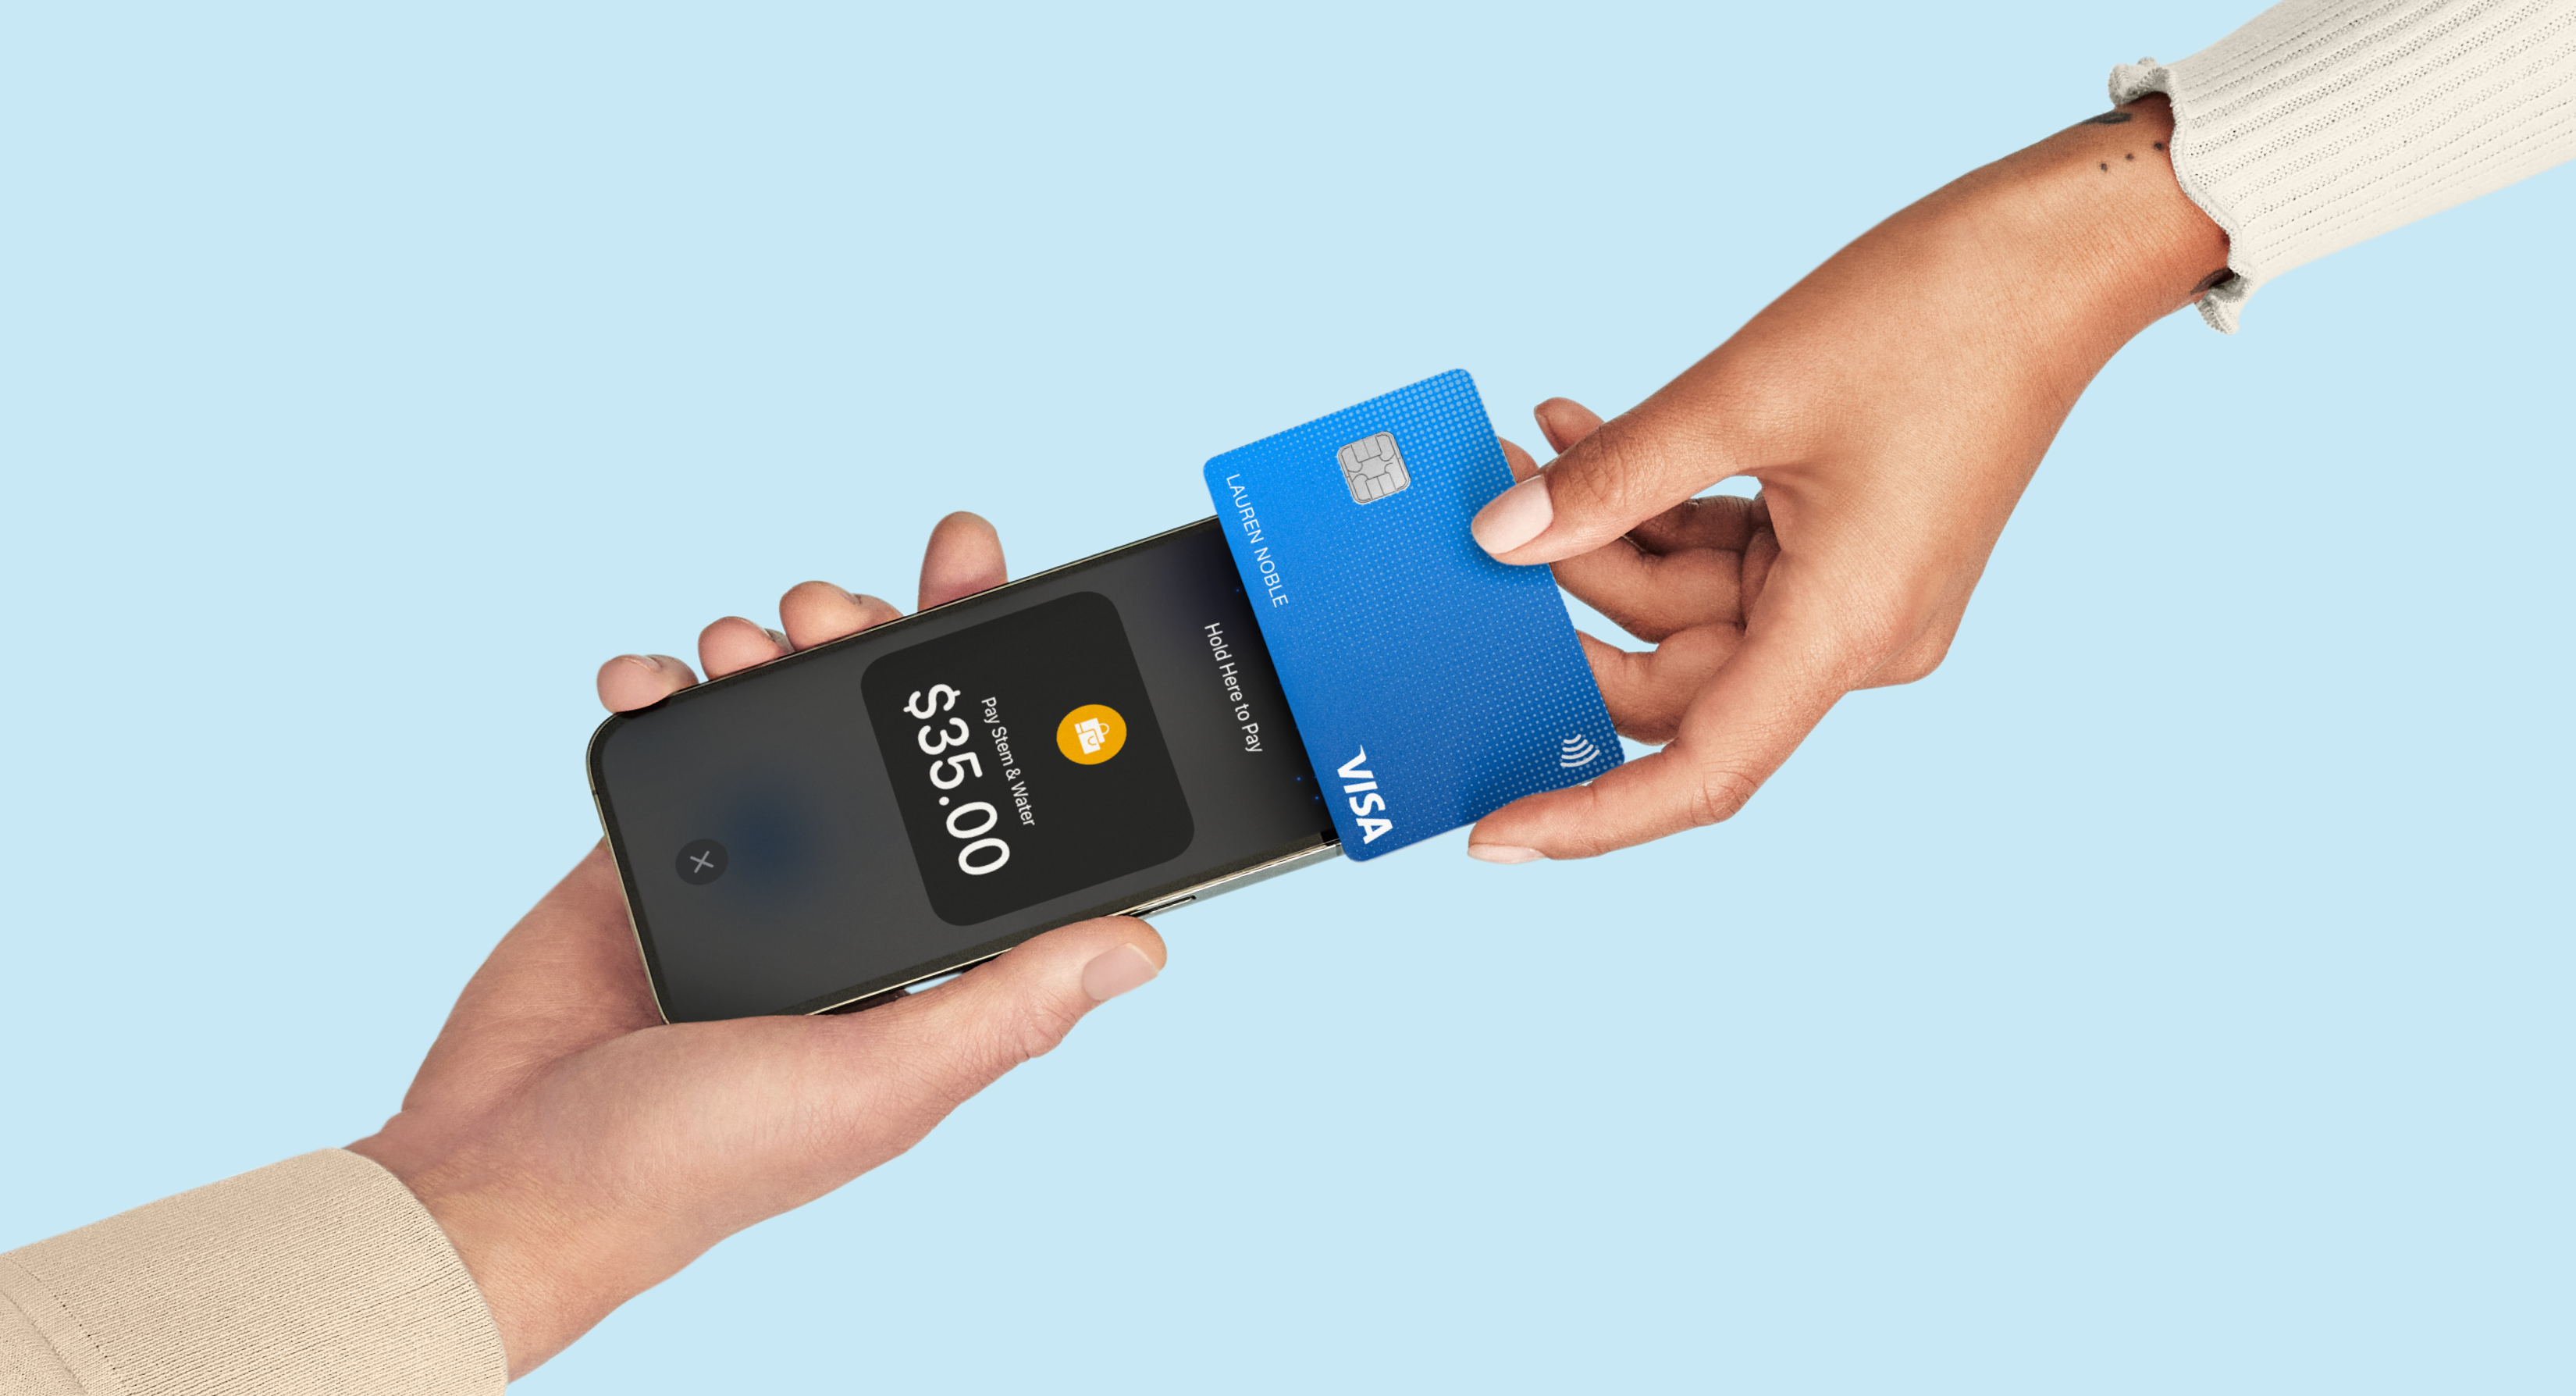
With Tap to Pay on iPhone, you can securely accept contactless payments from Samsung Pay, Apple Pay, Google Pay and NFC-enabled cards on your iPhone without a card reader. Tap to Pay on iPhone is currently available with Square Point of Sale, Square Appointments, Square Invoices and Square for Retail.
Pricing, Compatibility, and Transaction Limits
Square sellers using Tap to Pay on iPhone will pay a per transaction processing fee of 2.6% + 10 cents. This payment method is compatible with all contactless cards and digital wallets such as Apple Pay, Google Pay, and Samsung Pay. Accept any US-issued and most internationally-issued cards bearing a Visa, Mastercard, American Express, Discover, JCB, or UnionPay logo. To know if a card is contactless, look for the wave-like symbol.

Note: Please make sure your Square Point of Sale App is updated to the latest version. You will need an iPhone XS or newer and the phone must be running iOS 15.5 or later to use Tap to Pay on iPhone. Tap to Pay on iPhone is not currently available on iPad.
Tap to Pay on iPhone has a per-transaction limit for contactless payments (like Apple Pay, Google Pay, or Samsung Pay) of $50,000 and a per-transaction limit for plastic cards of $10,000.
iPhone Settings for Tap to Pay
To prepare your iPhone to use Tap to Pay:
Make sure your iPhone is running iOS 15.5 or higher. To check if your software is up to date, go to Settings > General > Software Update.
If you haven’t already, set a passcode for your iPhone by going to Settings > Face ID & Passcode. Tap to Pay on iPhone requires a device passcode.
If you are not already signed in on your iPhone, go to Settings > Sign in to your iPhone. If you are already signed in, you will see your name at the top of the Settings screen.
Enable Tap to Pay on iPhone
You can enable Tap to Pay on iPhone at any time through the Square POS app.
From the navigation bar at the bottom of your screen, tap ≡ More.
Tap Settings > Account.
Select Tap to Pay on iPhone > toggle on Tap to Pay on iPhone.
Verify the correct Apple ID is shown. If not, choose Use a Different Apple ID.
Select Agree & Continue to toggle on Tap to Pay on iPhone.
You can disable Tap to Pay any time by toggling off Tap to Pay on iPhone.
Note: You will not be able to use Tap to Pay on iPhone if you log in to your Square Point of Sale or Square Appointments app using a Device Code. Tap to Pay on iPhone is available with Square for Retail if you use a Device Code to log in.
Once the Account Owner enables Tap to Pay on iPhone, all Team Members under the same account with an eligible device will automatically be able to use Tap to Pay on iPhone. They will also have access to tutorials on how to use the feature within the app.
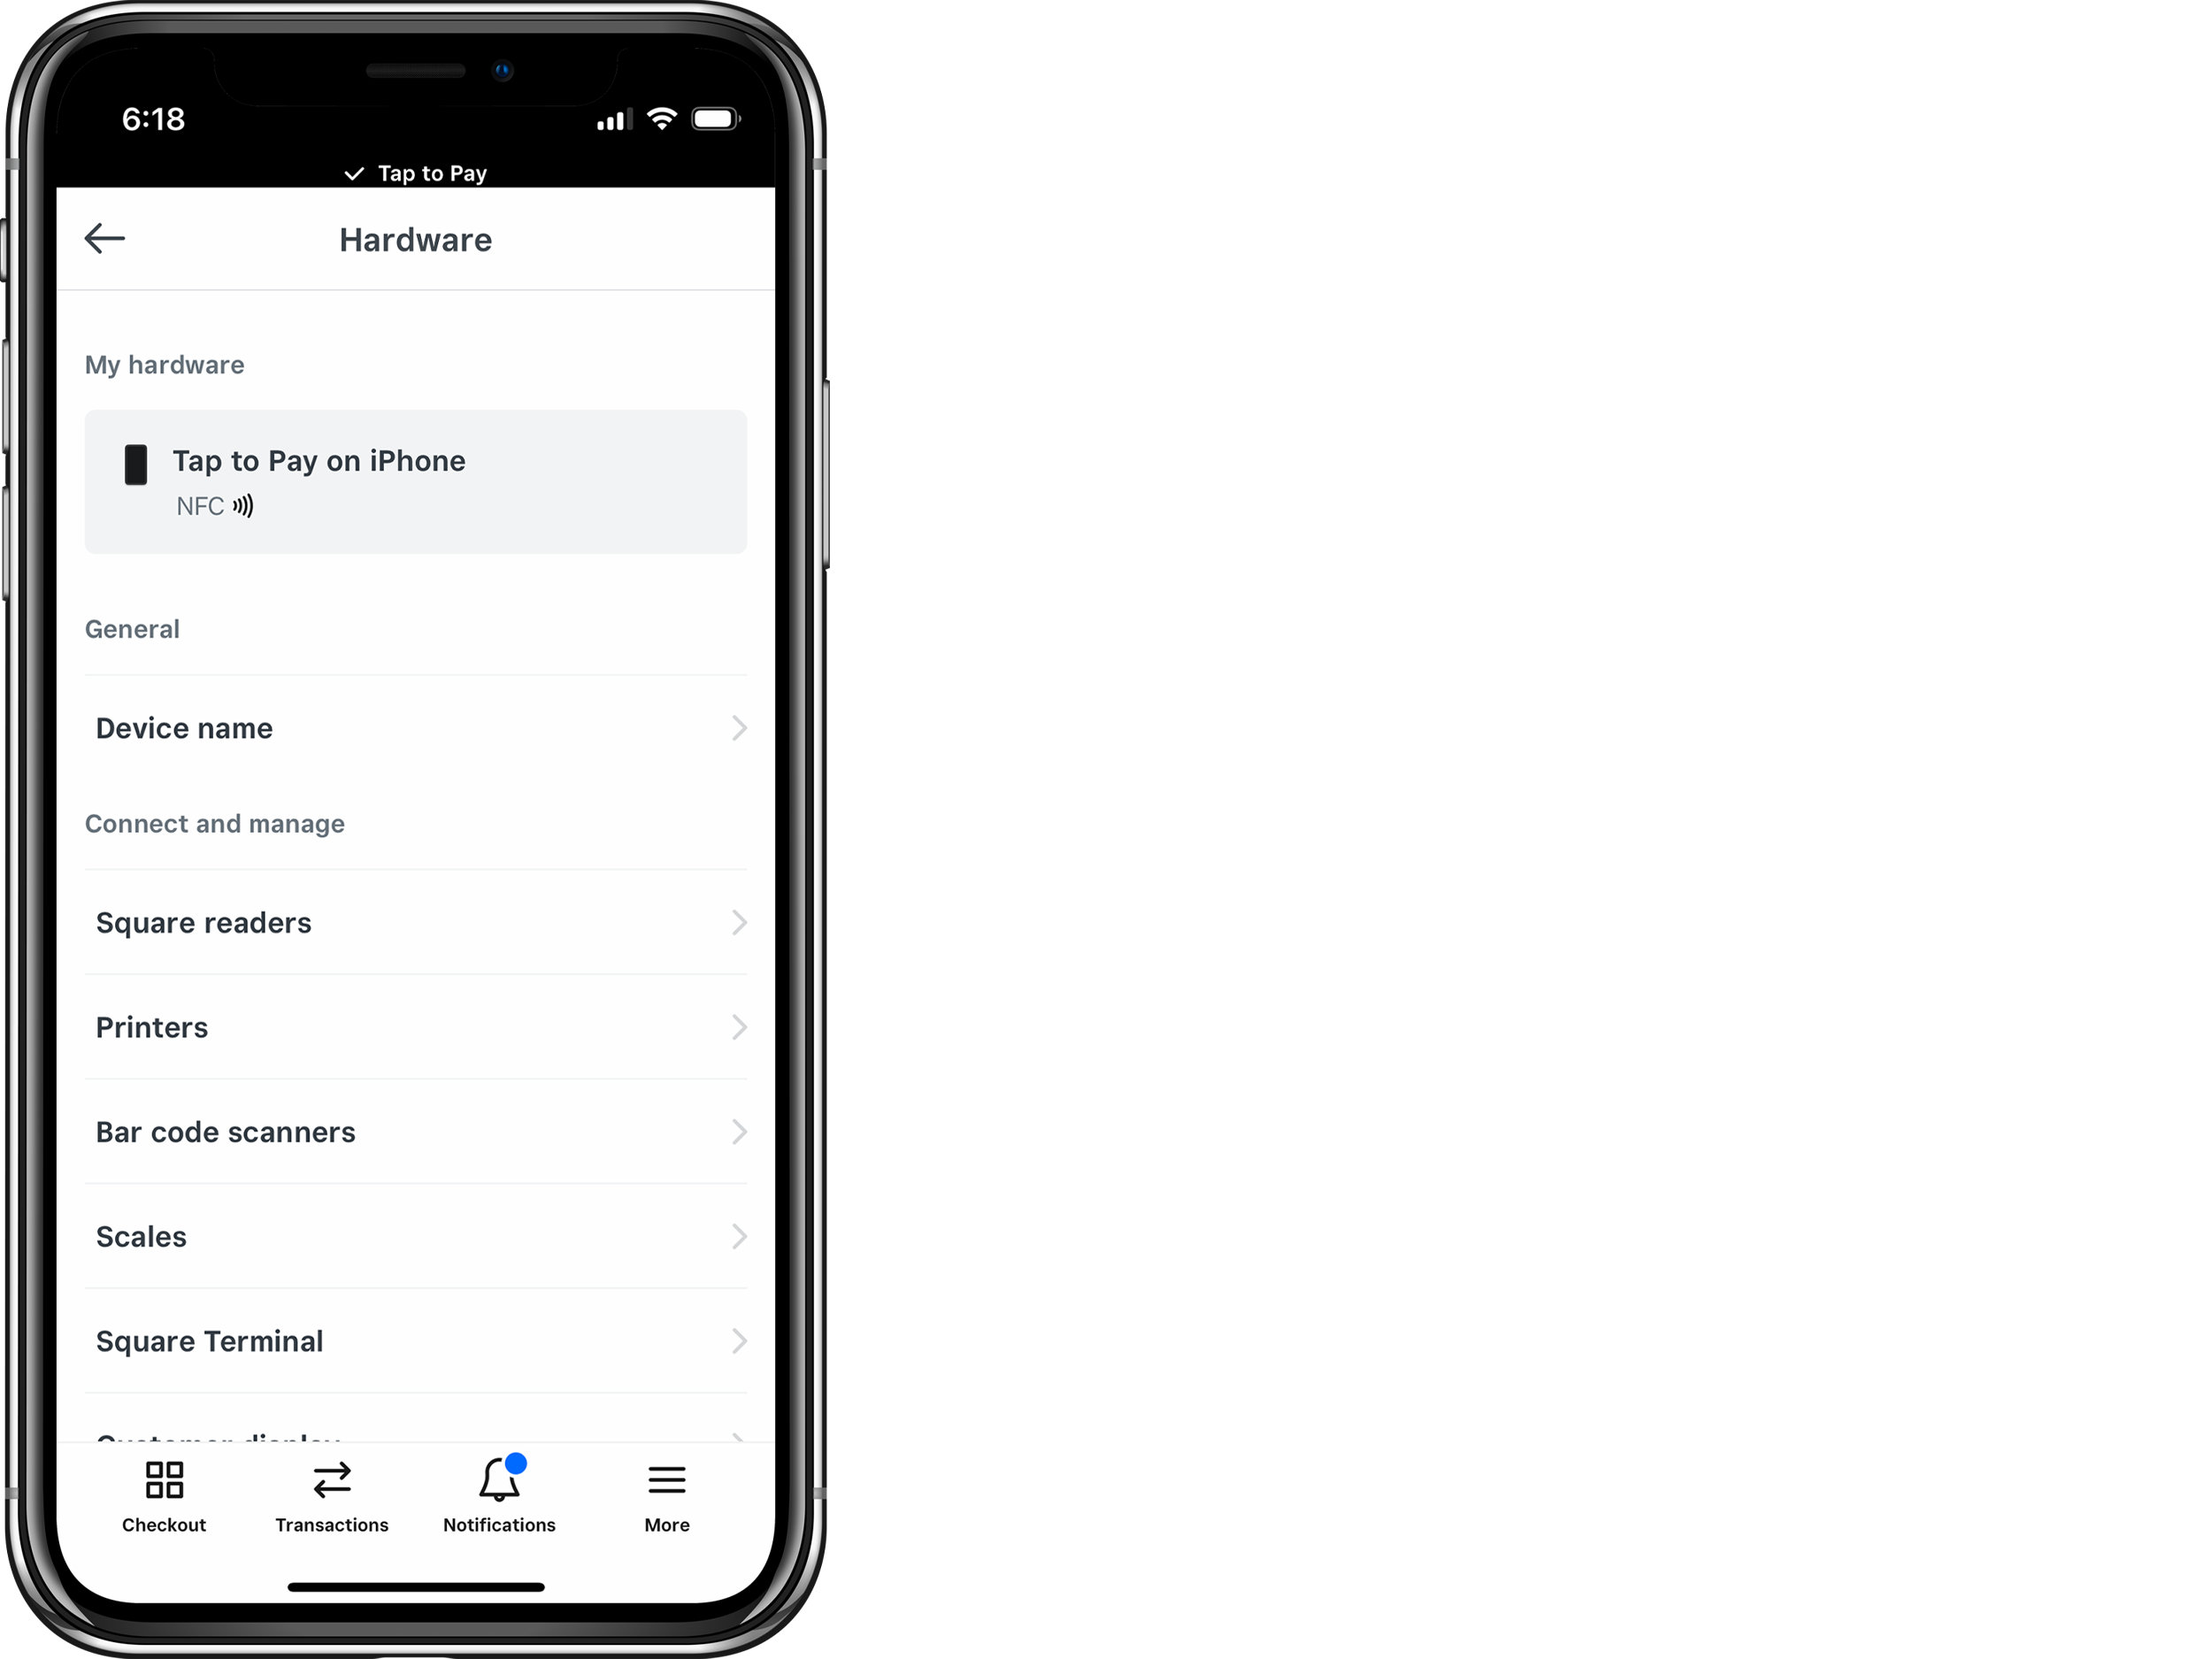
Once you enable Tap to Pay, the banner at the top of the screen will read “Tap to Pay on iPhone,” and you will see Tap to Pay listed under My hardware by going to ≡ More > Settings > Hardware.
Accept Payments
Find answers to commonly asked questions about Tap to Pay on iPhone via our FAQ.
- Go to Checkout and add items from your Library or use the Keypad to enter a custom amount.
- Tap Review Sale > Charge.
- Select Tap to Pay on iPhone and position your phone close to your customer. Have them either hold their card horizontally over the contactless symbol or hold any NFC-type devices (like Apple Pay, Google Pay, Apple Watch, etc.) to the front of the phone.
- If the payment times out before it’s processed, tap Try Again.
- Once the payment is complete, have your customer choose their desired receipt method.
Note: If the Invoice is already created, start from step #5.
- Navigate to Invoices and tap the + option to start creating an Invoice.
- Add customers and items to your Invoice.
- Tap Preview and send > Send Invoice.
- Tap X on the confirmation screen.
- Tap the created Invoice from the Invoices tab.
- Tap Add payment > choose the amount > Next.
- Choose Tap to Pay.
- Follow the on-screen prompts to complete the payment.