Set up Square Reader
About Square Reader
Square Reader lets you accept chip and PIN, contactless (NFC) cards, Apple Pay and Google Pay anywhere. Connect Square Reader wirelessly via Bluetooth to a compatible device to accept payments quickly.
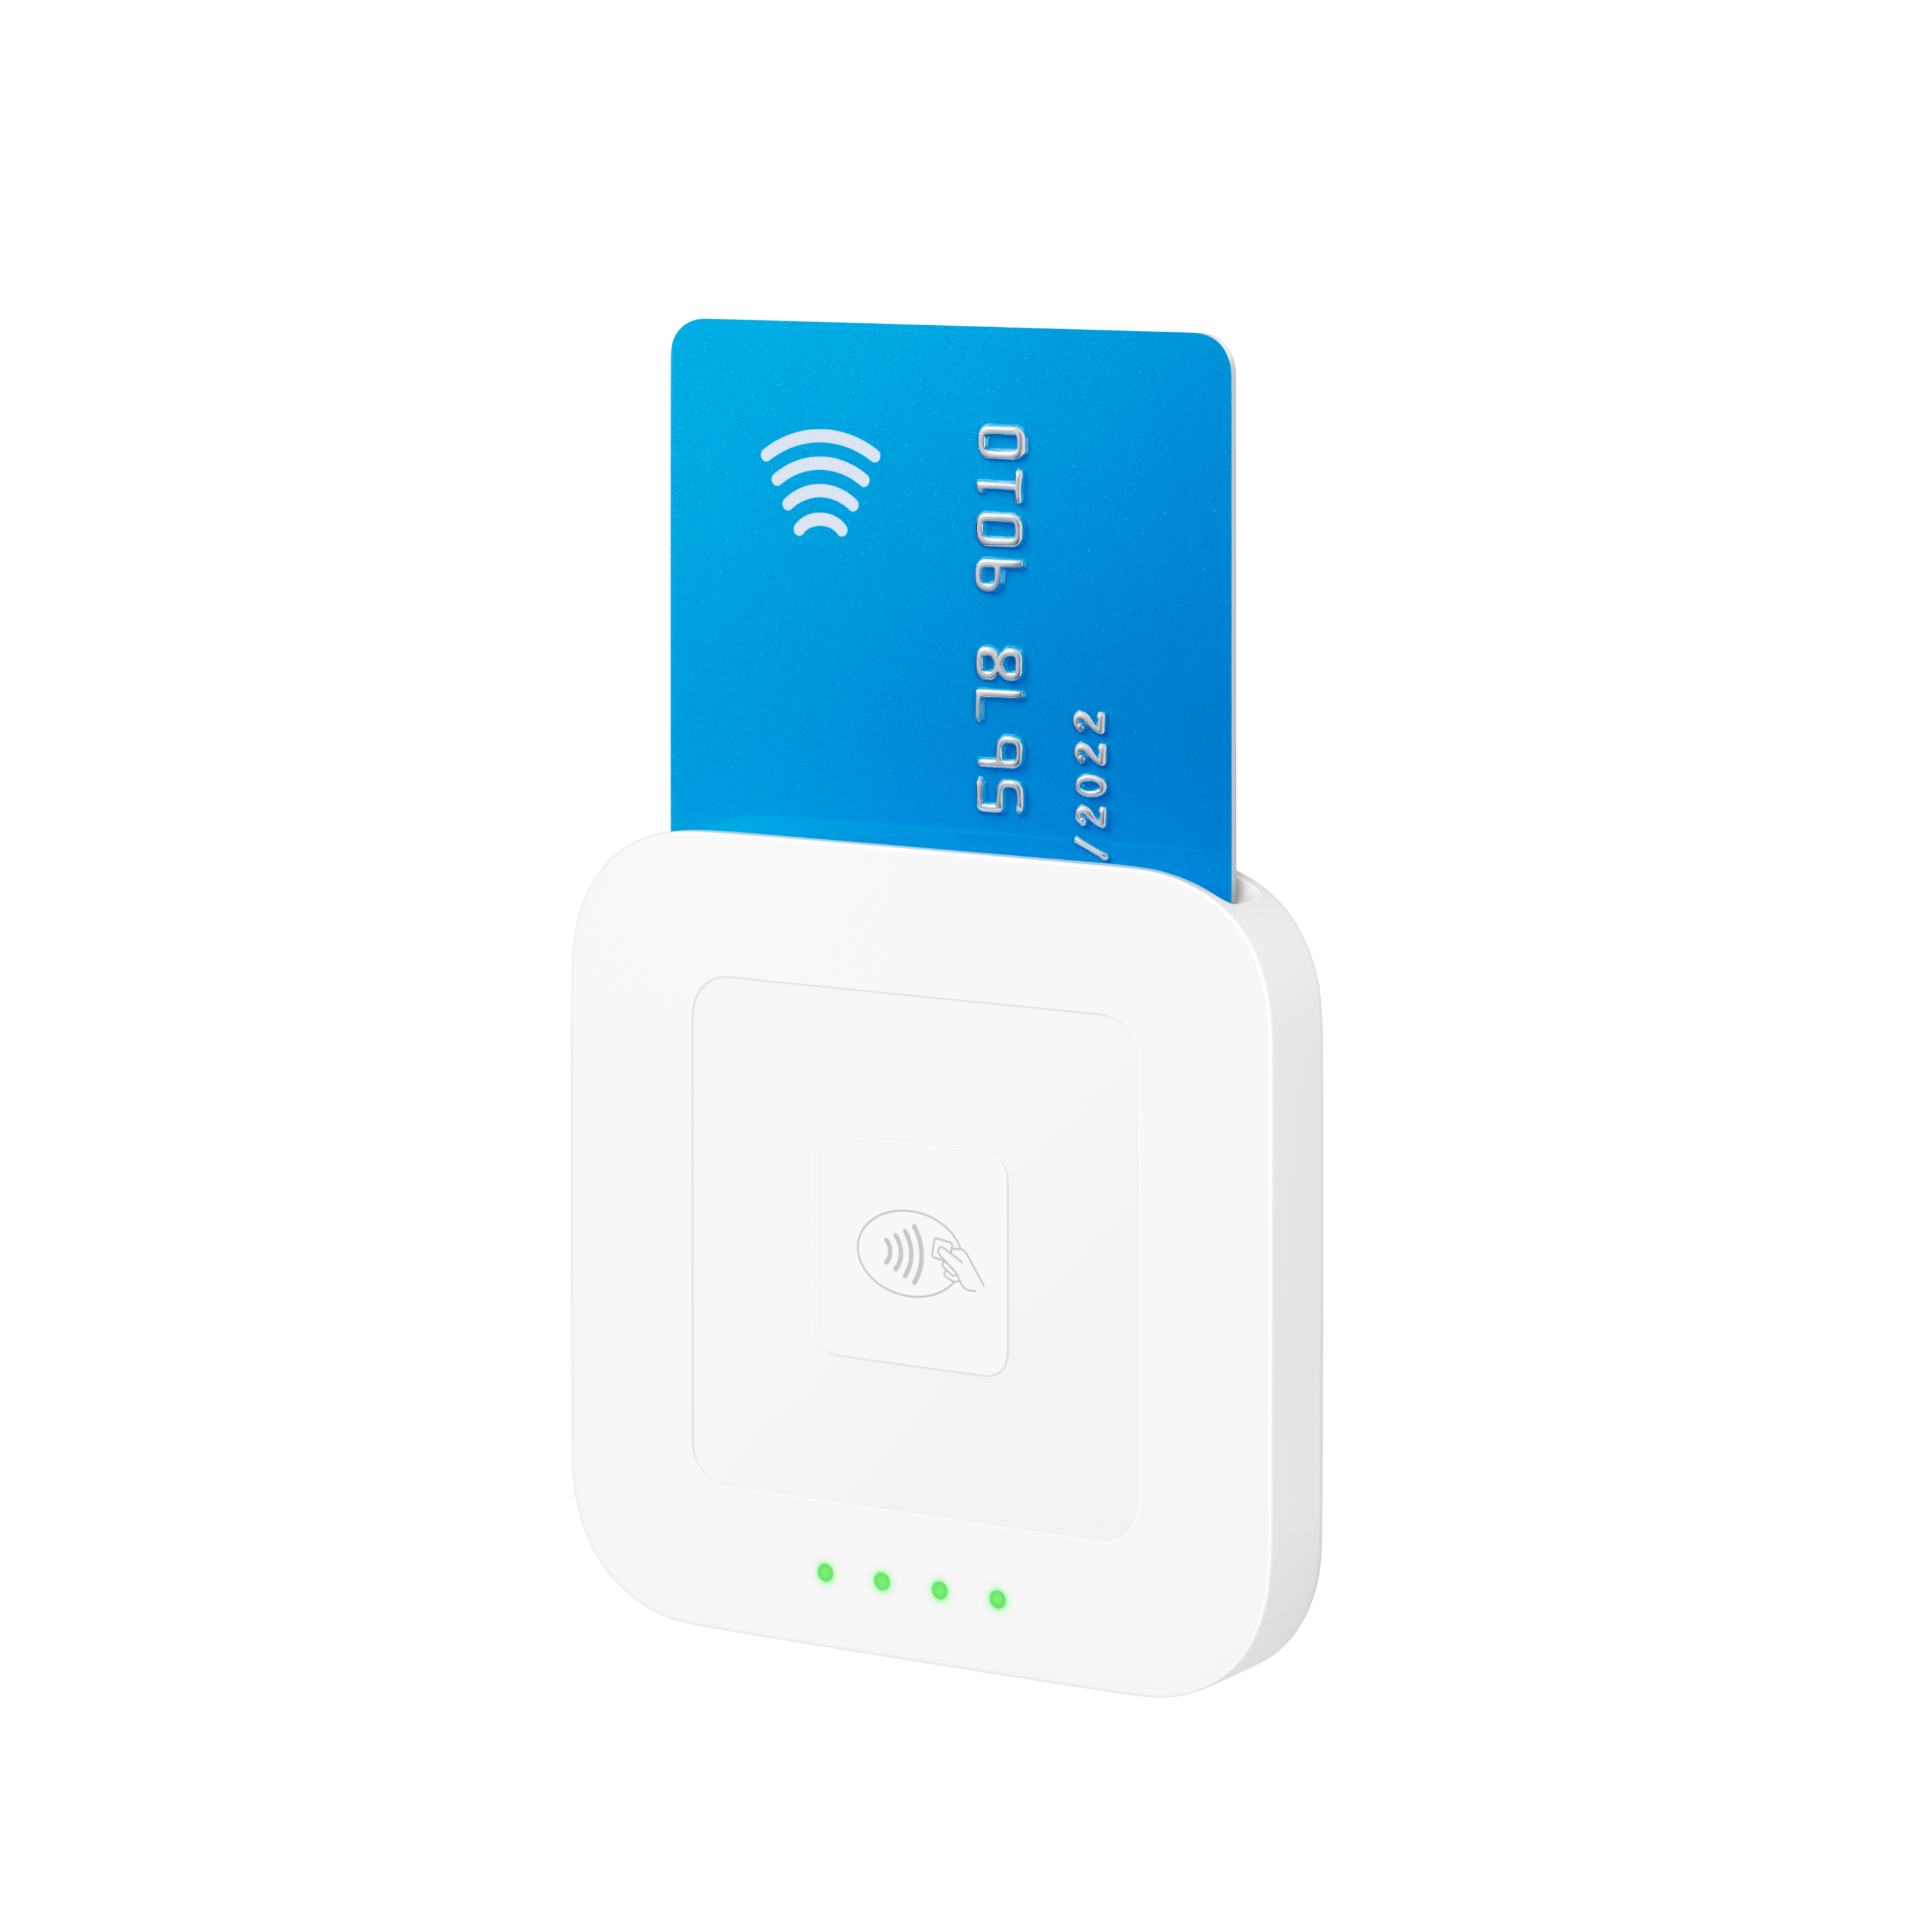
Square Reader is portable, but can be docked for countertop use.
Before you begin
There are two generations of Square Reader:
Square Reader (1st generation)
Square Reader (2nd generation)
Square Reader (1st generation) is no longer being manufactured or sold by Square. However, we will continue to provide updates and troubleshooting support for this Square Reader.
Square Reader (2nd generation, v1 and 1st generation, v3) can also connect to Android devices (phone or tablet) through a wired connection. Note: Wired connection to iOS devices is not supported, unless connected to Square Stand (1st or 2nd generation).
To set up and use your Square Reader (1st or 2nd generation), you need the following:
Compatible mobile device with Bluetooth connectivity. To check if your device is compatible, go to our device compatibility page.
Square POS app updated to the latest version
Power source to charge Square Reader
Secure internet connection
Learn more about Square Reader (2nd generation) technical specifications, like what’s in the box, dimensions, connectivity and more.
Step 1: identify your Square Reader generation and version
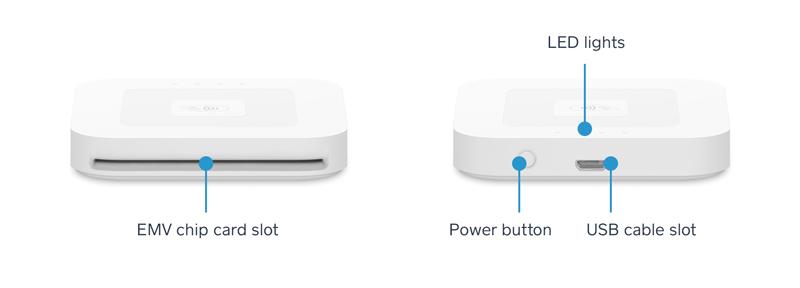
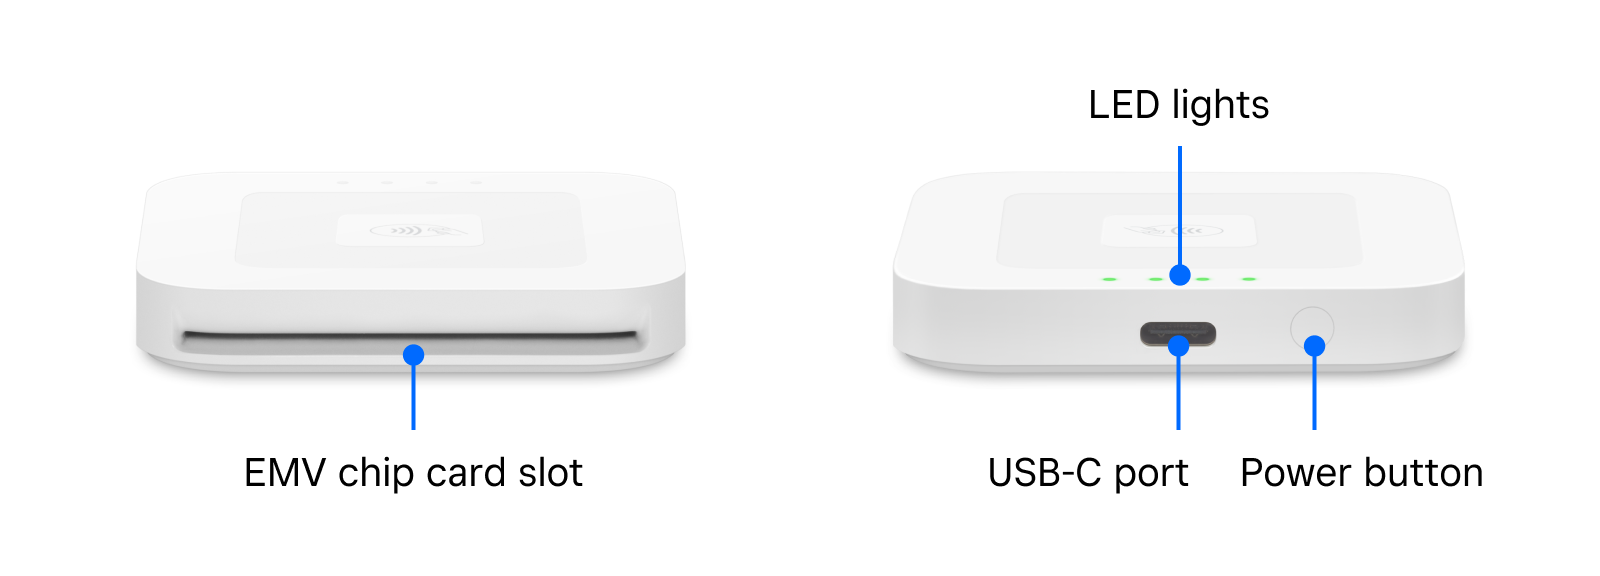
Step 2: check the battery level and charge your Square Reader
For an accurate battery reading, unplug your reader from any power source.
-
Firmly press the button on the reader and observe the lights.
Four green lights: battery is 100% charged
Three green lights: battery is 75% charged
Two green lights: battery is 50% charged
One solid red light: battery is 25% charged
One blinking red light: battery is low – charge immediately.
Connect one end of the accompanying USB cable (Micro USB or USB-C) to your reader and the other end to a USB port like a mobile phone charger, computer or car charger.
It takes about two hours for a reader with a low battery to charge completely.
Step 3: Connect and update your Square Reader
To establish a Bluetooth connection, your Square Reader must be within 3 metres of your mobile device. You also need to make sure your Square Point of Sale app is updated to the latest version, Square Reader pairs to Square through the Point of Sale app.
- Press and release the button on your reader to turn it on.
- Open the Settings app on your device and toggle Bluetooth ON.
- Open your Point of Sale app and tap ≡ More > Settings > Hardware > Square Readers.
- Tap Connect a Reader.
- Put your reader into pairing mode by pressing the reader’s button for three to five seconds. Remove your finger as soon as you see orange flashing lights. If you see red flashing lights, you’ve held the button too long and you’ll need to try again.
- Four orange lights flashing: reader is in pairing mode.
- Four green lights: reader has successfully paired.
- Four red lights: Reader failed to pair.
- Tap Pair on the notification from your Point of Sale app to complete the pairing process.
- Note: due to extended security measures, some Android devices will require multiple confirmations during the pairing process.
- On Android devices, quickly tap Pair and Pair & connect each time you are prompted until the connection is successful. If the connection fails, start the pairing process over and make sure you accept all Pair and Pair & connect prompts within 5 seconds.
- When your reader is successfully connected, you will see it listed as Ready in your Point of Sale app.
Any necessary firmware updates will be automatically installed once the reader has been connected. The wireless connection can be lost if the reader and device are more than three metres apart.
To connect Square Reader to an Android device using a wired connection, you need to use a USB adapter that fits your mobile device, like this: 
You also need to make sure your Point of Sale app and your Android device are updated to the latest software version.
- Using the cable provided with your Square Reader, plug the USB-C end of the cable into your Square Reader’s USB-C port, and the other end into the USB adapter.
- Plug the other end of your adapter into your mobile device.
- If your Square Reader was connected to your device via Bluetooth, a notification will appear saying ‘Reader disconnected from Bluetooth’.
- A ‘Reader connected via USB’ notification will appear to indicate that the wired connection was successful.
Make sure you check your Square Reader and Android device for the correct cable type. Learn how to identify your Square hardware.
Step 4: use low power state
Square Reader will go into a low power state if it hasn’t taken a payment for a while and will remain connected to your device for a period of time, depending on which generation you use.
This Square Reader will go into a low power state if it hasn’t taken a payment for a while, and will remain connected to your device for up to eight hours.
Any interaction with the reader through the Square POS app will wake it up from this low power state as long as the reader is within 10 ft of the device.
The reader will power off completely after eight hours of inactivity. After this point, you will need to press the button on the reader to reconnect.
Stay Connected is a feature built into this Square Reader. This feature aims to maintain connectivity, improve reliability, help save battery and eliminate the need to press the power button to re-pair the reader after a period of inactivity.
Note: Stay Connected only works if the Square Reader(s) have been paired to the device already. If the reader has never been paired to the device, you’ll need to go through the initial pairing process.
This Square Reader will go into a low power state if it hasn’t taken a payment for a while, and will remain connected to your device for up to 30 days.
Any interaction with the reader through the previously paired Square POS app will wake it up as long as the reader is within 10 ft of the device.
The reader will power off completely after 30 days of inactivity. After this point, you will need to press the button on the reader to reconnect.
Step 5: Select accessories for your Square Reader (optional)
You can view printers, cash drawers, barcode scanners, scales and more accessories that are compatible with your Square Reader.
Click an accessory option. If applicable, select Filter > Compatibility > Reader-iOS or Reader-android > Apply.
Under Compatible with, click the # products drop-down menu to view compatible Square hardware.