Set Up Square Register
What’s In The Box
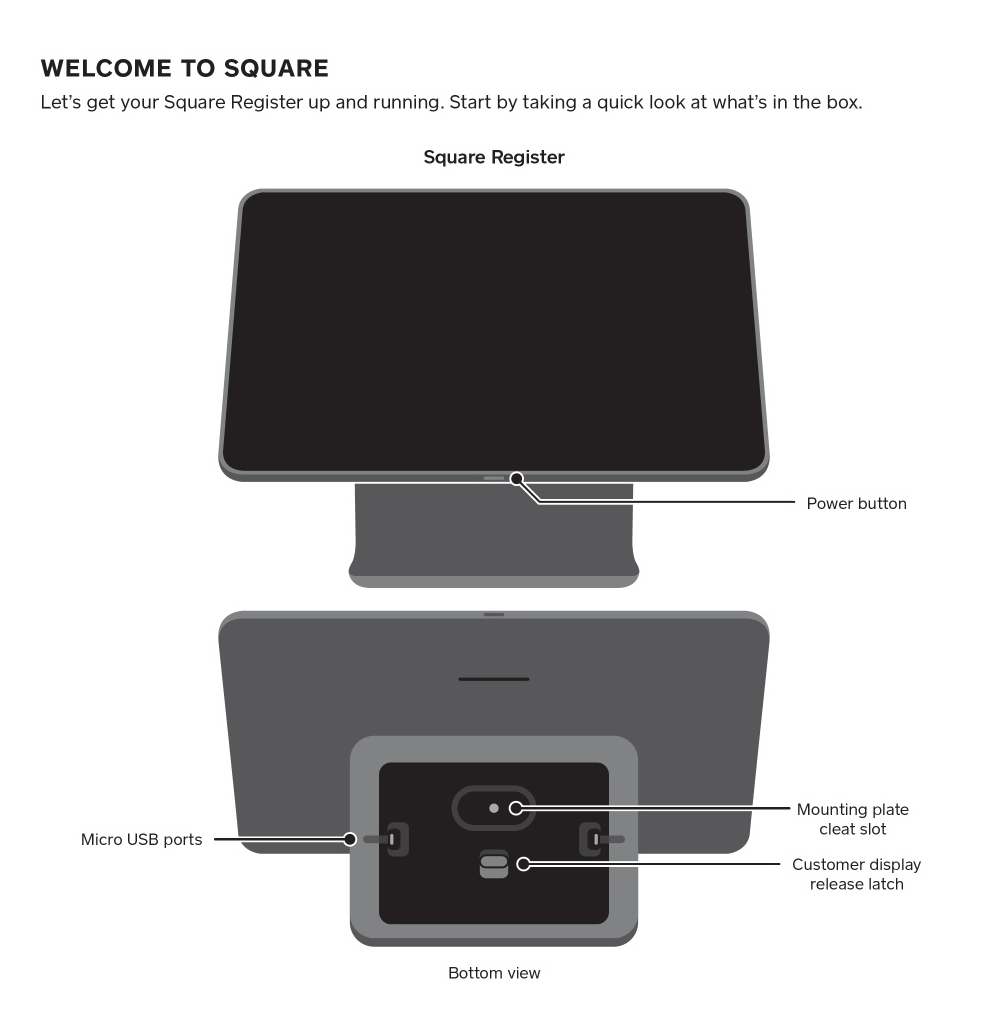
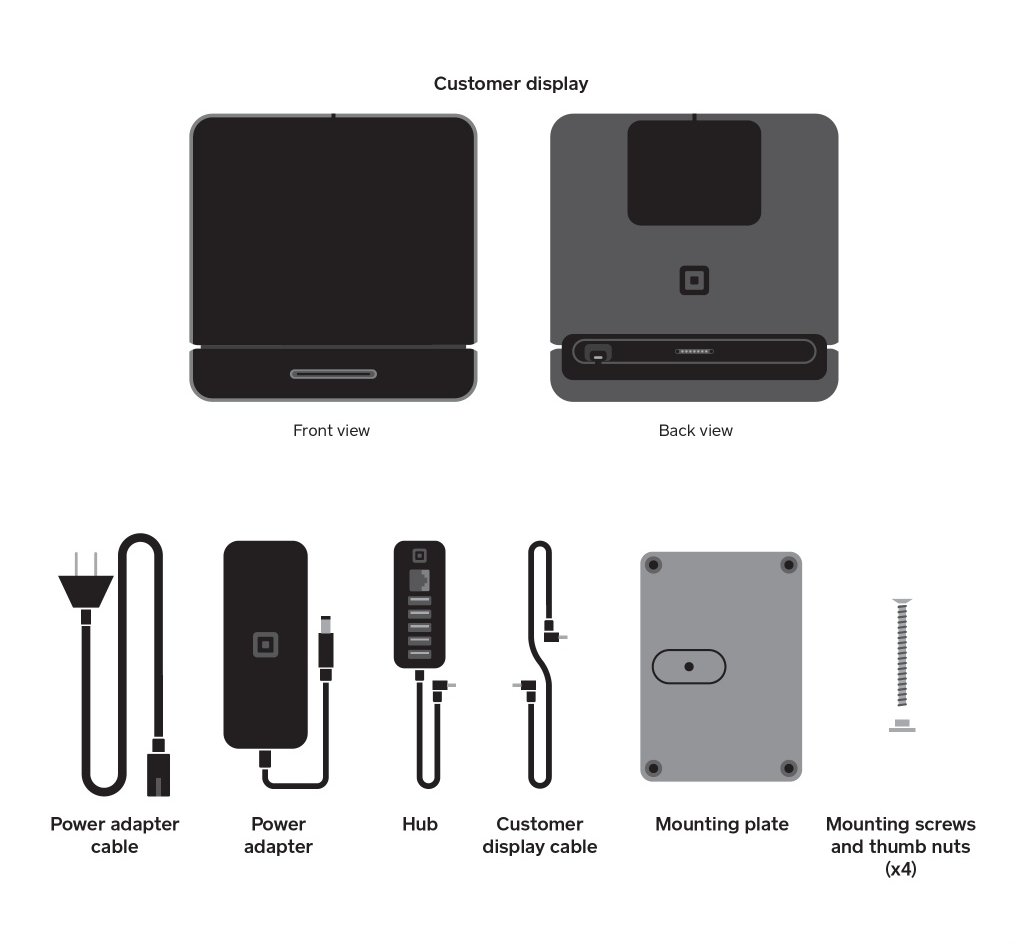
Let’s get your Square Register up and running. Start by taking a quick look at what’s in the box.
Get Connected
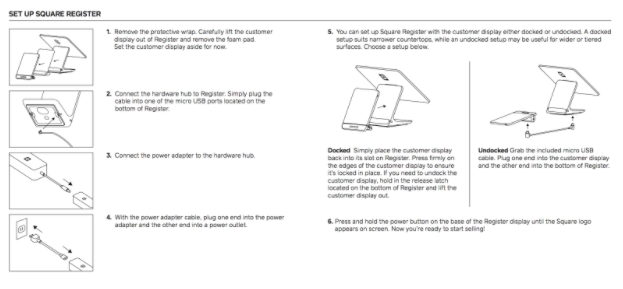
1. Remove the protective wrap.
Carefully lift the customer display out of Register and remove the foam pad. Place the customer display aside for now – make sure you lay it down flat.
2. Connect the hardware hub to Register.
Simply plug the cable into one of the micro USB ports located on the bottom of Register.
3. Connect the power adapter to the hub.
4. Plug it in.
Using the power adapter cable, plug one end into the power adapter and the other end into a power outlet.
Set Up Your Counter
Choose a setup. There are two ways to set up the customer display.
Docked
Simply place the customer display back into its slot on Register. Press firmly on the bottom edges of the customer display until you hear it click to ensure it’s locked in place. Double-check each side of the display, both sides need to be snapped in evenly for the customer display to function in the docked position. If you need to undock the customer display, press and hold the release latch located on the bottom of Register and lift the customer display out. Be sure that the latch is completely released before removing the display as it can’t be removed without the latch release.
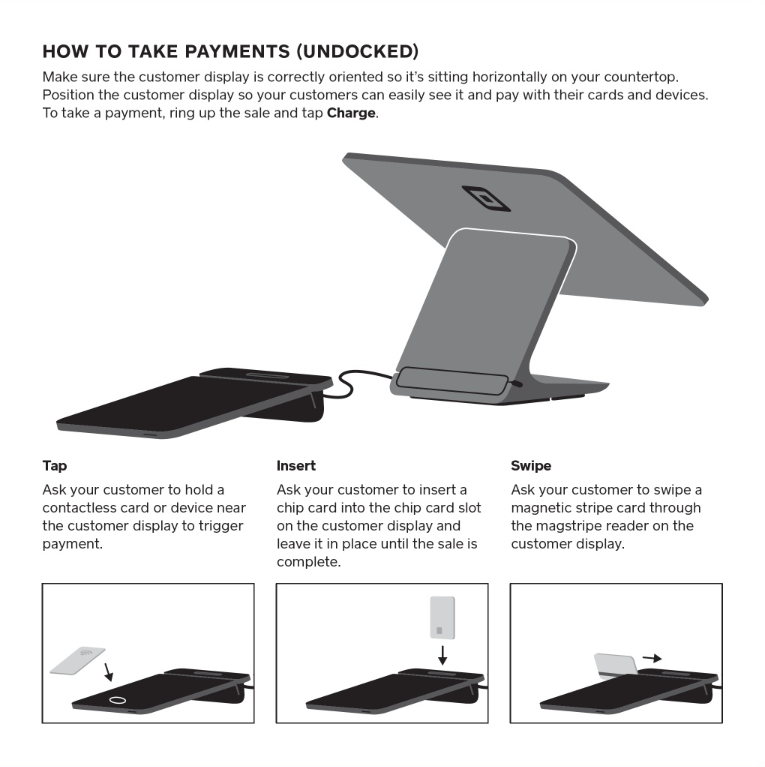
Undocked
Grab the included micro USB cable. Plug one end into the customer display and the other end into the bottom of Register.
Mount Square Register
Choose a mounting setup. There are two ways to mount Register to your counter.
Adhesive
1. Pick a spot to mount.
Using a damp cloth, clean the area where you want to secure Register. Wait for the surface to dry completely.
2. Prepare the adhesive.
Grab the mounting plate. Remove the paper backing from the adhesive located on the underside of the plate.
3. Position it properly.
Make sure the raised cleat of the mounting plate is on your side of the counter, not the customer’s side. Adhere the plate to your counter in the desired position and press down firmly for 30 seconds. Wait 30 minutes for the adhesive to set. If you need to remove the plate, slowly pull the tabs on the adhesive strips until it releases.
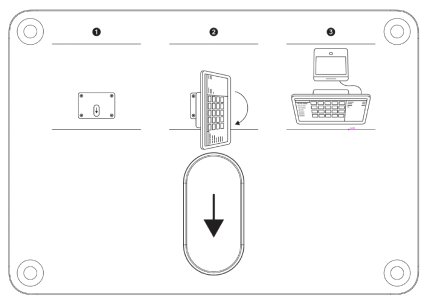
4. Twist and lock.
Place Register onto the mounting plate with the larger screen facing right. Make sure the cleat is positioned in its slot. Turn Register 90 degrees clockwise so it locks in place.
Screw-mount
1. Pick a spot to mount.
Grab the mounting plate. Pick a spot on your counter for Register, position the plate and use a pencil to mark the four screw holes on your counter. Make sure the raised cleat is on your side of the counter, not the customer’s side. Note: Maximum counter thickness is 45 mm.
2. Drill holes into your counter carefully.
You’ll need a drill and the included tools: drill bit, thumbscrew and thumb nut. Use the drill and drill bit to make the four holes you’ve marked for the plate.
3. Position it properly.
Position the mounting plate onto the holes you’ve drilled, then insert a thumbscrew into each hole. From the underside of your counter, place a thumb nut onto each thumbscrew and tighten until the thumb nut is flush against your counter.
4. Twist and lock.
Place Register onto the mounting plate with the larger screen facing right. Make sure the cleat is positioned in its slot. Turn Register 90 degrees clockwise so it locks in place.
Keep in mind that you should not attach the mounting plate to the Square Register before attaching it to the plate on your countertop, you won’t be able to remove the plate from Register.
Power Up
Press and hold the power button on the base of the Register display until the Square logo appears on the screen. Now Square Register is ready to go! Please note that Square Register needs to be plugged into a power outlet to function. It’s not battery powered.
Connect to Your Network
When you turn on Square Register for the first time, you’ll be asked to complete some setup steps. Please follow the instructions to set up your time, time zone, language and Wi-Fi or Ethernet.
Creating Your Account and Signing In
If you already have an existing Square Point of Sale account, simply sign in to your account using either your email address or by creating a new device code in Dashboard. If not, you can create an account on your computer, on Square Register or scan the QR code with a separate device for the following services:
When you create your account, you’ll be able to create items, set up taxes, enable your team members and more.
After you sign in, you can access the Square Point of Sale Setup Guide on your Square Register. The setup guide will walk you through setting up a bank account for transfers, creating items, ordering additional hardware and more.
To access the Square Point of Sale Setup Guide on Square Register:
Tap ≡ More in the bottom navigation bar.
Tap Support > Setup Guide.
Update Square Register Software
After you connect Square Register via Wi-Fi or Ethernet and sign in to your account, you’ll be prompted to choose a software update option: Update Now or Update Later. The initial software update takes around 20 minutes to complete, but may take up to one hour in the future.
Tap Update Now to start the software update immediately. You won’t be able to accept card payments during a software update, but you can record cash payments and navigate within the app.
Tap Update Later to defer the software update. The software update will start automatically overnight as long as Square Register is turned on and plugged in.
Note: Software updates for Square Register will complete first, followed by software updates for the customer display.
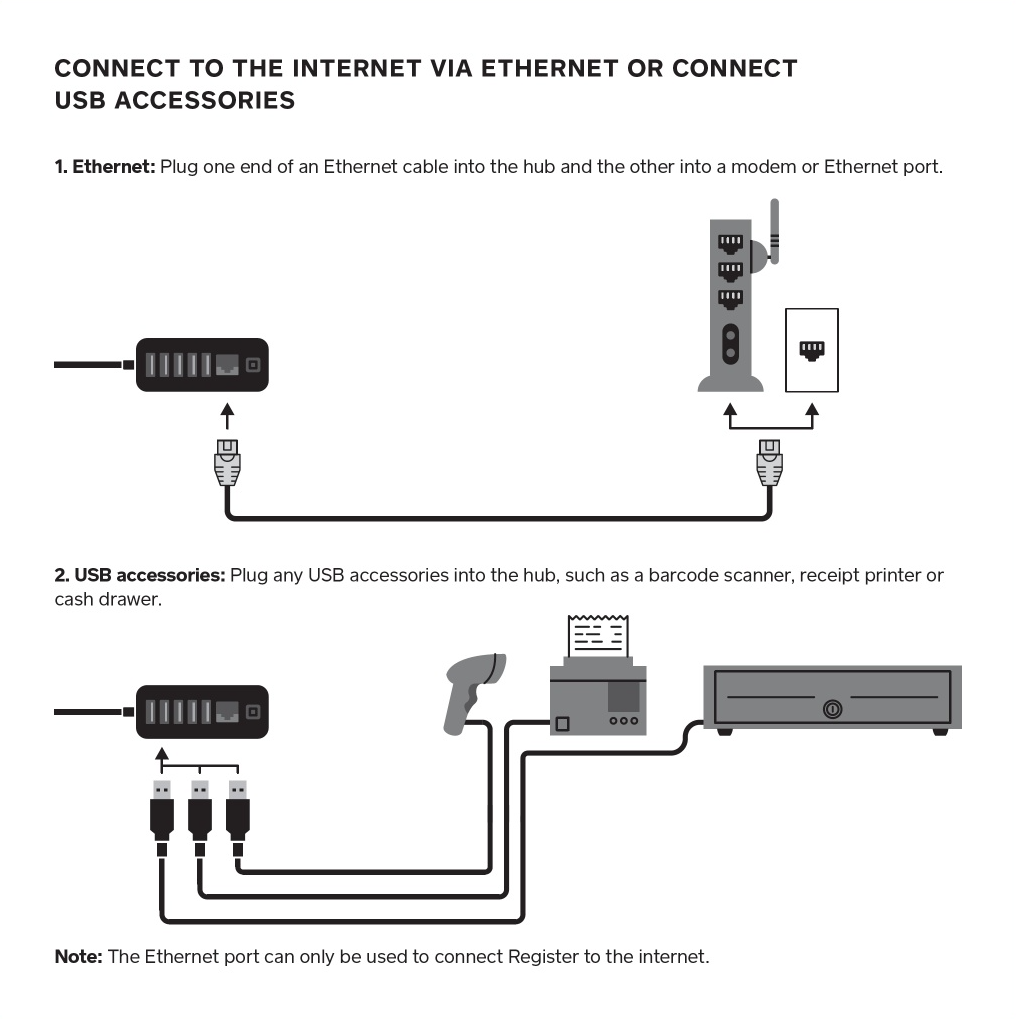
Connect Recommended Hardware
Square Register makes it easy to connect compatible cash drawers, receipt printers and barcode scanners. Learn more on how to connect recommended hardware to Square Register.
Help and Support
Also, find answers to frequently asked questions and review the Square Register troubleshooting guide to find the answers to common issues. Need help? Contact our Support Team if you have any trouble setting up your new Square Register.