Working With Columns
Arranging your content in columns is a quick way to give your pages a well-organized look, and it’s as simple as dragging things where you want them to be.

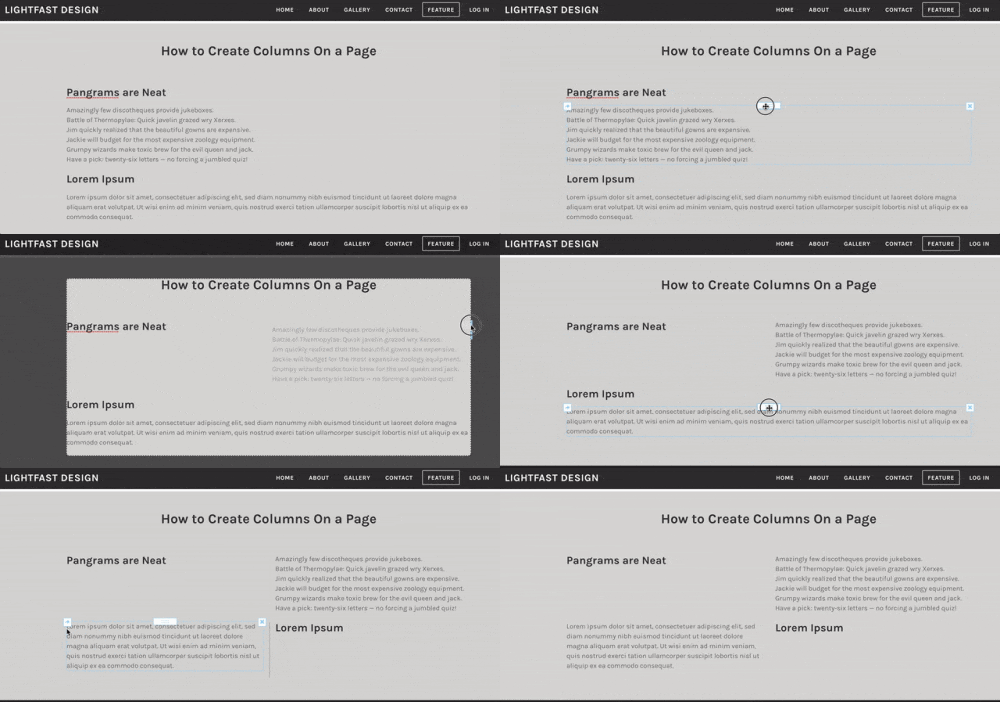
When you mouse over an element, you’ll notice a blue border around the outside along with some buttons at the top. The border represents the boundaries of the element, and the buttons allow you to perform various actions. The center button is what you’ll use to drag the element to a new spot on the page.

Click and hold on the white rectangular button at the top of the element and then drag it to the new position. A vertical line will show up next to different elements as you drag near them to illustrate where the element will land when you release it. Once you’ve dragged it to the right spot, simply unclick to release it and drop it into place. If this sounds tricky, take a look at the animation above to get a better sense of how it works.

You can position several items next to each other across the page, but keep in mind that the columns will get narrower as you add more in order to fit on the page in a single row.
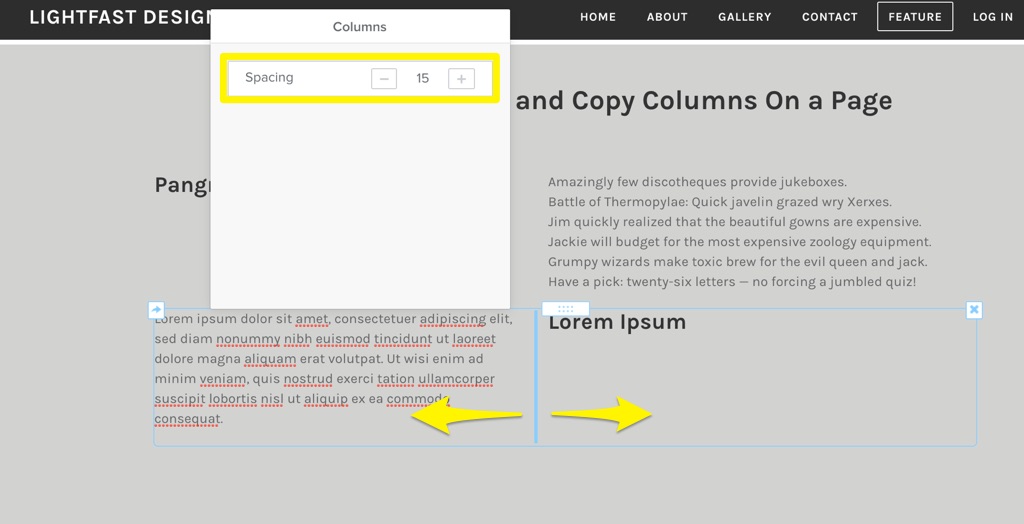
You can drag the blue vertical lines between each column left or right to adjust the size and it will snap into place and automatically adjust the columns. Hold down the Shift button on your keyboard while you drag to get more precise control over the width. You can also adjust the spacing between columns using the options panel to increase or decrease the amount of space. If you don’t see the column options, mouse over the columns and click on one of the blue vertical lines to bring it up.

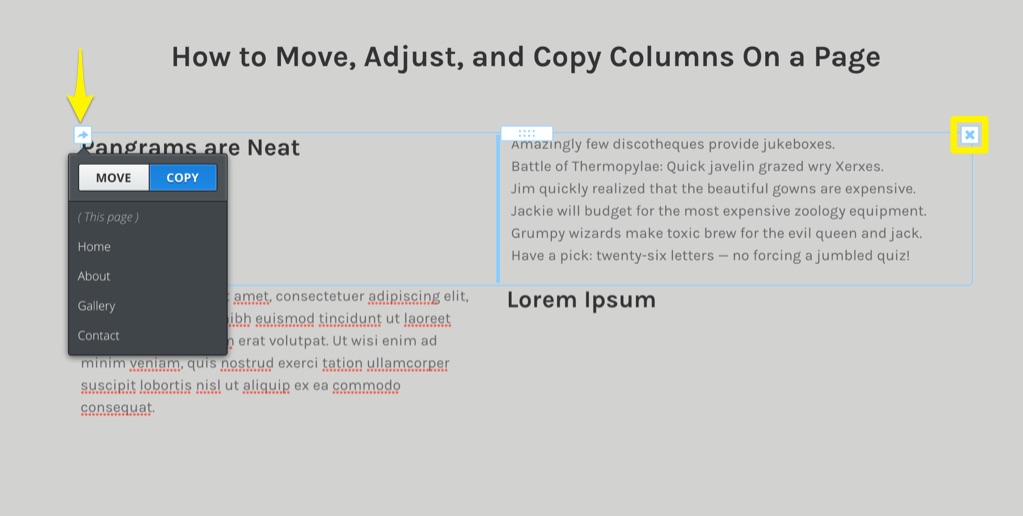
Just like individual elements on a page, columns can be copied or moved to different pages using the arrow on the upper left. Click on either Move or Copy and then choose which page to move or copy the columns to. You can also delete a column and everything inside it using the x button in the upper right. Be careful with this option - it can’t be undone!