Set up your Block List with Risk Manager
About block lists
Block list in Square Risk Manager is a feature that gives you the option to block emails, payment cards, and IP addresses — all from your Square Dashboard. Blocking provides you with a wider net if you're noticing a pattern of fraud across multiple methods.
Before you begin
Try blocking an email address and/or payment card first before blocking the IP address. The buyer is not alerted when you take this action, and can be unblocked at any time.
-
If you get an error telling you that something you’re trying to add to your Block List is not available, it's usually because:
You’ve already blocked all possible identifiers.
The item you’re trying to block is already in your Allow List. You must remove an item from your Allow List before it can be blocked.
Types of blocks
Block a payment card

Blocking a card prevents that card from being used to make purchases with your business moving forward. If you identify what you believe to be a fraudulent transaction, you can take this action to prevent future payments being made with that card.
Blocking a payment card on Risk Manager will stop any payment from that card from processing a subsequent payment at your business.
Fraudsters sometimes have several stolen payment cards they attempt, so blocking one card might not be enough if you’re seeing a large pattern of fraud. If you’re noticing a pattern, you may want to consider also blocking other identifiers: IP address and/or emails.
Block an email address
You can block any email address that seems suspicious — fraudulent email addresses sometimes contain a random string of letters and numbers. Blocking an email address will decline any subsequent payment that is associated with that email
Understanding IP addresses
An IP address is an alphanumeric label assigned to each device connected to a computer network that uses the Internet Protocol for communication. Blocking an IP address is a big deal - it can affect a large area and accidentally block potential good buyers.
Unlike phone numbers, IP addresses are not permanently assigned to specific user devices. Instead, most IP addresses are temporarily assigned to specific locations, such as apartment complexes, households, businesses, public parks, and restaurants where many unrelated people are logged on at the same time.
For example, blocking the IP address assigned to a coffee shop or apartment complex would block everyone in that coffee shop or apartment complex. This would potentially block good buyers.
Public internet access in libraries or parks can use a shared IP over several devices. Blocking a shared IP address can block multiple devices, and potentially good buyers.
IP addresses are often recycled. Because they are frequently reassigned, an IP address used by a household today may be reassigned to another household tomorrow.
Block an IP address

If you take payments online with Square, IP address blocks can be good for blocking large-scale fraud or repeated attempts. Blocking an IP address can prevent fraudsters from targeting your business with a large number of stolen cards and fake email addresses.
For example, a fraudster could visit your site and make purchases with a large number of stolen cards and fake email addresses in a single session. In this case, you'd see lots of fraudulent transactions coming from a single IP address.
Usually, an IP address is only valid for about 30 days. We recommend re-blocking IP addresses only when additional fraud attempts are detected.
Set up your block list
There are three ways to add to your Block List. You can do so from your Risk Manager navigation by clicking through to your Alerts table, Block List table, or Blocked payments page.
- Sign in to Square Dashboard and go to Orders & payments (or Invoices & Payments or Payments) > Risk manager.
- Go to Alerts and click on the relevant payment.
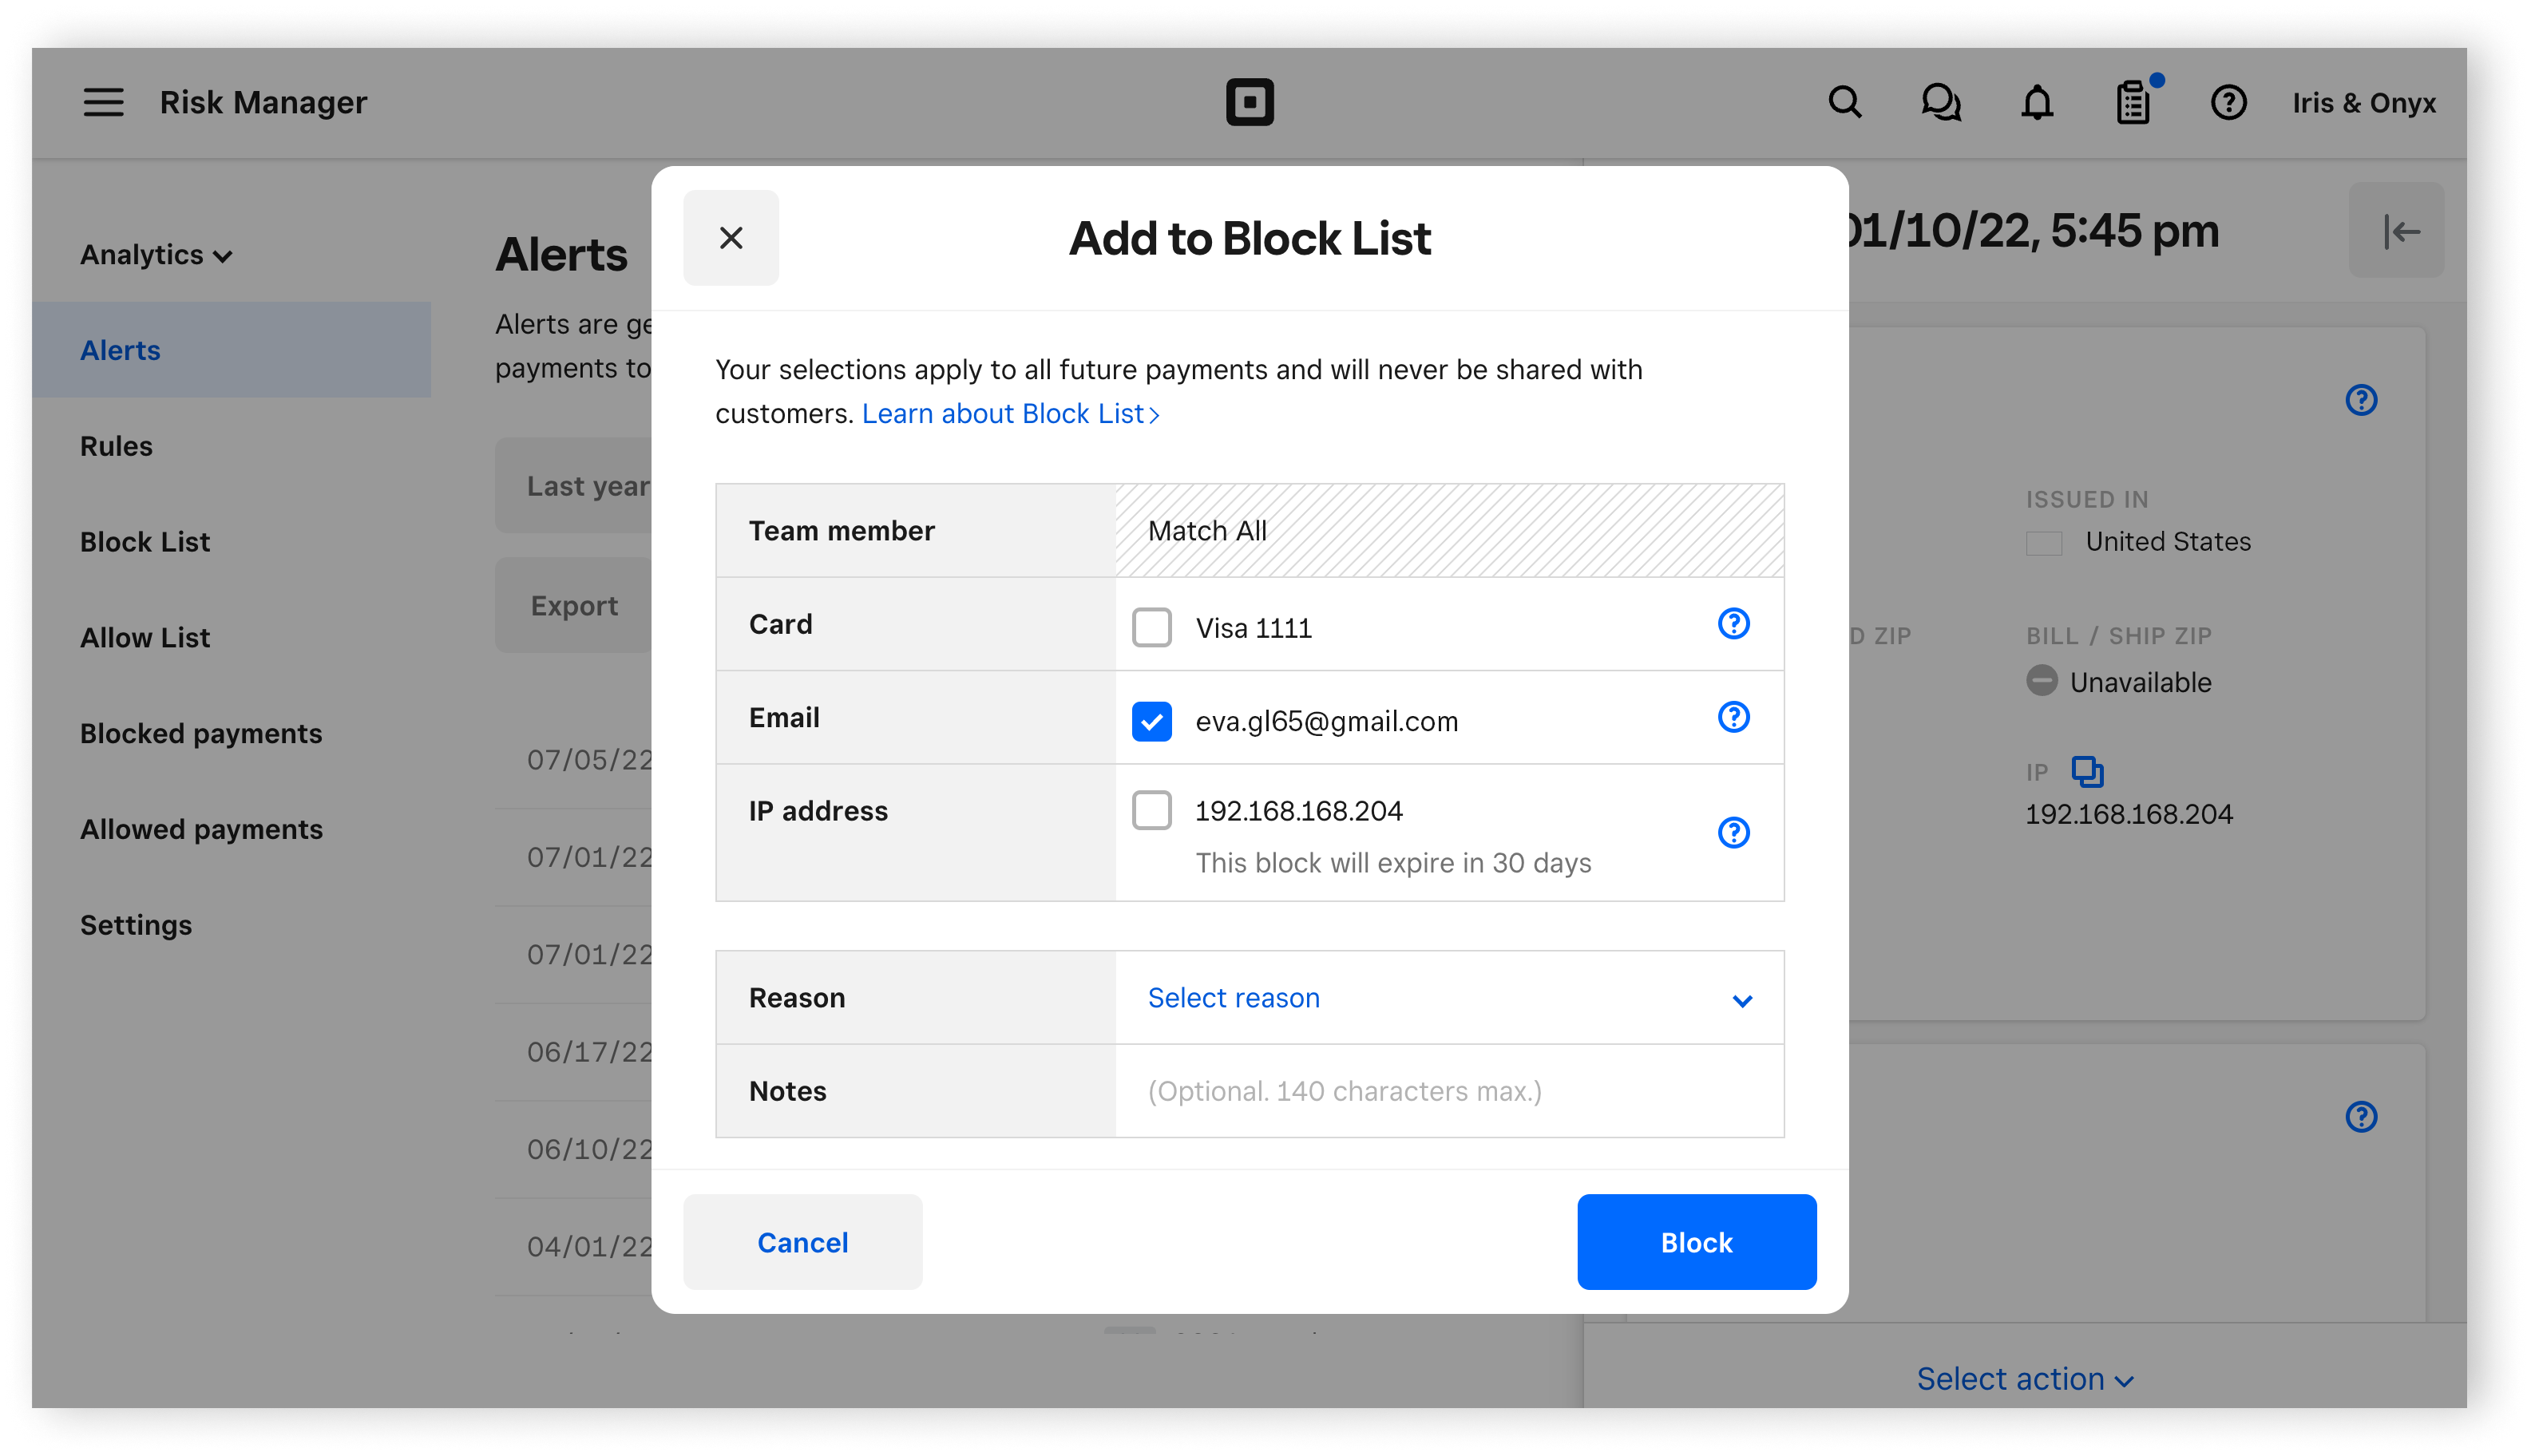
- Click Select action > Add to Block List.
- From here you can also Refund payment, Add to Allow List, or Archive alert.
- Check the tick boxes next to Card, Email, or IP address.
- Select the reason for blocking and add an optional internal note.
- Click Block to confirm or Cancel.
- Sign in to Square Dashboard and go to Orders & payments (or Invoices & Payments or Payments) > Risk manager.
- Go to Block list and click Add to list or create a new block > to block a payment card, email address, or IP address.
- Apply any date filter and search for a customer note or the last four digits of a payment card.
- Sign in to Square Dashboard and go to Orders & payments (or Invoices & Payments or Payments) > Risk manager.
- Go to Blocked payments and click (•••) on the right hand side of your selected transaction to add that card to your Block List.
- Select Add to Block List.
- Select a reason that you are adding the card to the list, and click Block.
View blocked payments
To view declined payments and the rule that triggered a decline:
Sign in to Square Dashboard and go to Orders & payments (or Invoices & Payments or Payments) > Risk Manager.
Go to Blocked payments and apply any relevant date filters.
Click All sources to change to view All sources, Square, Bank, Block List, or Decline rules.
Search by the last four digits of the payment card.
You can export this data to a .CSV file, if required.
Remove from your block list
You can remove a payment card, email address, or IP address from your Block List at any time and for any reason. Risk Manager will not inform the customer when this occurs. When a card is removed from your Block List it will be able to resume transaction processing with that method. The card can be declined due to your rules, your Allow List, Square standard payment protections, or if the issuing bank declines.
To remove a card:
Sign in to Square Dashboard and go to Orders & payments (or Invoices & Payments or Payments) > Risk Manager.
Go to Blocked payments and click (•••) on the right side of the allowed item.
Click Remove from Block List.
Use the drop-down menu to select a reason to remove the card.
Click Remove.
Disclaimer: Although this tool is designed to help prevent payment disputes, the risk of a payment dispute is present with all card payments. Sellers will continue to be liable for all payments they accept and the disputes they receive. Square is not assuming liability for payments, regardless of the risk evaluation that is delivered.