Set up and manage SevenRooms integration with Square
About SevenRooms and Square
The Square and SevenRooms integration allows you to view customer and reservation information from SevenRooms in your Square account to personalise hospitality during service. Use SevenRooms’ host-facing features by sharing your Square account and sales information with your SevenRooms account.
Before you begin
You need either a paid subscription to Square for Restaurants Plus (or a free 30-day trial of Square for Restaurants Plus) and an active SevenRooms Essentials, Growth, or Premium package to use the integration. If you currently use the Square for Restaurants Free plan or the Square Point of Sale app, you need to upgrade to either Square for Restaurants Plus or Premium to integrate with SevenRooms. Visit your Square Dashboard to upgrade your subscription.
When you upgrade to Square for Restaurants Plus, all your existing account information is available with Square for Restaurants, including your items, customers, team members and bank account information. If you upgrade from the Square POS app, you need to set up your menus and floor plan before syncing with SevenRooms.
Integrate SevenRooms with Square
If you are new to SevenRooms and need to create an account, visit their website and select Book a Demo.
If you already have a SevenRooms account and want to start using the integration:
Sign in to Square Dashboard and go to Settings > App integrations.
Click Visit App Marketplace.
Search ‘SevenRooms’ and select the app listing.
Click Get Started and follow the prompts to connect your SevenRooms account with your Square account.
Manage your settings
Your table names in your Square for Restaurants account must match the table names in SevenRooms. To match table names on your floor plan:
- Sign in to Square Dashboard and go to Settings > Device management > Floor plans.
- Edit or create your floor plans and table names.
- To change multiple table names at once, select a section and update the table names. Click Done.
- Click Save when you’re finished.
To enable coursing on Square:
- Sign in to Square Dashboard and go to Settings > Device management > Modes.
- Select an existing full-service, quick-service or bar mode or create a new mode.
- With the mode selected, click Manage under Settings.
- Click Coursing and toggle Enable Course Management on.
- Set other coursing preferences and click Save.
- Add or adjust your course names in your Square Dashboard > Service settings >
Courses - Map courses from Square to table statuses in SevenRooms.
Coursing is specific to each location. If you have multiple locations, you’ll need to create courses for each one. Learn more about Coursing with Square for Restaurants.
With Seated status, you can improve your staff’s workflows, create automated bills and keep track of table progress with SevenRooms integrated with Square for Restaurants. When you enable this setting in Square Dashboard, reservations from SevenRooms will automatically create a new ticket for each table when a diner is seated and any applicable deposit will automatically apply to orders.
To create a reservation with SevenRooms:
- Sign in to your SevenRooms mobile app.
- Select Add Reservation in the upper-right corner to begin the reservation process.
- Follow the prompts to pick a date, party size and time of the reservation.
- Search for and select a client profile if you are creating a reservation for an existing client or add a new client.
- After selecting your client, select More Details. Here you can add notes and tags related to this reservation.
- Select Book.
Take the following steps from your SevenRooms account for the new reservation to appear on the Square Point of Sale app with full-service, quick-service or bar mode enabled or the Square Restaurant POS app:
- Sign in to your SevenRooms mobile app.
- From the Floor Plan view, drag and drop your party to the table where you’d like them to dine.
- Select Seat on the prompt.
The reservation only appears in Square if the seated status is enabled and you set the reservation status as ‘Seated’ in your SevenRooms account.
From the Square Point of Sale app with full-service, quick-service or bar mode enabled or from the Square Restaurant POS app:
- Sign in to your Point of Sale app.
- Go to your floor plan.
- Select the table linked to this reservation. Your Square for Restaurants floor plan shows purple tables to indicate unopened reservations (seated status must be enabled from the Square Dashboard.
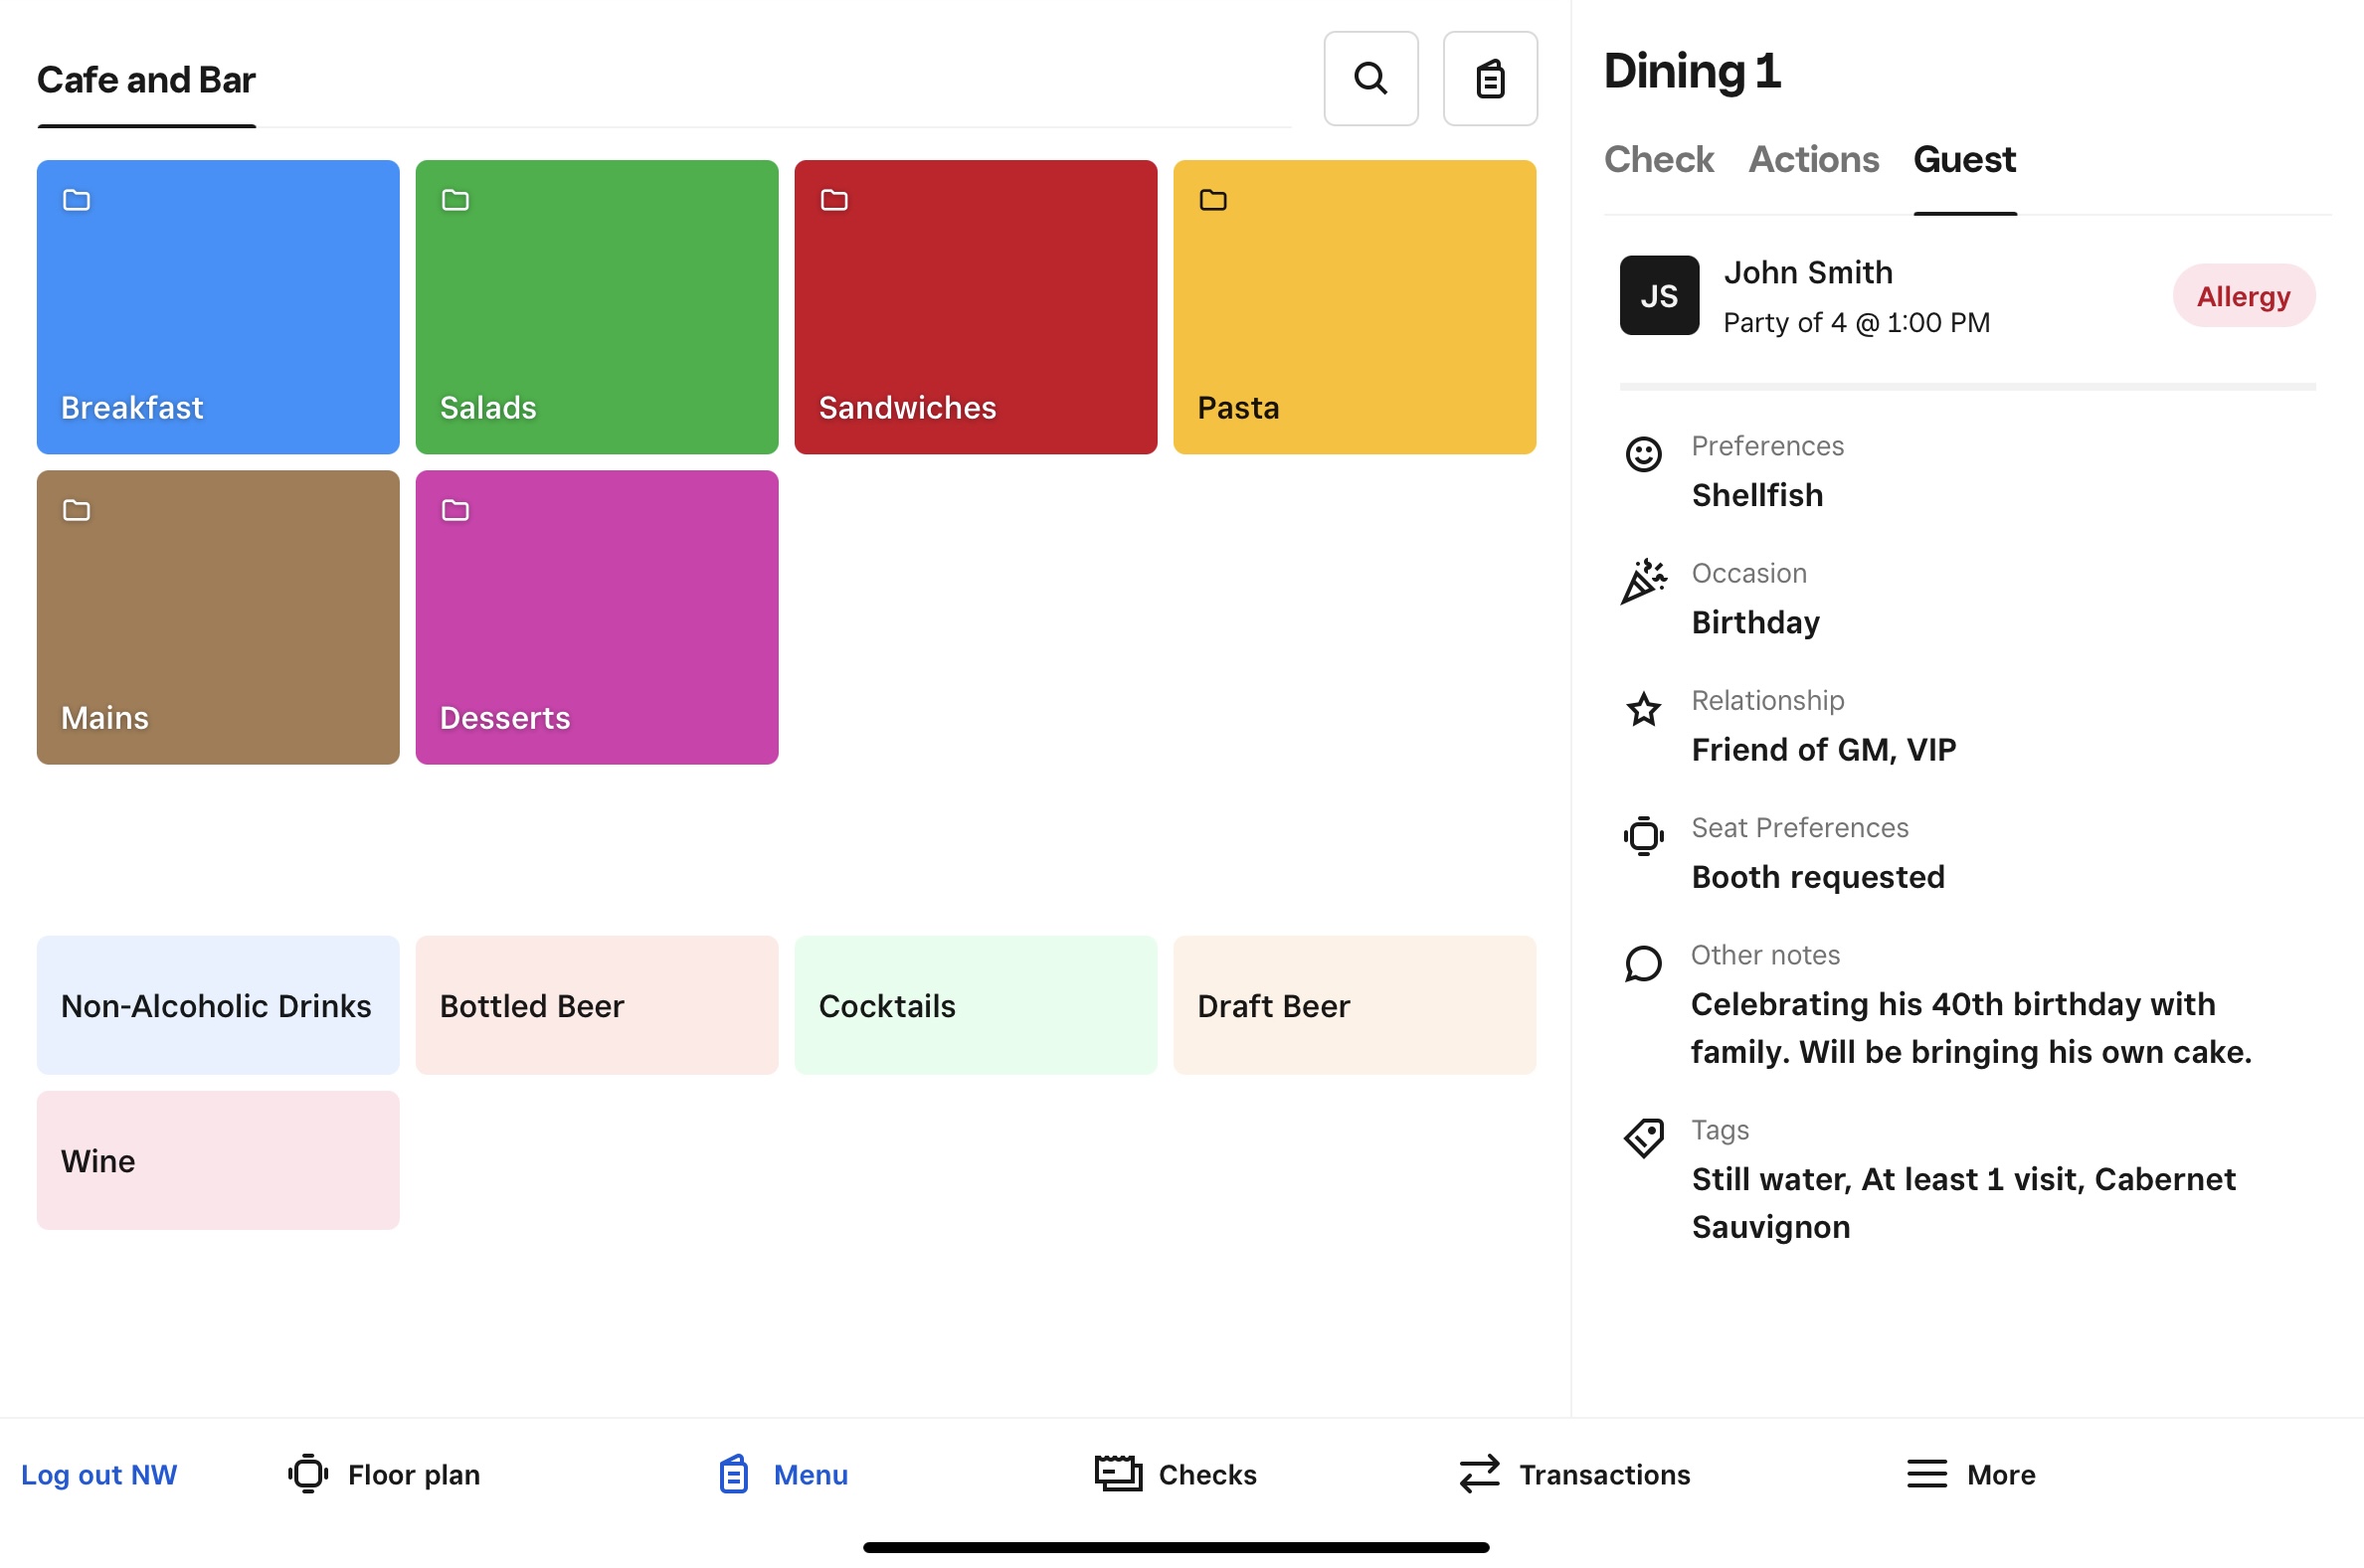
- Add menu items to the order. The Guest tab shows tags, the number of people in the reservation and notes from SevenRooms.
- Tap Send to forward the order to kitchen printers or Square Kitchen Display System (KDS) stations.
- Upon concluding the service, select Print Bill to generate an itemised bill. Present this to the customer and select Pay.
Reservation deposits are only available with the New order and pay capabilities with Square for Restaurants. With reservation deposits and Seated status enabled, you can import SevenRooms deposits to Square and deposits will automatically apply to a reservation.
If Seated status is disabled, deposits will not automatically apply and your point of sale will present the option to manually apply the deposit to the reservation’s order. The deposit amount will be pre-set to the amount received from the third-party platform that created the reservation. This option will only appear if there is a deposit associated with the reservation.
When using reservation deposits:
- Tips and tipping rates are based on the entire meal amount, not the meal amount minus deposit.
- Deposit refunds are handled through SevenRooms, not Square.
Troubleshoot the integration
If the integration isn’t syncing correctly, try the following steps:
Check that your table names are an exact match between your Square and SevenRooms accounts.
Make sure that coursing and seated status are enabled on your Square account.
Adjust the course names in your Square account to match the course names in your SevenRooms account.
Make sure you have menus created with Square.
Confirm your subscriptions to Square and SevenRooms are both active and up to date.
Get support from SevenRooms
For help with the SevenRooms and Square for Restaurants integration, contact SevenRooms Support via pos-integrations@sevenrooms.com. You can also find comprehensive guidance on how to configure your SevenRooms account with Square for Restaurants in the SevenRooms Support Centre.