In-Store Pickup with Weebly
In-store pickup is a flexible and convenient option for your local customers, especially if you’re selling food online. You can allow customers to request curbside pickup and text message notifications for a smooth and seamless experience.
Turn on In-store Pickup
To use In-Store Pickup you’ll need to have your store location information saved. Go to the Settings > Pickup page and use the button to add your location information. If you’ve already added this, then you can move on to the next step.

Click the “Set up” button to start, then click the toggle to turn on pickup. Click the toggle to enable Curbside pickup if you want to offer that option, then click Next to move on.
Configure Pickup Hours, Prep Time, and Fulfillment Workflow
Check the box for each day of the week that you will offer pickup, then enter the hours for each day.
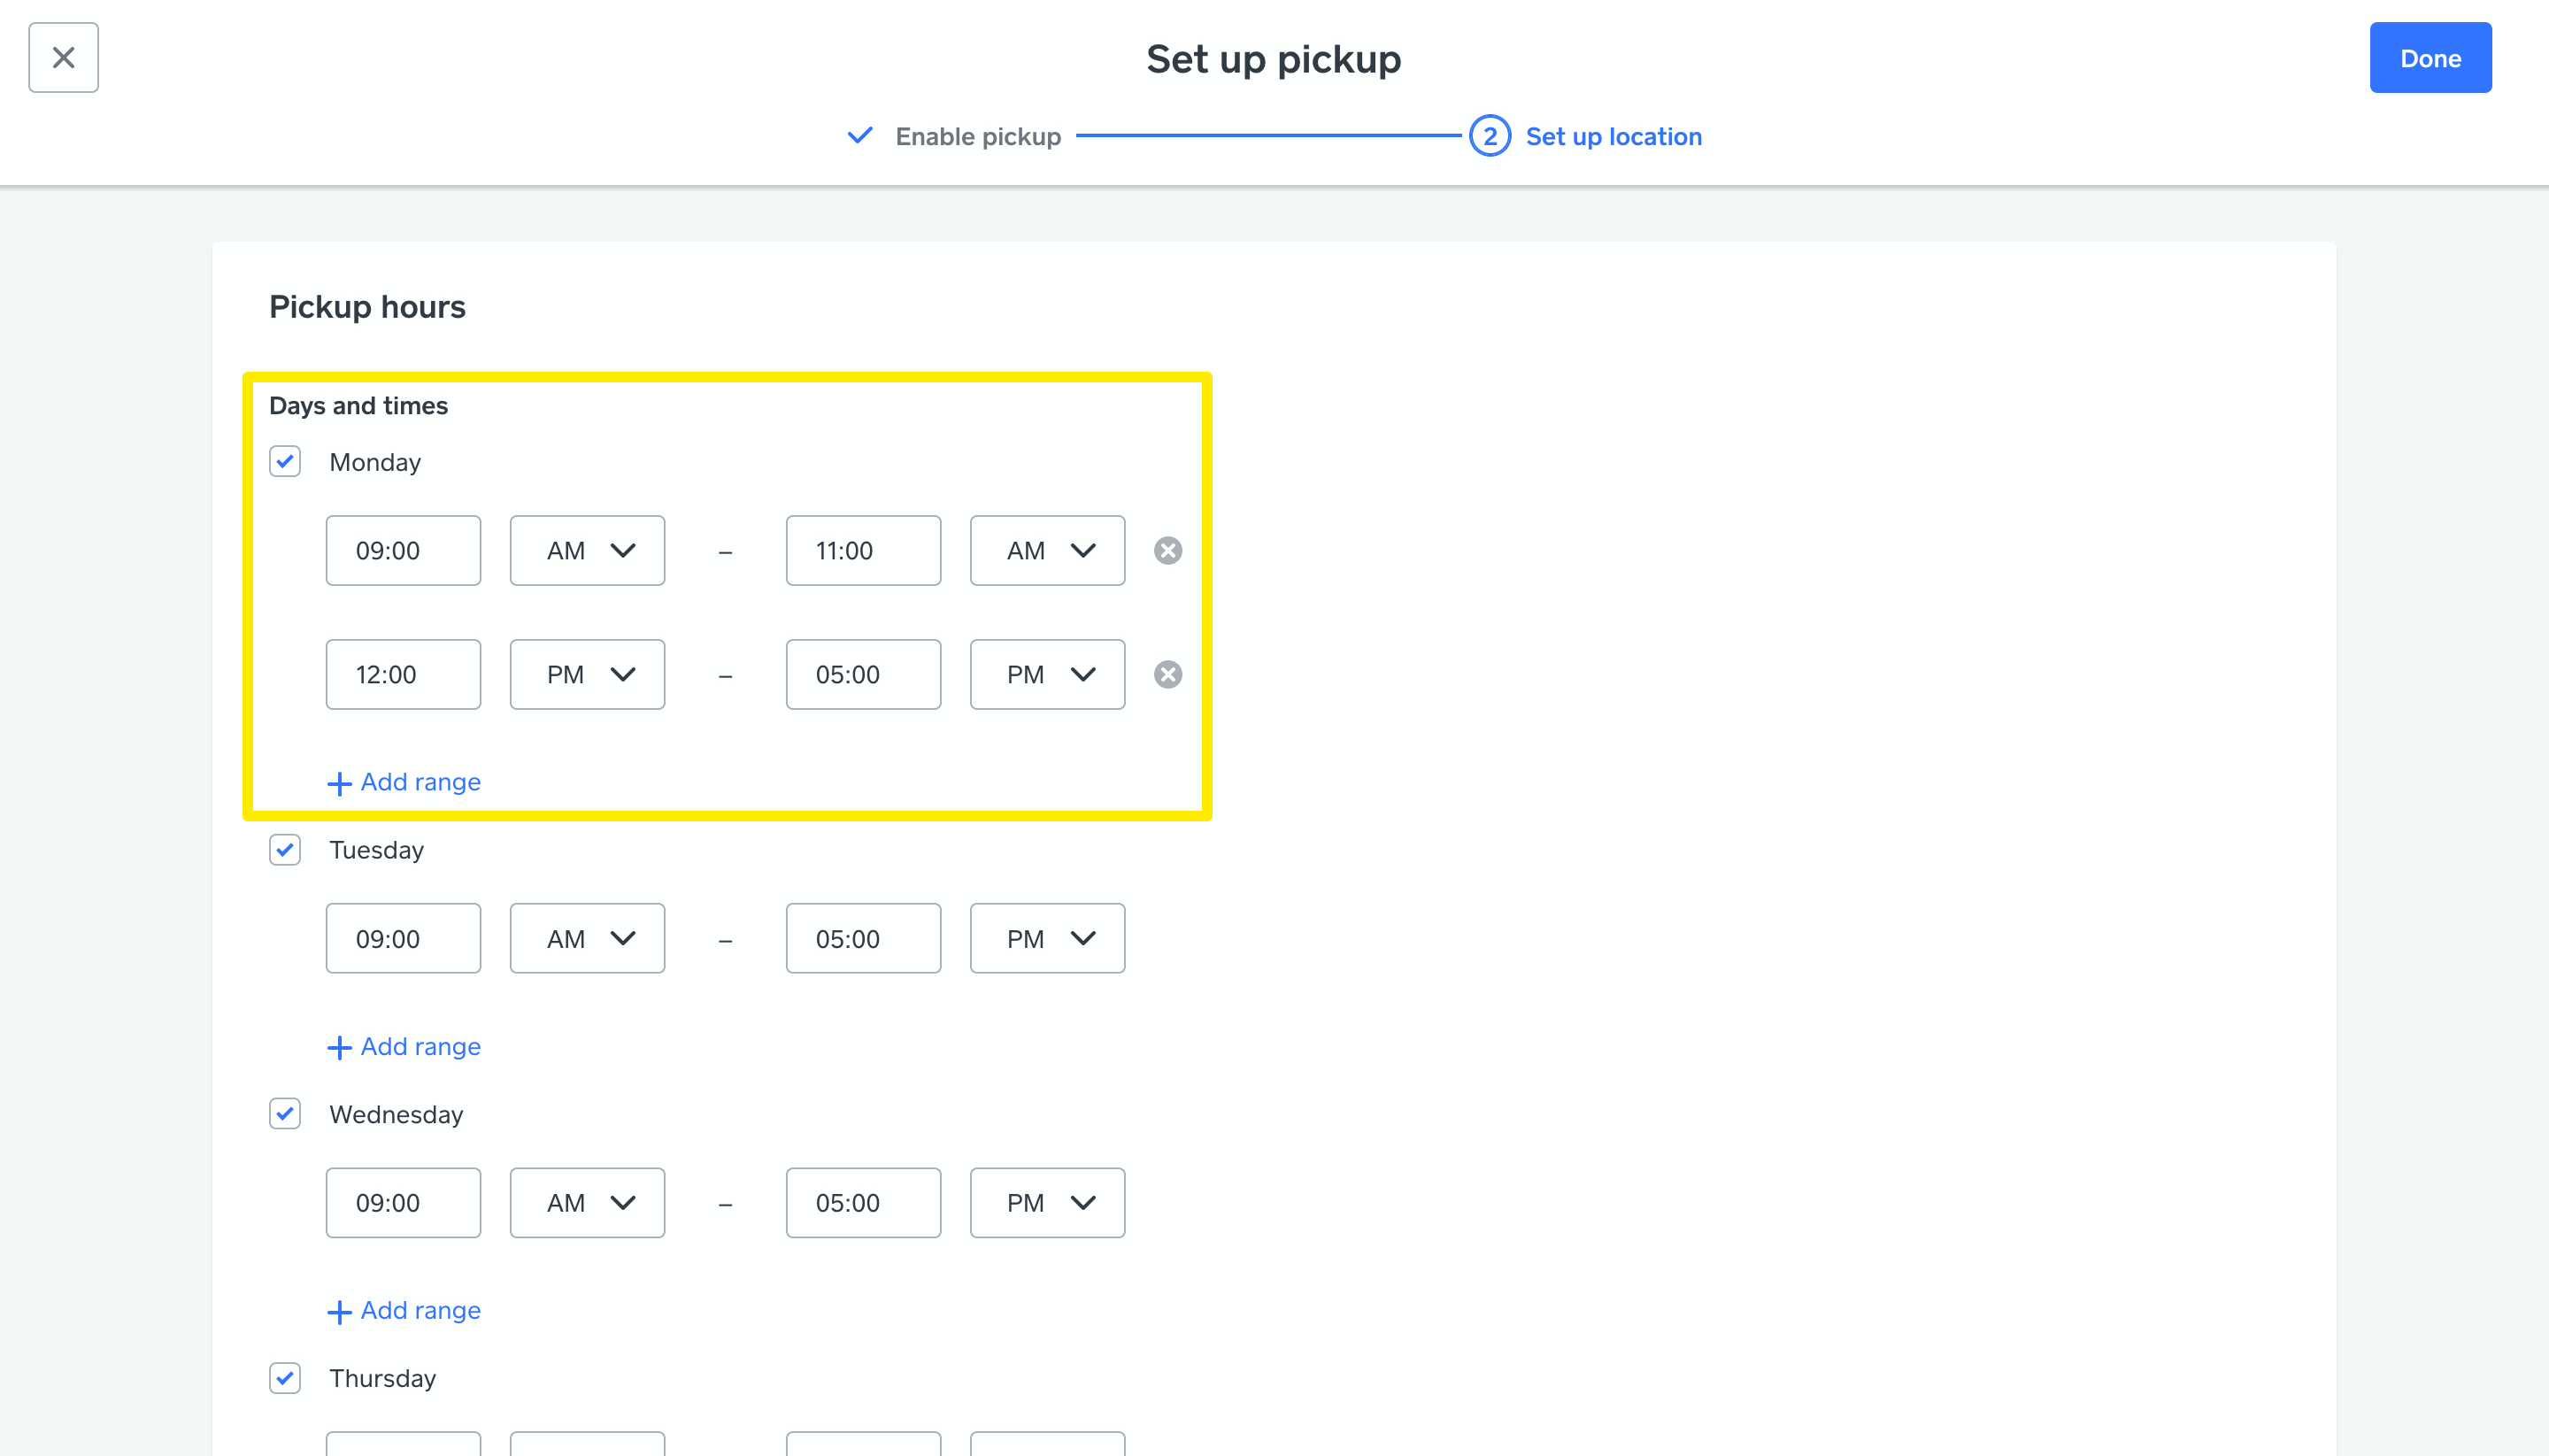
You can add multiple time frames within a day by clicking Add range. This allows you to exclude certain hours, which is convenient if you would prefer not to handle pickups during regular busy periods.
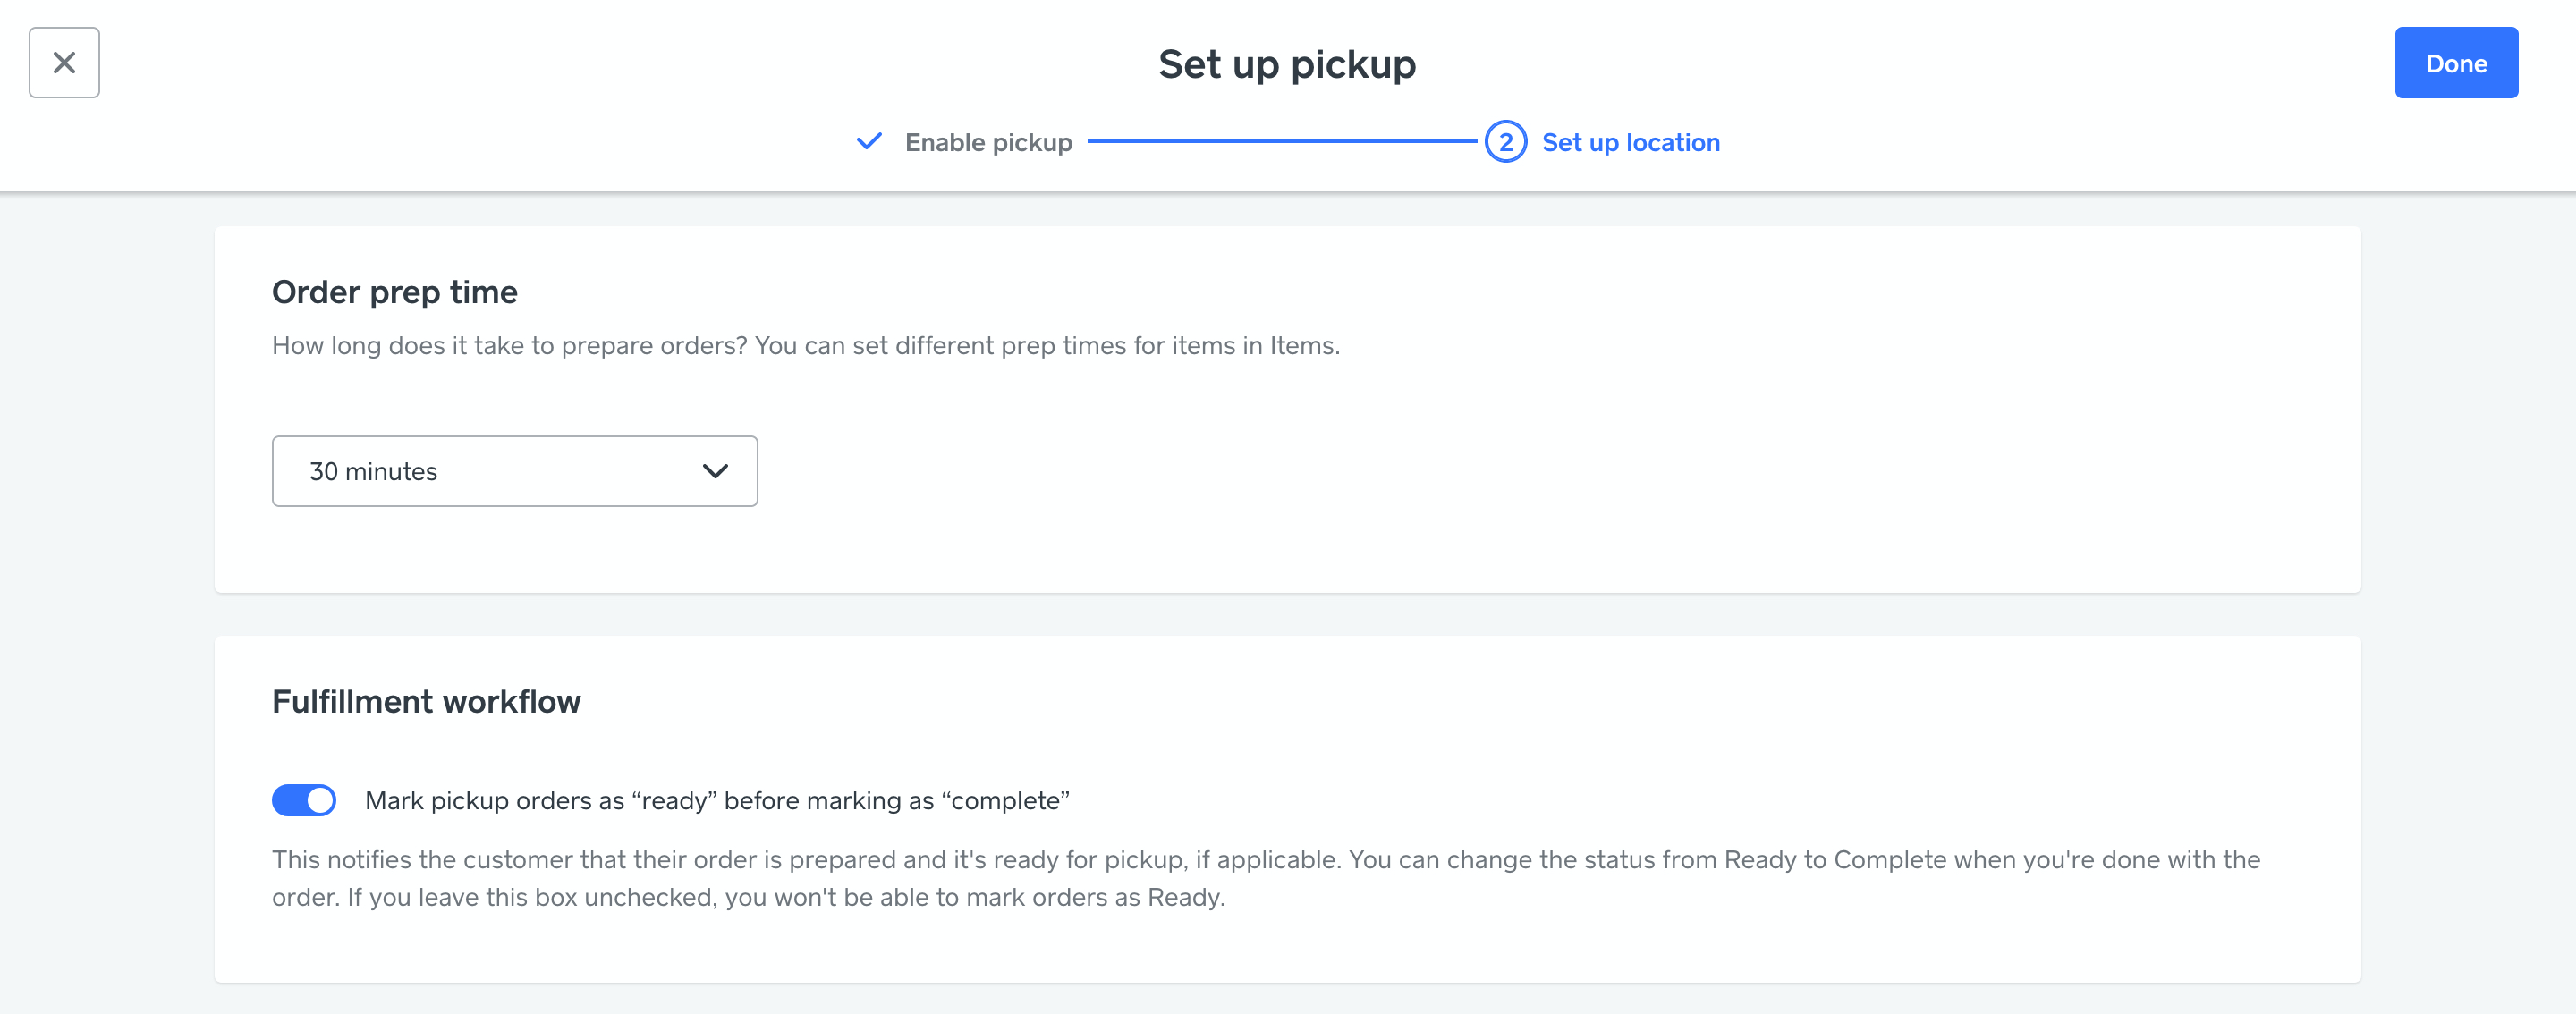
Next, select an appropriate prep time for pickup orders. You can set this for as little as 5 minutes or as long as 12 weeks. Choose an average amount of time that’s likely to cover most of your orders.
Does your prep time vary depending on the item? You can specify a prep time at the item level as well. Simply edit the item from the Items > Item Library page on your dashboard and scroll down to the fulfillment section. The prep time you select from the drop down menu will only apply to this item.
Click the toggle under Fulfillment workflow if you want to utilize the “ready” status for pickup orders and scroll down.
Add Pickup Instructions and Enable Curbside and Scheduled Pickups
You can turn on curbside pickup here if you haven’t already done so. If you want to let customers schedule a pickup time, click the toggle to enable that option.
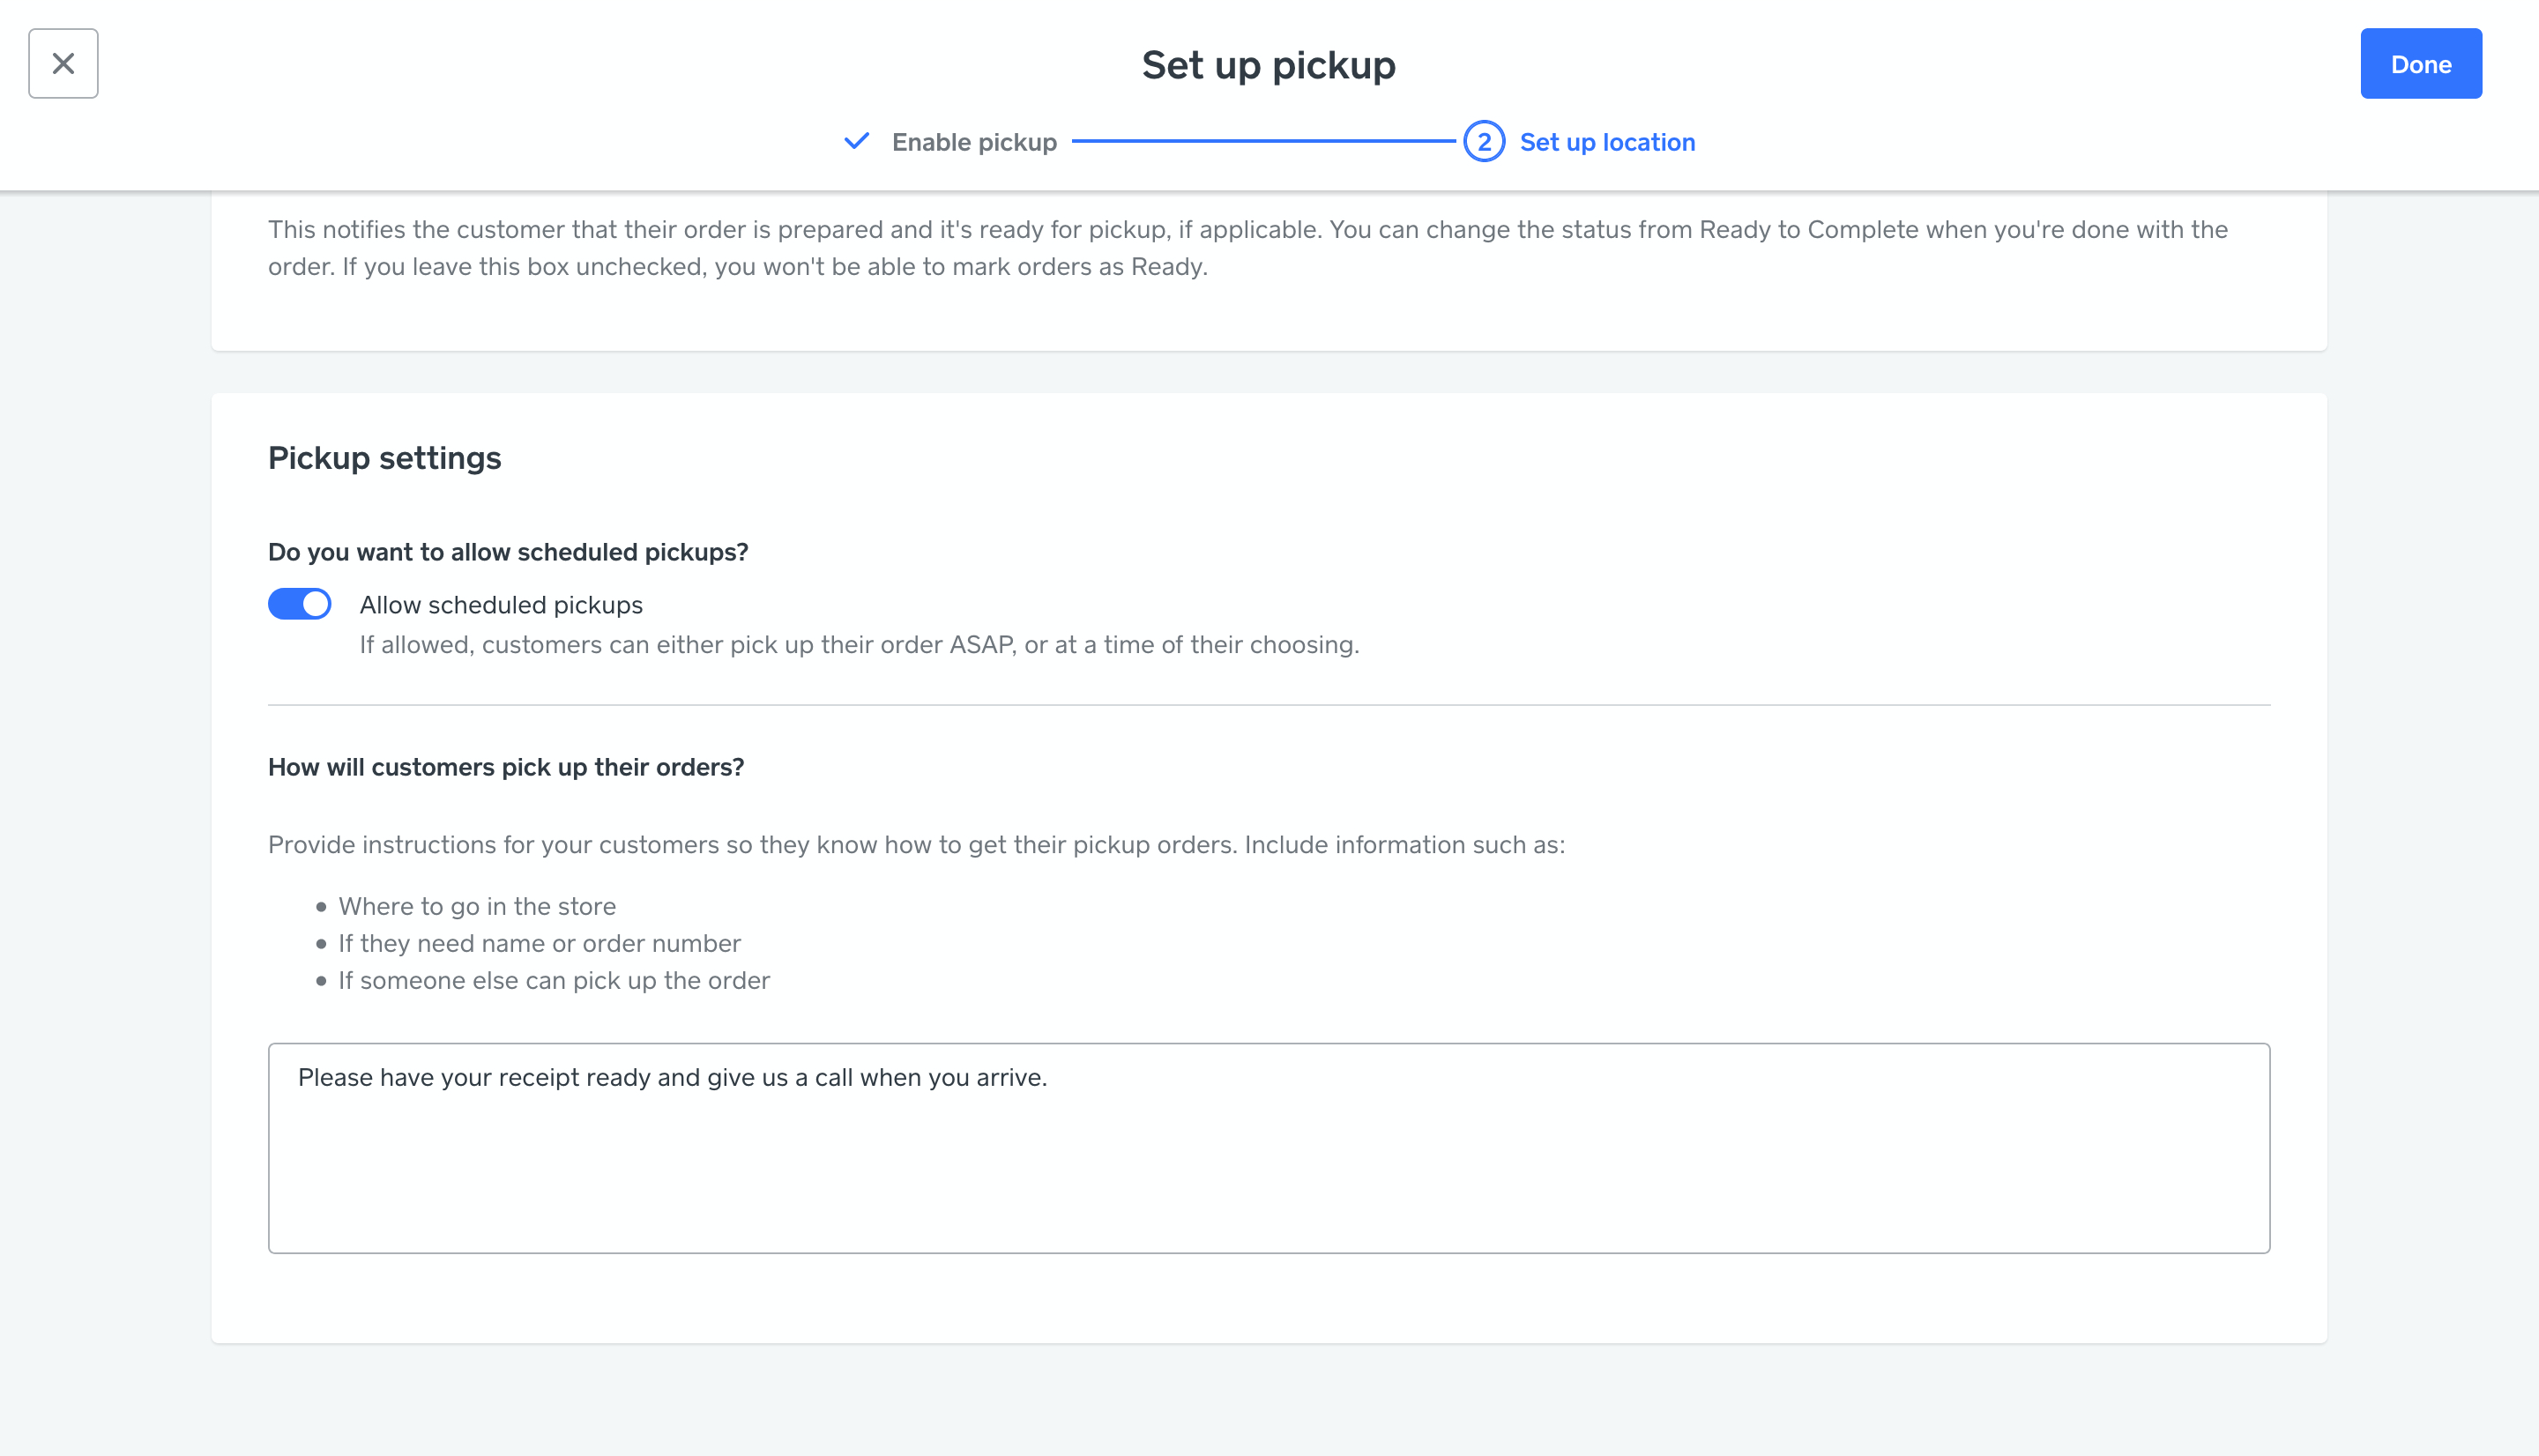
During checkout, buyers can choose a pickup date and time from within the business hours and prep times you set up. For example, let’s say that pickup is only available on weekdays from 9:00 AM to 5:00 PM, and the prep time for orders is 30 minutes. If a customer placed an order on a Saturday, the first available pickup time would be Monday at 9:30 AM. If you don’t want customers to place pickup orders when you aren’t available, you can turn off pickup during those times.
Next, enter instructions for your customers so they’ll know how to pick up their order. Be sure to include any additional details that customers need to know when picking up an order.
Click Done to return to the main pickup settings page.
Edit Location and Pickup Settings
Click the Edit location link if you need to make any changes to the pickup hours, prep time, or buyer instructions, or location information.

Use the Edit links next to each section to open and change the settings.
Edit Advanced Settings
Next, click the “Advanced settings” button.
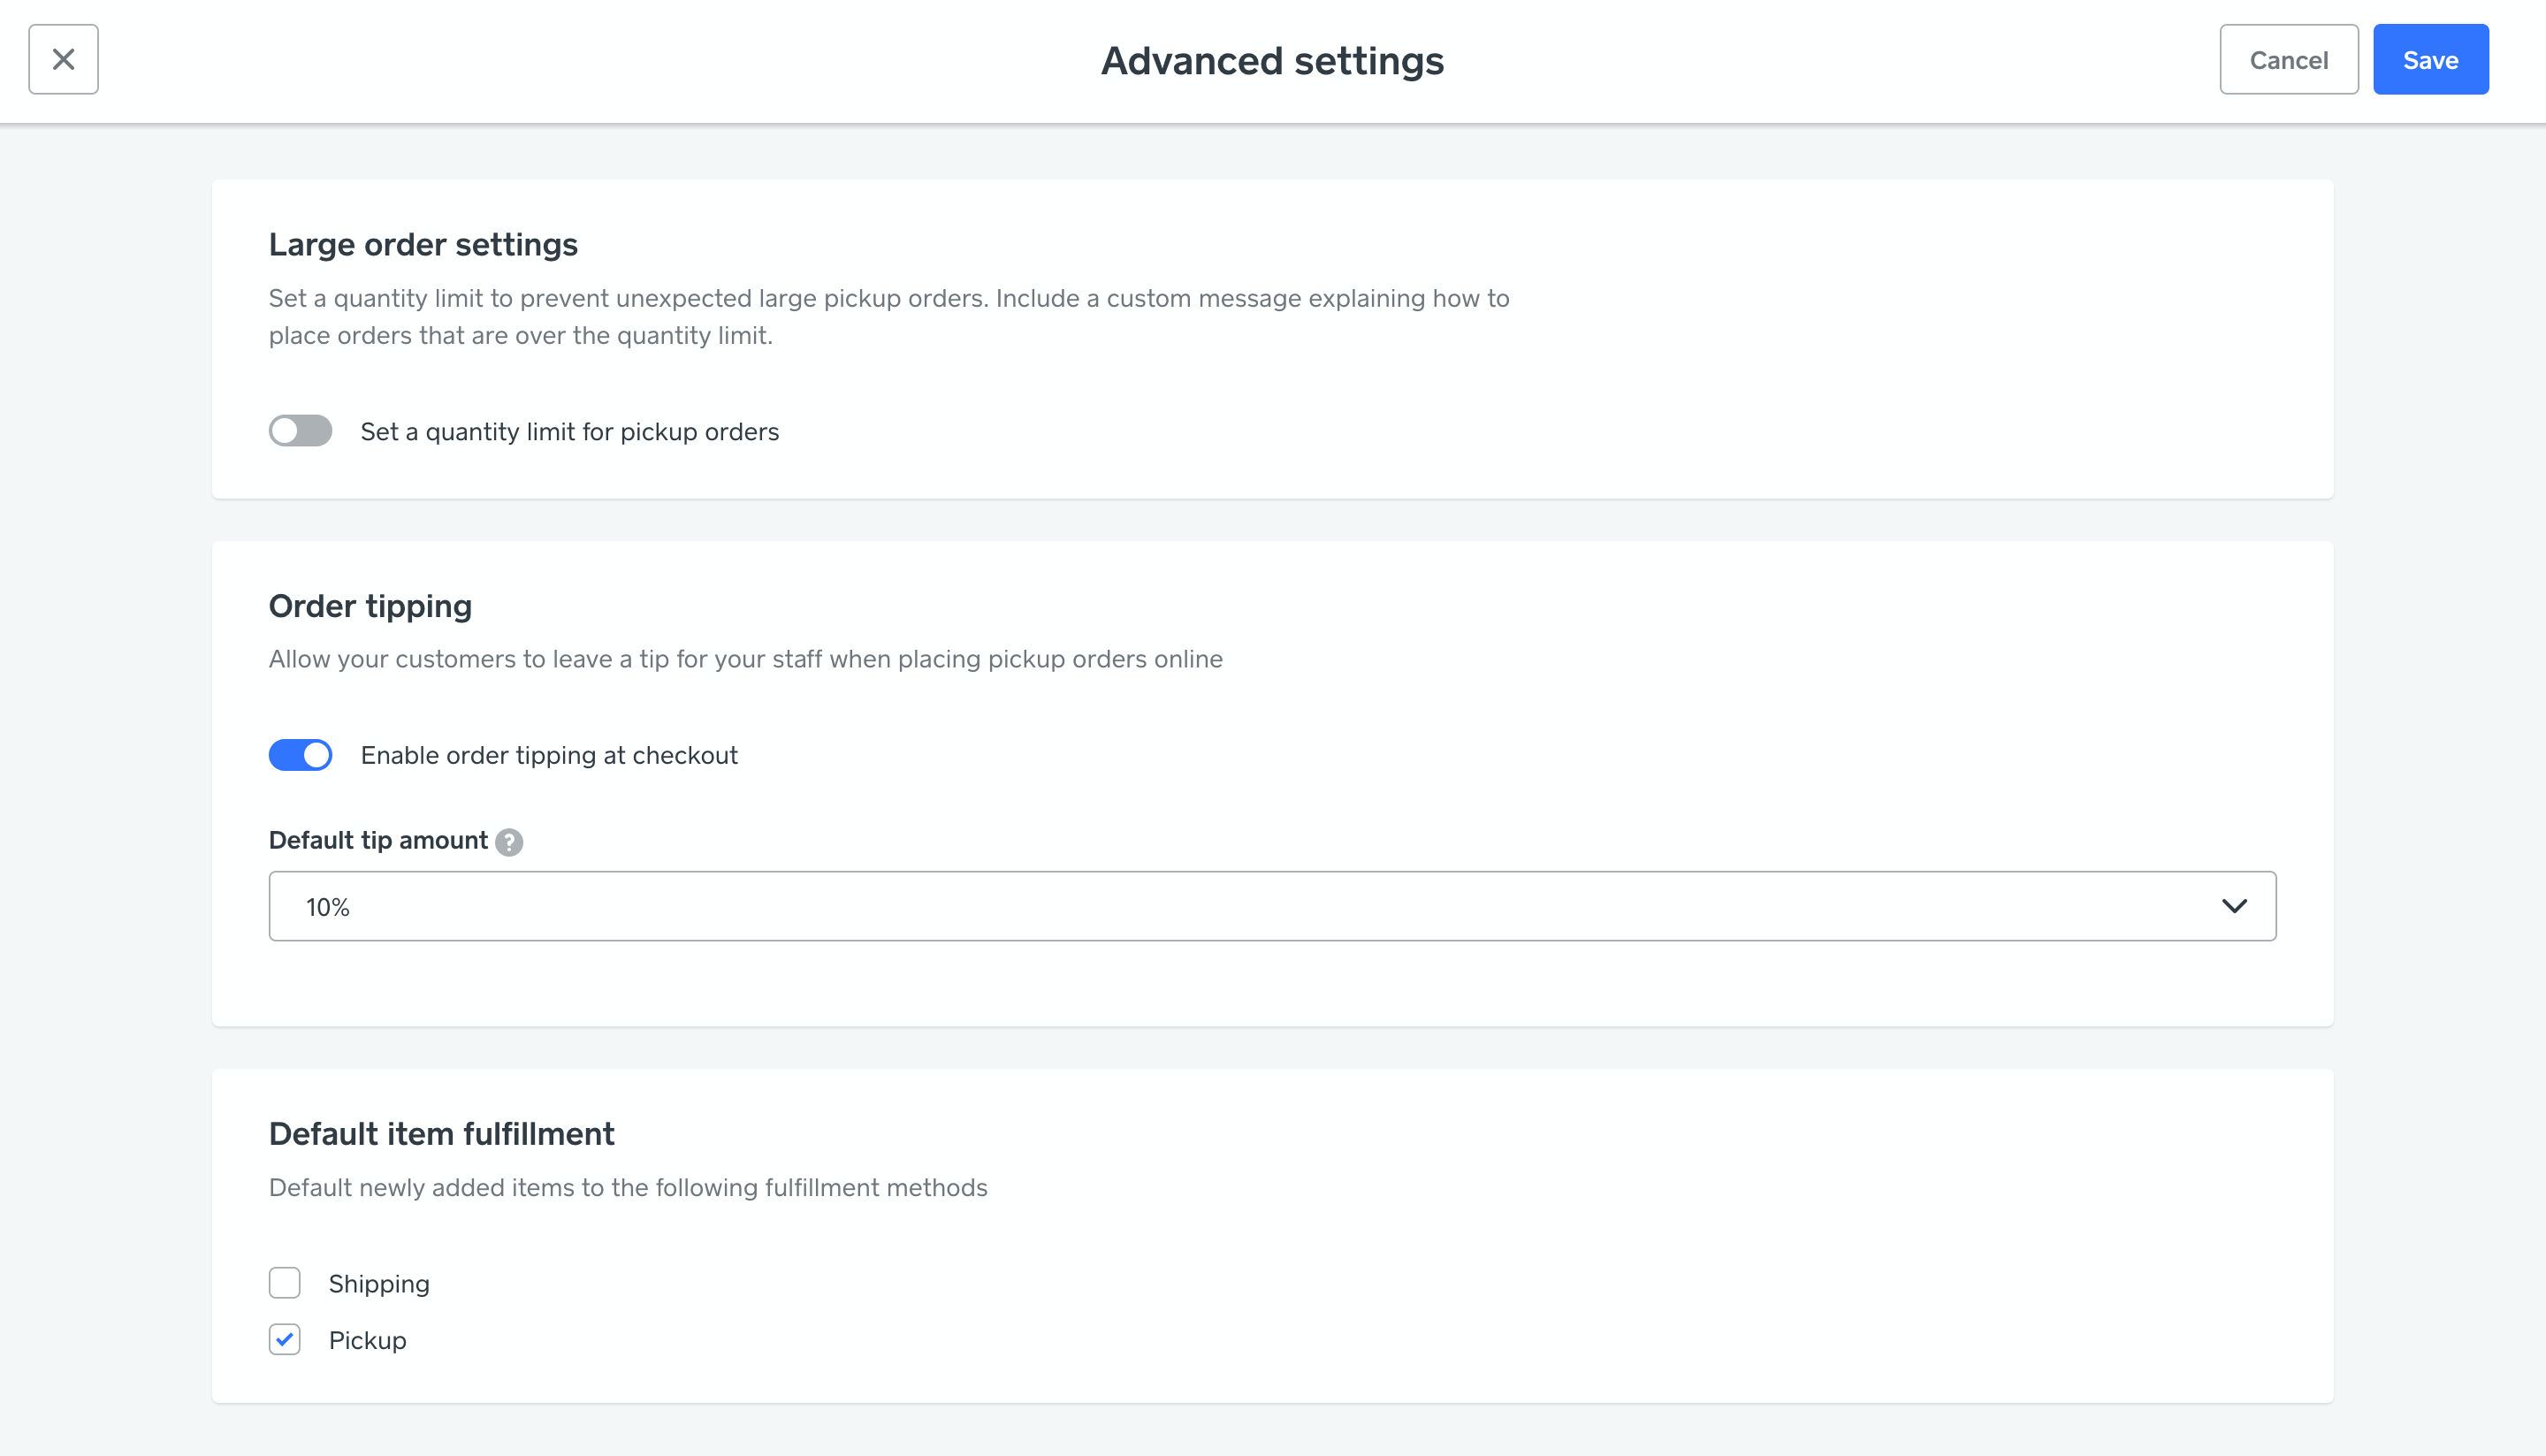
To prevent customers from submitting large orders that may be difficult to fulfill, click the toggle to enable quantity limits. Enter the maximum number of items you want to allow per order, and optionally include additional information about your policies on large orders. Customers who attempt to place an order exceeding the amount you set here will see this information in the shopping cart.
If you’re selling food online, you can enable tipping and select a default tip amount that will be automatically calculated and added to the order. Customers will see the tip as a separate line item when checking out, and they can change the tip amount before completing the purchase.
If pickup is your preferred fulfillment method, use the checkbox here to default to pickup for any future items you add.
Tip: If you want to ship some of your items or let buyers choose between pickup and shipping, you can edit the fulfillment method for multiple items from the Items > Item Library page. Use the checkboxes to select items and then click Set fulfillment method to change the selected items to shipping only, pickup only, or both. If you don’t see the button to set a fulfillment method, check to make sure you haven’t selected any non-physical items like events or memberships. These item types don’t have a fulfillment method, so the button won’t appear when they’re selected.
When you’re finished editing the settings, click save.
The Checkout Experience
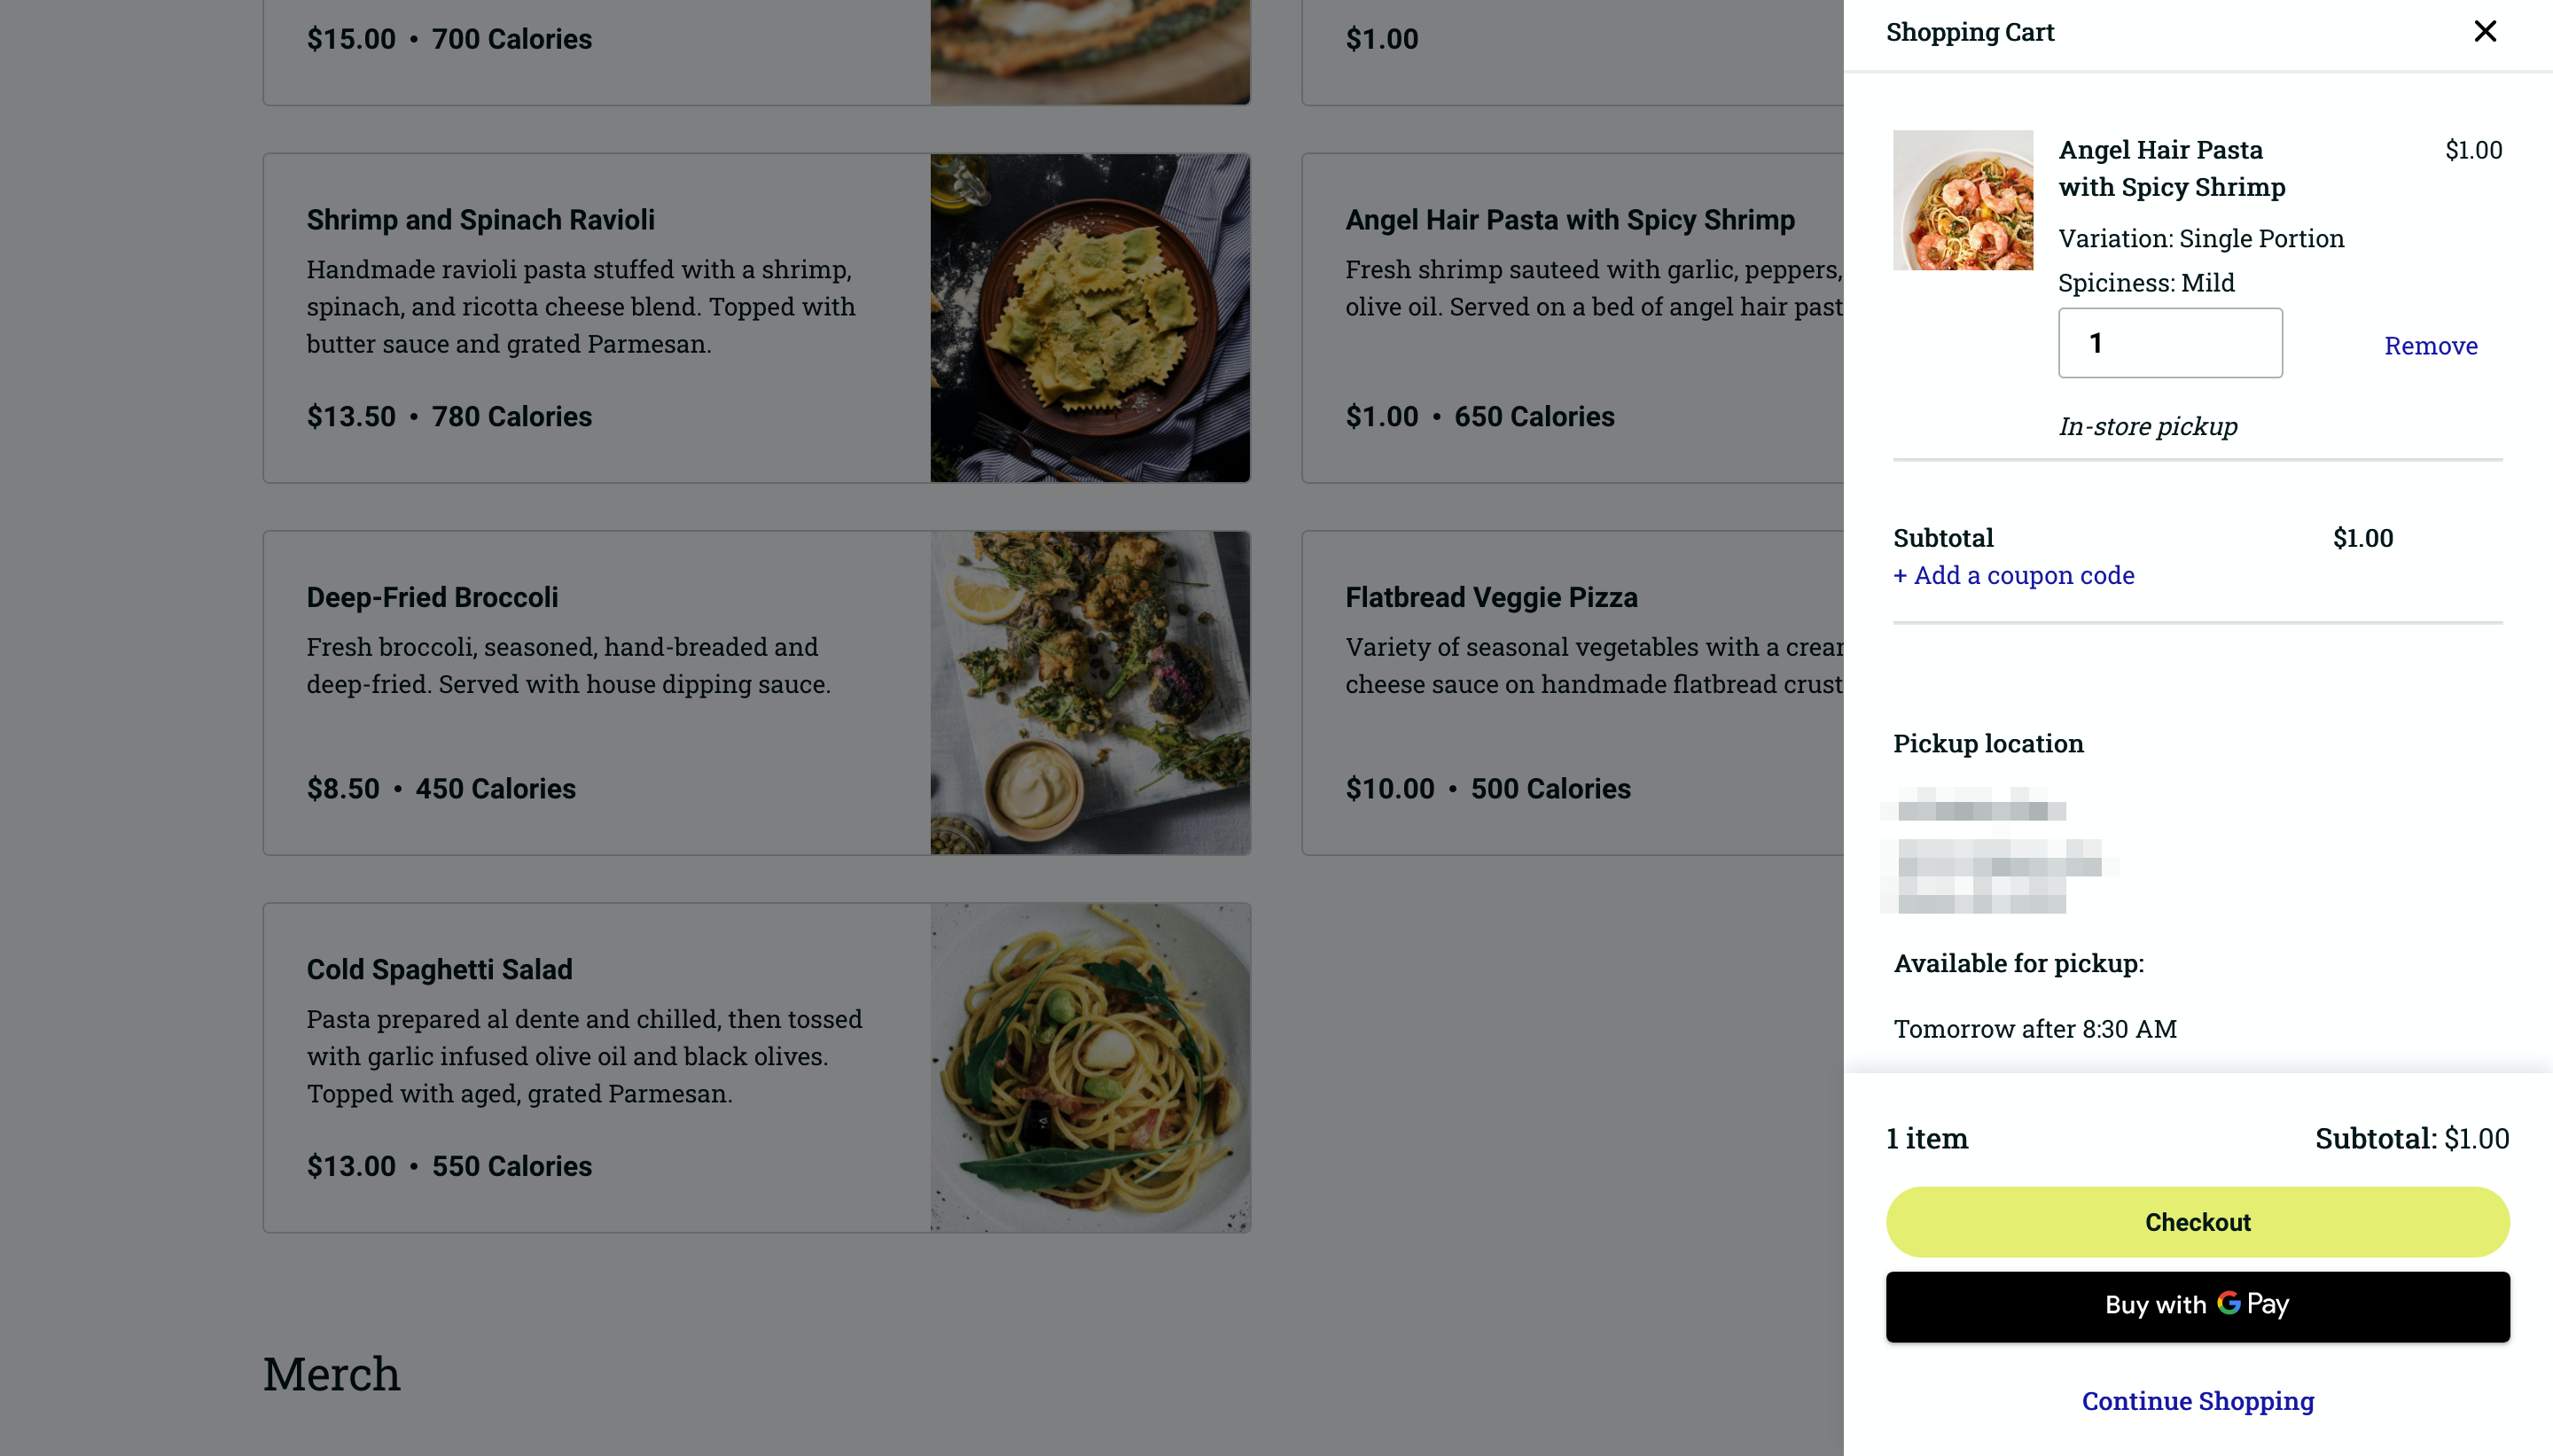
When a customer places a pickup order, they can choose from the locations you enabled for pickup. If you’ve opted to allow pickup scheduling, they’ll be able to choose from among the hours and days you provided. If not, they’ll be given the earliest possible date and time slot based on your hours and prep time settings for the chosen location. If curbside pickup is turned on, customers can check a box to request that before paying for the order.
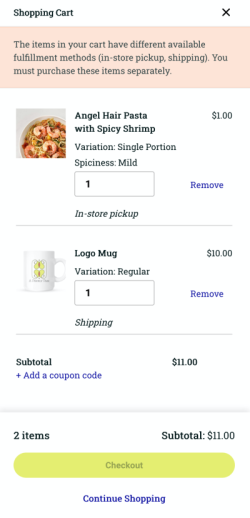
Orders with mixed fulfillment methods will affect checkout. If a customer has an item in the cart that is shipping only and an item that can be shipped or picked up, they will only be able to select shipping during checkout. The same is true in the reverse - if the cart contains an item that is pickup-only and one that can be shipped or picked up, pickup will be the only option at checkout. If an order contains items that are pickup only, shipping only, and both, they will see a message on the checkout screen letting them know they need to purchase these items separately.
Manage Pickup Orders
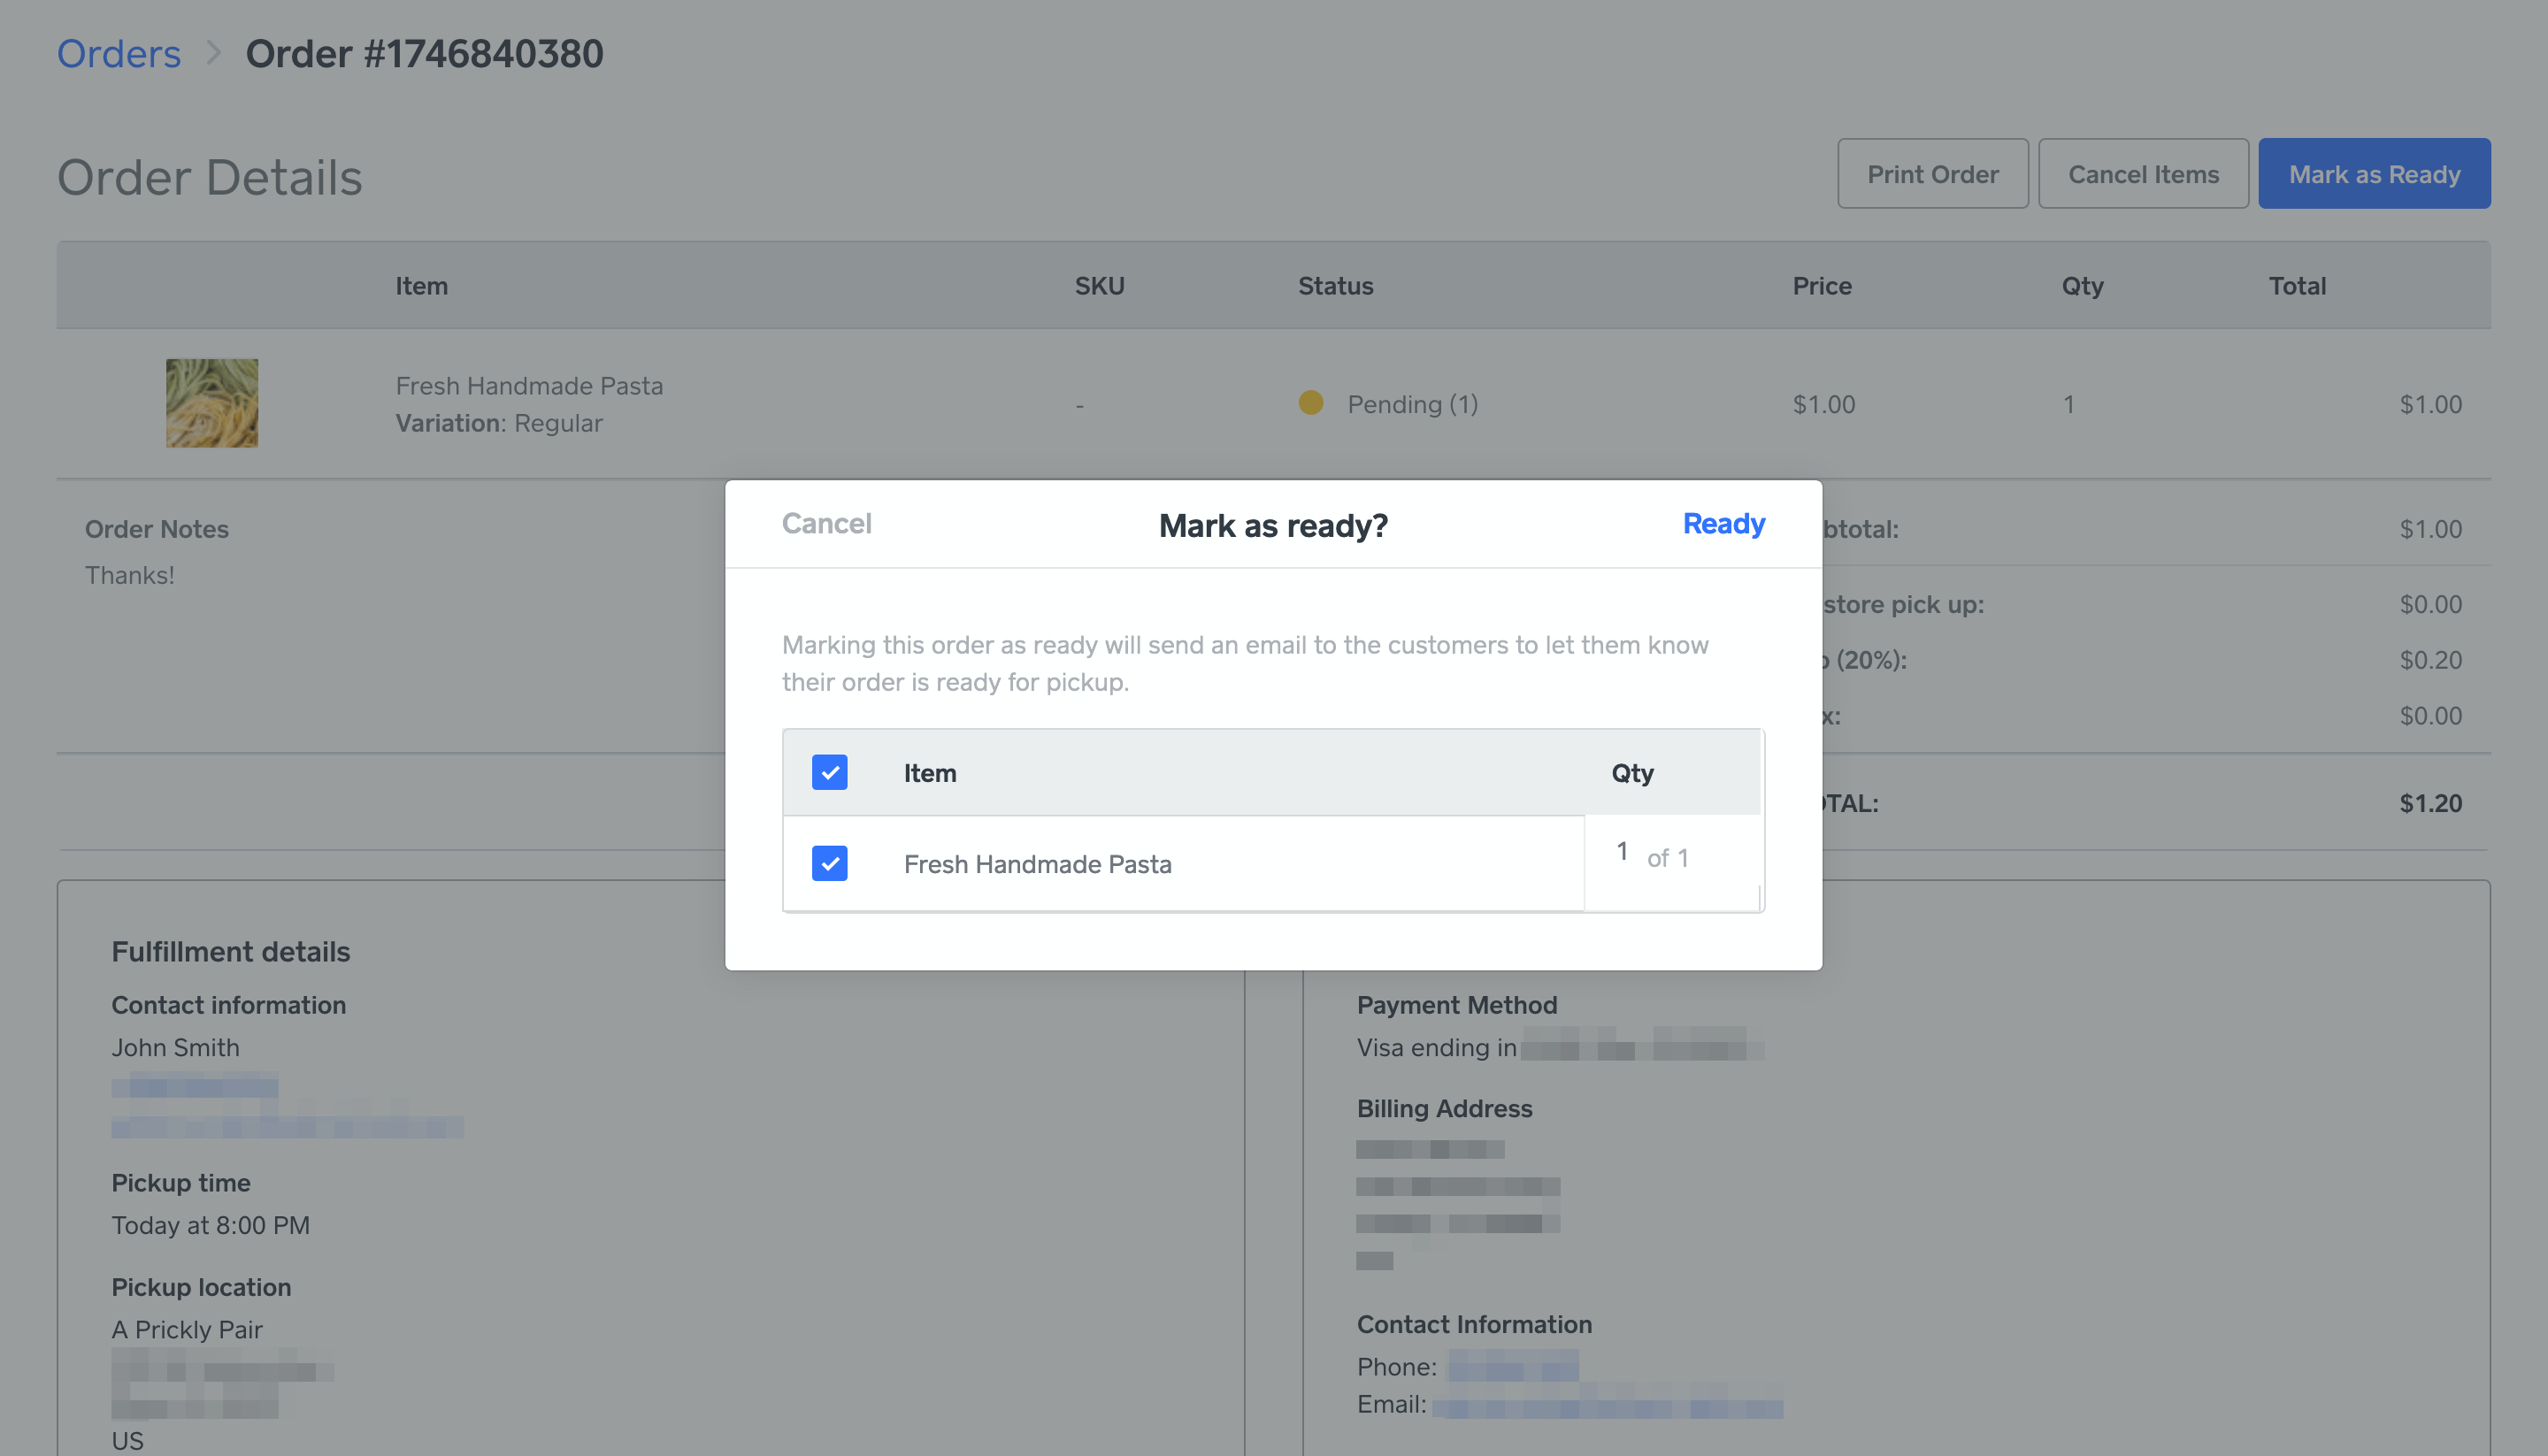
When you’ve finished preparing an order for pickup, navigate to the order in Items > Orders on your Online Store Dashboard and click to open it. Click the Mark as Ready button on the upper right and confirm the items in question are ready for pickup. This will change the order status to “Ready” and send an email to the buyer. The Mark as Ready button on the order detail page will change to Mark as Completed, so you can change the status again when the customer has picked up their order.
Tip: Enable text message notifications in your checkout settings so customers can opt in to receive text notifications about their order status. When you mark an order as ready, a text message will be sent to the phone number they entered at checkout.
Text message notifications are currently supported in the United States, United Kingdom, Australia, and Canada.
There are couple of things to note about the order ready status:
You can not refund an item that is in Ready status, so you’ll need to change the status to Completed before you can process a refund.
You can disable the “Ready” option in the Pickup settings, but doing so will automatically move all orders you’ve set as Ready to Completed.
Turn Off In-store Pickup
To turn off In-Store Pickup, go to the Settings > Pickup page on your dashboard. Click the toggle switch to disable pickup orders. You can re-enable pickup at any time using the same toggle switch.