Display Categories on a Page
Once you create categories, you can display them on your Storefront (or any other page, for that matter). Be sure to have images for your categories so that they’ll display nicely on the page.
To display a category:
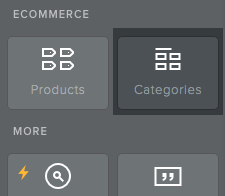
From the Build tab, drag and drop a Categories element onto the page.
A dialog displays all your current categories. Sub-categories are also displayed.
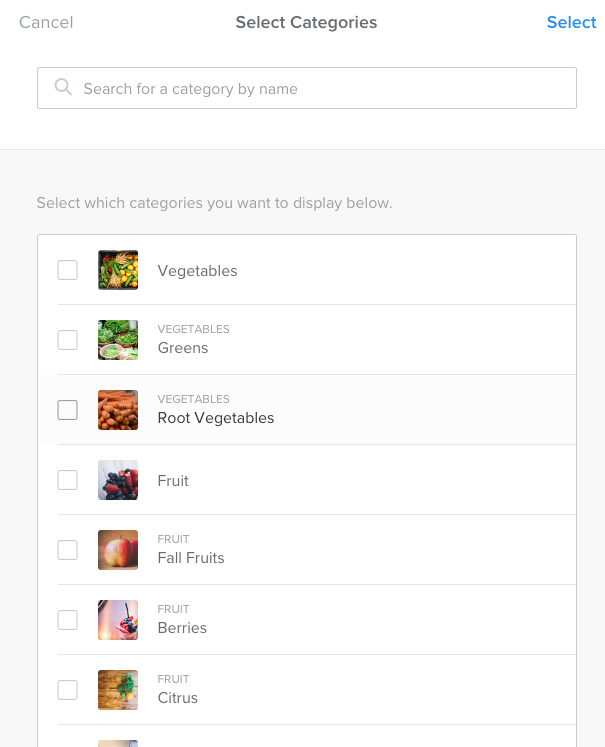
NOTE: If you don’t have any categories created, you will be asked to create some first.
Choose the one(s) to display on the page and click the Select link.
Now that the Categories element is on the page, you can change how it displays your categories, or even change the categories that are displayed.
Tip: You can design with the Categories and Items elements in the same way that you use any other Weebly elements. Use the Title and Text elements to add more information. Use the Spacer element to add whitespace. Upload other images. Or visit our App Center to add a third-party tool!
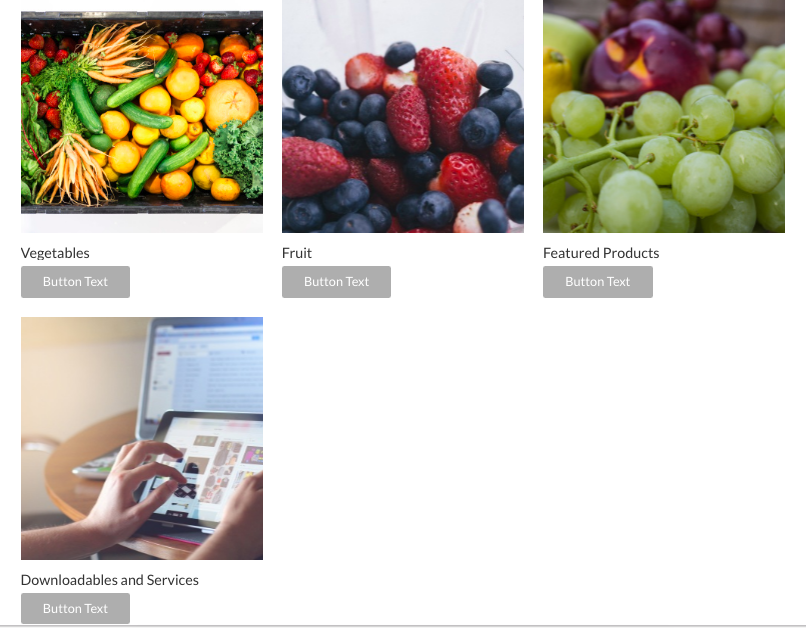
Change the Category Layout
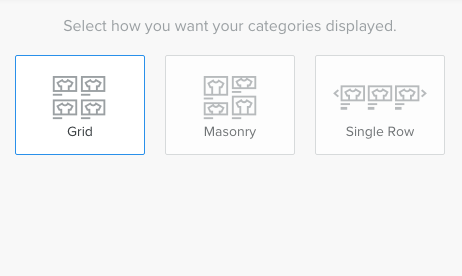
There are a number of different ways to layout the category images and info. By default, they display in a grid. If there are more categories than fit on a page, pagination appears at the bottom.
You can choose from one of the following:
Grid: Category images are lined up in a grid, each image is the same size.
Masonry: The categories are laid out based on the size of the image – usually alternating smaller and larger. Pagination displays at the bottom if needed.
Single Row: The categories display in a single row and the user can scroll to the left or right, similar to a slideshow.
To change the layout, in the Categories dialog (opened by clicking inside the element on the page), click Change Layout and choose the layout you want. Dismiss the dialog by clicking outside the element.
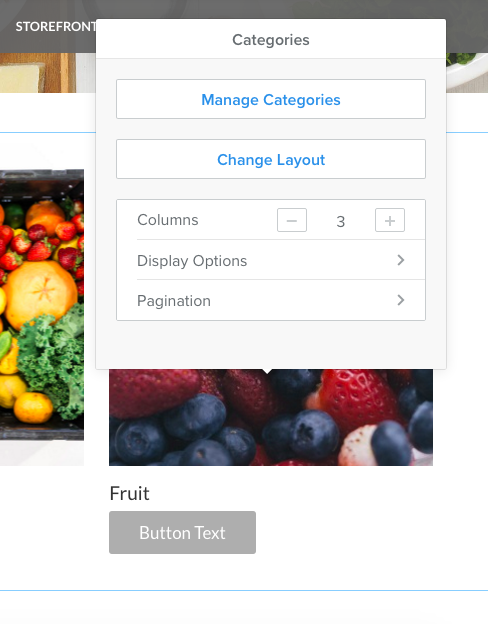
Change Category Display Options
Once you decide on a layout, you can change other display configurations from the Categories dialog (opened by clicking inside the element on the page).
Read the following sections to see what you can change.
Number of Columns
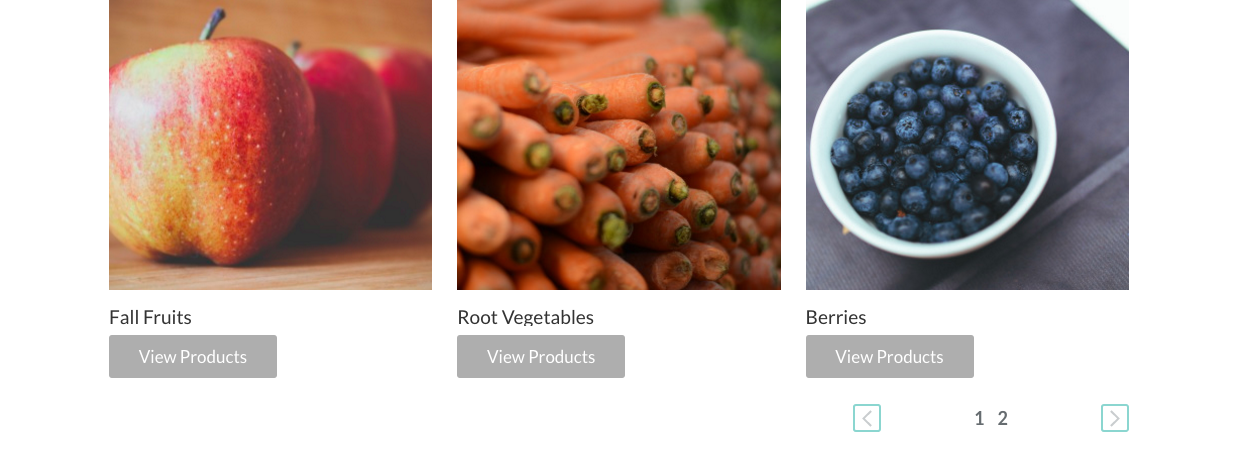
By default, the Categories element displays 3 columns:
Here’s the same Category element configured to use 2 columns instead of 3.
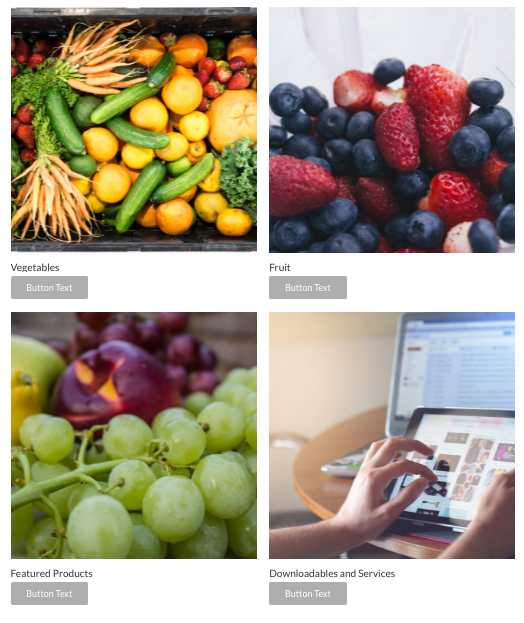
To change the number columns, click inside the Categories element and in the Columns field of the dialog, enter a number or use the + or - icons to change the number. The page redraws with the new configuration.
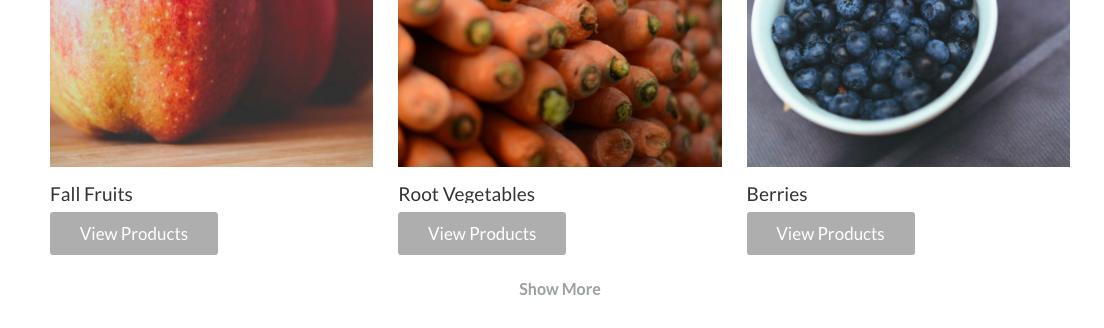
Pagination
When you have more categories than can display on a page, pagination links display so that your customers can access all categories. You have two options for pagination:
A Show More link that displays at the bottom of the Categories element:
Page number links with page forward/backward links:
To set pagination, click Pagination and choose which option to use. You can also set the number of categories to display per page.
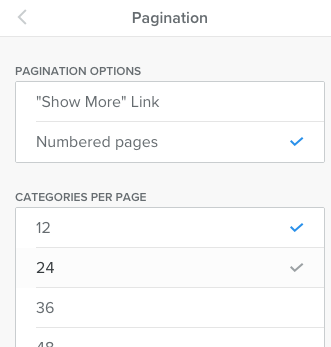
Image Display
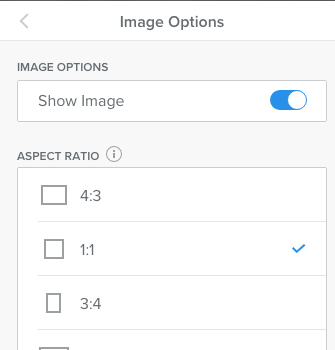
By default, the Categories element displays the images you’ve uploaded for them. You can turn those off, or you can change the aspect ratio at which they display.
Tip: The aspect ratio sort of determines the size and shape of your image. A 4:1 ratio would make the image width 4x the size of the height. A 1:1 ratio creates a square. A 3:2 ratio means the width is just a bit larger than the height. Feel free to play around with this ratio until you find the right look for your shop.
To change image display, click Display Options and then Image Options. If you don’t want to display images for categories, you can turn off that option. By default, images are displayed at a 1:1 ratio. Click through the other options and choose the size that works best for your page.
Button Display
By default, each category displays a button that navigates to a page that dynamically displays all the items in that category. You can turn the button off, or you can change the text, size and colour (based on your site’s theme) of those buttons.
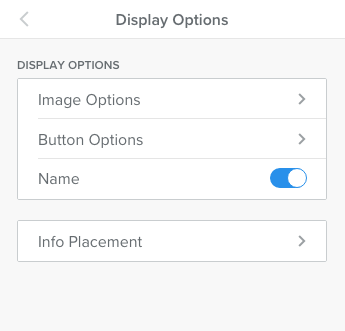
To change how the buttons display, click Display Options and then Button Options.

Category Name Display
By default, the category name displays below the image. To hide the category name, click Display Options and turn off the Name option.
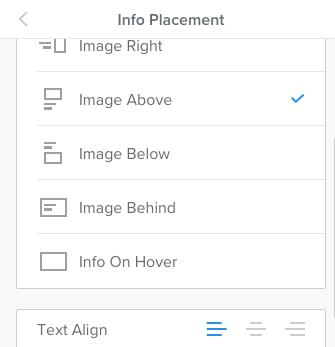
Text Placement
By default, the category name and button are below the image and they are left-aligned. You can instead have the image to the left, right or below the text and button. Or you can have the image behind the text. You can also have the text display only when your customer hovers over the image. Alignment can be either left, right or centred.
To change text placement, click Display Options and then Info Placement.
Manage the Categories that are Displayed
Once you’ve dropped the Categories element on a page, you can change the categories it displays and the order that they’re displayed in.
Click inside the Categories element on a page to open the Categories dialog.
Click Manage Categories.
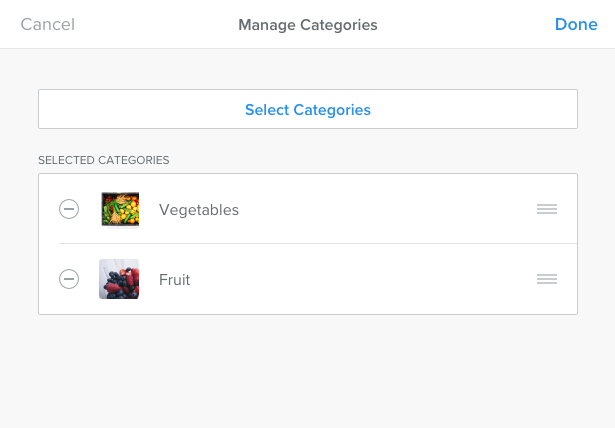
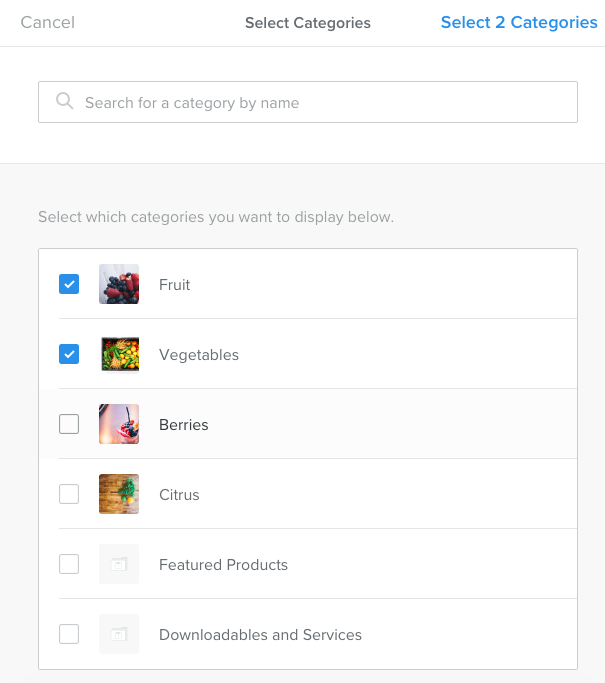
The categories currently selected for display are shown.
To change the categories (add or delete), click Select Categories and choose the categories to display.
To reorder the existing categories, simply drag and drop.
To delete a category, click the minus icon to the left of the category image.
Click Done when you’re finished. Your changes are reflected on the page.