Manage your Square Loyalty Programme
Once you’ve created your Square Loyalty Programme, you’ll be able to monitor your programme right from your Square Dashboard.
View a Customer’s Loyalty Status
Square Loyalty integrates with the Square Point of Sale app and your Customer Directory to keep track of your customers’ loyalty statuses. View a customer’s loyalty status from their profile activity feed to see when they enrolled, points and rewards earned, redemptions and more.
A customer’s activity feed will reflect the following loyalty events:
Enrolled in Loyalty: Customers are enrolled in your loyalty programme by entering their phone number after an eligible purchase.
Earned a Point or Reward: See how many points and rewards were earned and at which locations.
Manually Added/Removed Points: See if a customer’s points were adjusted.
Automatically transferred balance of points: Customers who may have inadvertently created multiple loyalty profiles have them automatically merged by our system to prevent lost points or rewards. For example, if they used the same payment card twice but accidentally entered the wrong phone number, we’ll pick up on it and fix it for you. Read more on how to merge a customer’s profile.
Signed up for the Mailing List: See when a customer signs up for your mailing list and if they did so in return for points. When you enable the Collect Contacts feature in Square Loyalty, new customers will receive a text message offering an additional amount of points in exchange for their email address.
Reward Redeemed: See when customers redeem an earned reward and at which location.
Update a Customer’s Loyalty Phone Number
Update or correct a customer’s loyalty cell phone number from their Customer Directory profile.
To do so:
Sign in to the Customers section of your online Square Dashboard.
Search and select the customer in question.
Next to Personal Information tap Edit > Update their cell phone number.
Save changes.
Merge a Customer’s Loyalty Profile
If a customer enrols in your programme using more than one phone number, they’ll earn points on duplicate customer profiles. To fix this, you can merge the two profiles and select a phone number for their loyalty programme participation going forward.
To do so:
Sign in to the Customers section of your online Square Dashboard.
Click Select > Tap the customers in question and click Merge > Continue. Make sure you select the customer’s accurate phone number in case they have more than one.
Confirm your changes by clicking Merge.
Merging customers that each have loyalty accounts associated with them will combine the earned points.
Note: Both profiles being merged must be enrolled in your loyalty programme in order to select the correct phone number.
From here, ensure the customer uses the same phone number they enrolled with when claiming a loyalty point going forward.
View and Void Rewards and Vouchers
Scroll to the Rewards section of a customer’s directory profile in your online Square Dashboard to see earned vouchers and rewards, and to void any if needed.
To manually void a voucher:
Sign in to the Customers section of your online Square Dashboard > Directory.
Search for your customer by name or phone number.
Scroll to the Vouchers and Rewards section of their profile, click Manage.
Tick the box for each voucher you’d like to void.
Click Void > Confirm Void.
View Loyalty Points and Rewards in Current Sale
You can view the number of points your customer will earn before you finalise the transaction, during the checkout process in the Current Sale section. To make sure your customers are able to view the points earned in a purchase, you’ll need to add them to the transaction.
Redeem Rewards
In the case that your customer has enough points to redeem a reward, Reward Available will be prompted on the current sale before finalising the transaction. You can add the reward to the current sale by tapping Reward Available and selecting the reward you’d like to apply.
Customers with available rewards paying with a card linked to their Loyalty account will see a reward redemption screen at checkout that allows them to select from their available rewards and apply them to their transaction. This is currently available for payments processed on Square Terminal and the Square Point of Sale app for iOS and Android devices.
Note: If the customer is paying with a new card, this screen will not show up and their available rewards can be redeemed by tapping Redeem Rewards from the Item Library. If a buyer is completing a transaction for a Square Invoices payment, they can only enrol in or check in to your Loyalty programme. Buyers can’t redeem any available rewards when completing an invoice payment at this time.
Buyer Check-In
During the checkout process, you can give buyers the option to either enrol in or check in to your Loyalty programme by providing their phone number at your point of sale. The Loyalty screen will appear during each transaction regardless of whether their purchase earned them a point or reward.
To enable this on your Square Point of Sale app or Square Terminal:
Tap More > Settings.
Select Loyalty and toggle on Customer check-in on customer display.
To enable this on your Square Register:
Tap More > Settings.
Select Loyalty.
Toggle on Show check-in screen at start of transaction. Ensure that the Enable Loyalty option is toggled on in order to update the settings on your device.
After each transaction, your customer will receive a text message indicating that they’ve been enrolled and, if applicable, earned their first point, along with a link to their loyalty programme status.
Note: This feature is currently available for transactions processed through Square for Retail, Square for Restaurants, and Square Appointments. Buyers can also enrol in or check in to your programme when completing a Square Invoices payment, but can’t redeem any available points. You can enable this check-in option from Loyalty > Settings in your online Square Dashboard. Read more about how .
Manage Reward Redemption
You can turn off the reward redemption screen from your Square Point of Sale app or from Square Register.
To do so:
Navigate to More > Settings in your Point of Sale app or on your Square Register.
Tap Loyalty > Tap Loyalty and toggle off Show reward redemption screen.
Your customers will no longer see the reward redemption screen.
Manually Adjust a Customer’s Loyalty Points
To edit a customer’s point count, locate their customer profile from your online Square Dashboard or the Square Point of Sale app and assign them the correct number of points.
From the Square app:
From the main menu, tap More > Customers.
Search for your customer by name or phone number.
Scroll down to Loyalty Programme and tap on the three-dotted Actions menu > tap Adjust Points.
Tap Add Points or Remove Points and enter the value. Select the reason for changing points.
Tap Save.
From your online Square Dashboard:
Sign in to the Customers section of your online Square Dashboard > Directory.
Search for your customer by name or phone number.
Under Loyalty Programme, click on the three-dotted Actions menu > click Adjust Points.
Click Add Points or Remove Points and enter the value. Select the reason for changing points.
Tap Save.
Note: Your customers will not be automatically notified of the changes made to their loyalty programme.
For any edits, please communicate this with your customer directly by following the above steps on your app or Dashboard to navigate to the Loyalty Programme menu > Send Status > Press Send. This will send a text message to your customer with their currently loyalty balance.
Refunds & Updating Loyalty Status
See when loyalty points will be removed automatically based on the loyalty programme type and the refund type below:
| Loyalty Programme Type | Full Refund | Partial Item Refund | Custom Refund Amount |
| Amount spent programme | All points will be removed. | Points will be removed proportional to the amount refunded. | Points will be removed proportional to the amount refunded. |
| Per Visit | All points will be removed. | Points will be removed if the amount refunded is below the spending threshold to earn points. | Points will be removed if the amount refunded is below the spending threshold to earn points. |
| Per Item or Category | All points will be removed. | If an item that earned points is refunded, the points earned for that item will be removed. Otherwise points will not be removed. | Points will not be removed. |
For exchanges processed on Square for Retail Plus, points will be adjusted based on the items being exchanged. The adjustment is based on the loyalty programme settings at the time of the transaction. If no points were earned in the original transaction because no loyalty customer was associated to the transaction, then there will be no adjustments to a loyalty balance.
Manage Your Customers’ Linked Cards
If a customer accidentally links their phone number to the wrong payment card, or vice versa, you can always unlink the two. If you’re not sure which phone number a card was linked to, you can search for the payment in the Transactions tab of your online Square Dashboard using the last 4 digits of the payment card, then clicking Paid By in the payment details to find the customer profile. You can also search for a customer’s profile using their full phone number.
To unlink a customer’s payment card:
Sign in to the Customers section of your online Square Dashboard > Directory.
Search for your customer by name or phone number.
Click the three-dotted Actions menu > Managed Cards.
Tick the box for each of the cards you’d like to unlink.
Click Unlink > Confirm Unlink.
Edit Your Loyalty Programme
You can update your loyalty programme anytime with no affect on your customers’ existing, earned points.
To edit your Loyalty Programme:
Navigate to Customers > Loyalty >Settings in your online Square Dashboard.
Click Edit on the section you’d like to modify.
Make your changes and tap Save.
If you edit your programme:
Changes will apply to previously issued points going forward. For example, if a customer had three of five points and you change to a ten-point programme, they will now have three of ten points. Please make sure your customers and cashiers understand the impact of these changes.
Changes to reward settings will not impact previously issued rewards. For example, if a reward was originally 10% off an item and you change to 20%, previously issued rewards that haven’t been redeemed won’t be updated from 10% to 20%.
Note that you can create up to 15 rewards for your Loyalty Programme. If you already have 15 rewards on your account, you’ll need to delete an existing reward in order to create and apply a new reward on your programme.
Once you have your Loyalty Programme set up, you can manage the number of points your customers have directly from the Square Point of Sale App or online Square Dashboard, so you’ll never have to worry if your customer misses a point.
Note: You must inform your customers when you make any changes to your loyalty programme.
Some ways in which you can notify your customers can be placing a notice at your register, telling your returning customers as they visit your business, or if you have their contact information, you can contact them directly and inform them.
In case you manually deduct points from your customer’s profile, they will receive a text message informing them of this change.
Exempt items from accruing points
If you set up a spend-based loyalty programme, you can exclude certain items or categories from accruing points. To do so:
Log in to your online Square Dashboard and navigate to Customers > Loyalty > Settings.
Select Edit next to the Eligible items and categories section.
Use the filter or search bar to locate items, and deselect any items you want to prevent from accruing points. Any items that are uncategorised will be located at the bottom of this list.
Click Done.
If you exclude a category, then any new items you create in that category will automatically be excluded from accruing points as well.
Once you finish updating your Loyalty settings, the changes will apply to all future transactions. These changes aren’t retroactive – so they won’t apply to transactions that have already been processed. If your customer purchases items that are exempt from accruing points within your programme, let them know during the checkout process.
Note: The option to exclude items from accruing points is only available for spend-based loyalty programmes and is not available for visit-based, item-based or category-based programmes at this time.
Set Up a Loyalty Status Page
Your Loyalty Status page is a unique link you can share with your customers, which allows them to use their phone number to check their loyalty status at your business. New customers will also be able to enrol in your loyalty programme.
You can add your Loyalty Status page anywhere you like. We recommend adding it to your website and social media pages, and letting your customers know they can check their status there.
To view and share your Loyalty Status page:
Navigate to the Loyalty section of your online Square Dashboard and select Promotions.
Under Loyalty Status page you will be able to view or copy the link of your business’ Loyalty Status page.
Note: In addition to viewing Loyalty Status from their Loyalty Status page, customers can view how many points they earned just by looking at their digital receipt once they have made an eligible purchase. Customers can click on the Loyalty Status page link on the receipt for more information about the loyalty programme, including available rewards and a record of their loyalty activities.
Modify Points Expiration
To update or add a point expiry to your current programme:
Navigate to the Loyalty section of your online Square Dashboard and select Settings.
Under Earning Points locate Expiration > click Edit and select whether you’d like your points never to expire, or select after how long you’d like them to expire.
Click Confirm.
Changes to point expiration will only impact future points earned. Customer’s existing points will expire based on the expiration settings at the time of earning. Expiry will be implemented at the end of the month on the last month of the expiration policy. An automated text message will be sent to buyers who have expiring points 14–16 days before they expire, which you are able to do from Dashboard.
For example, if the programme has a 3 month expiration policy then when a customer earns 100 points on 1st October, their points will expire 3 months later on 31st January.
View Expiring Points
You can view a customer’s expiring points from your Customer Directory and the Square app. To do so:
1. Go to your Customer Directory and select a customer.
2. Under Loyalty in the customer’s profile, click the three horizontal dots.
3. Click View Expiring Points to view total points that will expire for that customer.
You can also view a customer’s expiring points from the Square app:
1. Go to your Customers Tab and select a customer.
2. Under Loyalty in the customer’s profile, click the three horizontal dots.
3. Click View Expiring Points to view total points that will expire for that customer.
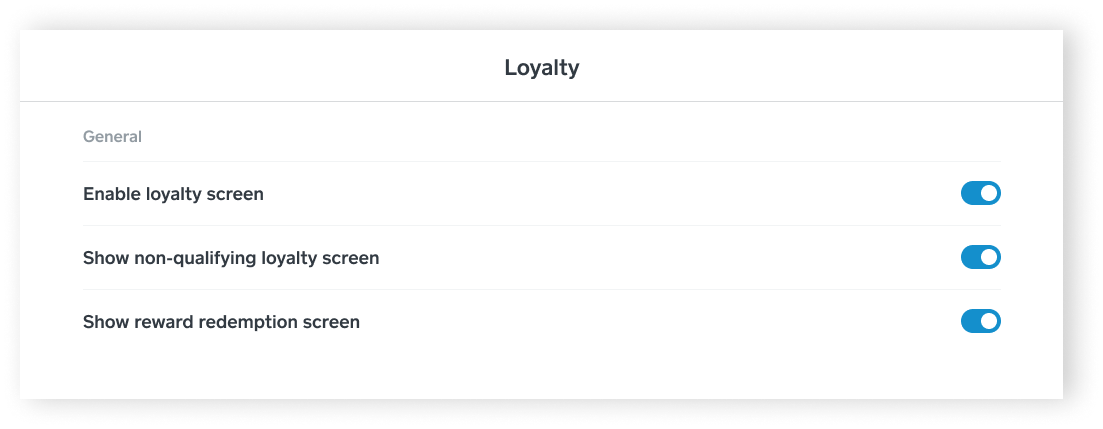
Customise your Sign-in Screen
You can edit the way your Loyalty sign-in screen shows on your Square Point of Sale for iOS. You are able to turn off the Loyalty screen for non-qualifying transactions, customise the display time of the Loyalty sign-in screen or turn off the Loyalty sign-in screen completely.
To locate these settings:
Log in to your Square Point of Sale.
Select More > Settings.
Select the setting you would like to adjust for your Loyalty Programme.
Assign Team Members’ Loyalty Permissions on your Account
If you want to allow team members to take action on your loyalty account on your behalf, you can assign them permission sets through Square’s team permissions service. Actions that you can allow your team to take range from viewing Loyalty reports, managing customer’s Loyalty data and configuring your loyalty programme settings
Loyalty permissions are broken down into the following categories and actions:
Reporting: Viewing loyalty reports, programme performance and customer engagement metrics.
Program Management: Viewing and editing loyalty programme settings and setting up loyalty promotions.
Customer Management: Viewing and editing Loyalty customers’ account information. Note: This permission requires the ‘View, edit, create and delete customer directory data’ permission from the Customers permission group to be enabled.
To enable Loyalty permissions for your team members:
Log in to your online Square Dashboard > Staff > Team.
Select Permissions > Create Permission Set.
Choose a permission set name and click Loyalty from the list. Select the permissions you would like to assign to the permission set.
Click Continue > choose the device access points > click Save.
You can learn more about Team Management in our Support Centre.