Use Card on File with Square Appointments
With Square’s online appointments scheduling tools, you’re able to keep a customer’s card on file to charge for future bookings and no-show cancellation fees.
The fee for customer prepayments, no-show protection charges and charging a card on file from your online dashboard or Square app is 2.5% per transaction.
Add Card on File
Before you can charge a customer’s card on file, it must be added to their Customer Profile either through the Customer Directory or from a booked appointment.
Add Card on File From Customer Directory
Here’s how to link a payment card to an existing customer’s profile:
From the Customers tab of your online Square Dashboard, click Directory.
Select a customer > click the three-dotted actions menu > Add Card.
Enter the card details and your customer’s email address.
You must have written authorisation from your customer to save their payment card. Use the provided template form by clicking Download Form and send it to your customer.
Click Confirm.
To save a new customer’s card on file:
Head to the Customers tab of your online Square Dashboard, click Directory.
Click Create Customer > add their details > click Save.
Once their profile has been created, click three-dotted actions menu > Add Card.
Enter the card details and your customer’s email address.
You must have written authorisation from your customer to save their payment card. Use the provided template form by clicking Download Form and send it to your customer.
Click Confirm.
Note: Make sure to keep authorisation forms on file and store them securely.
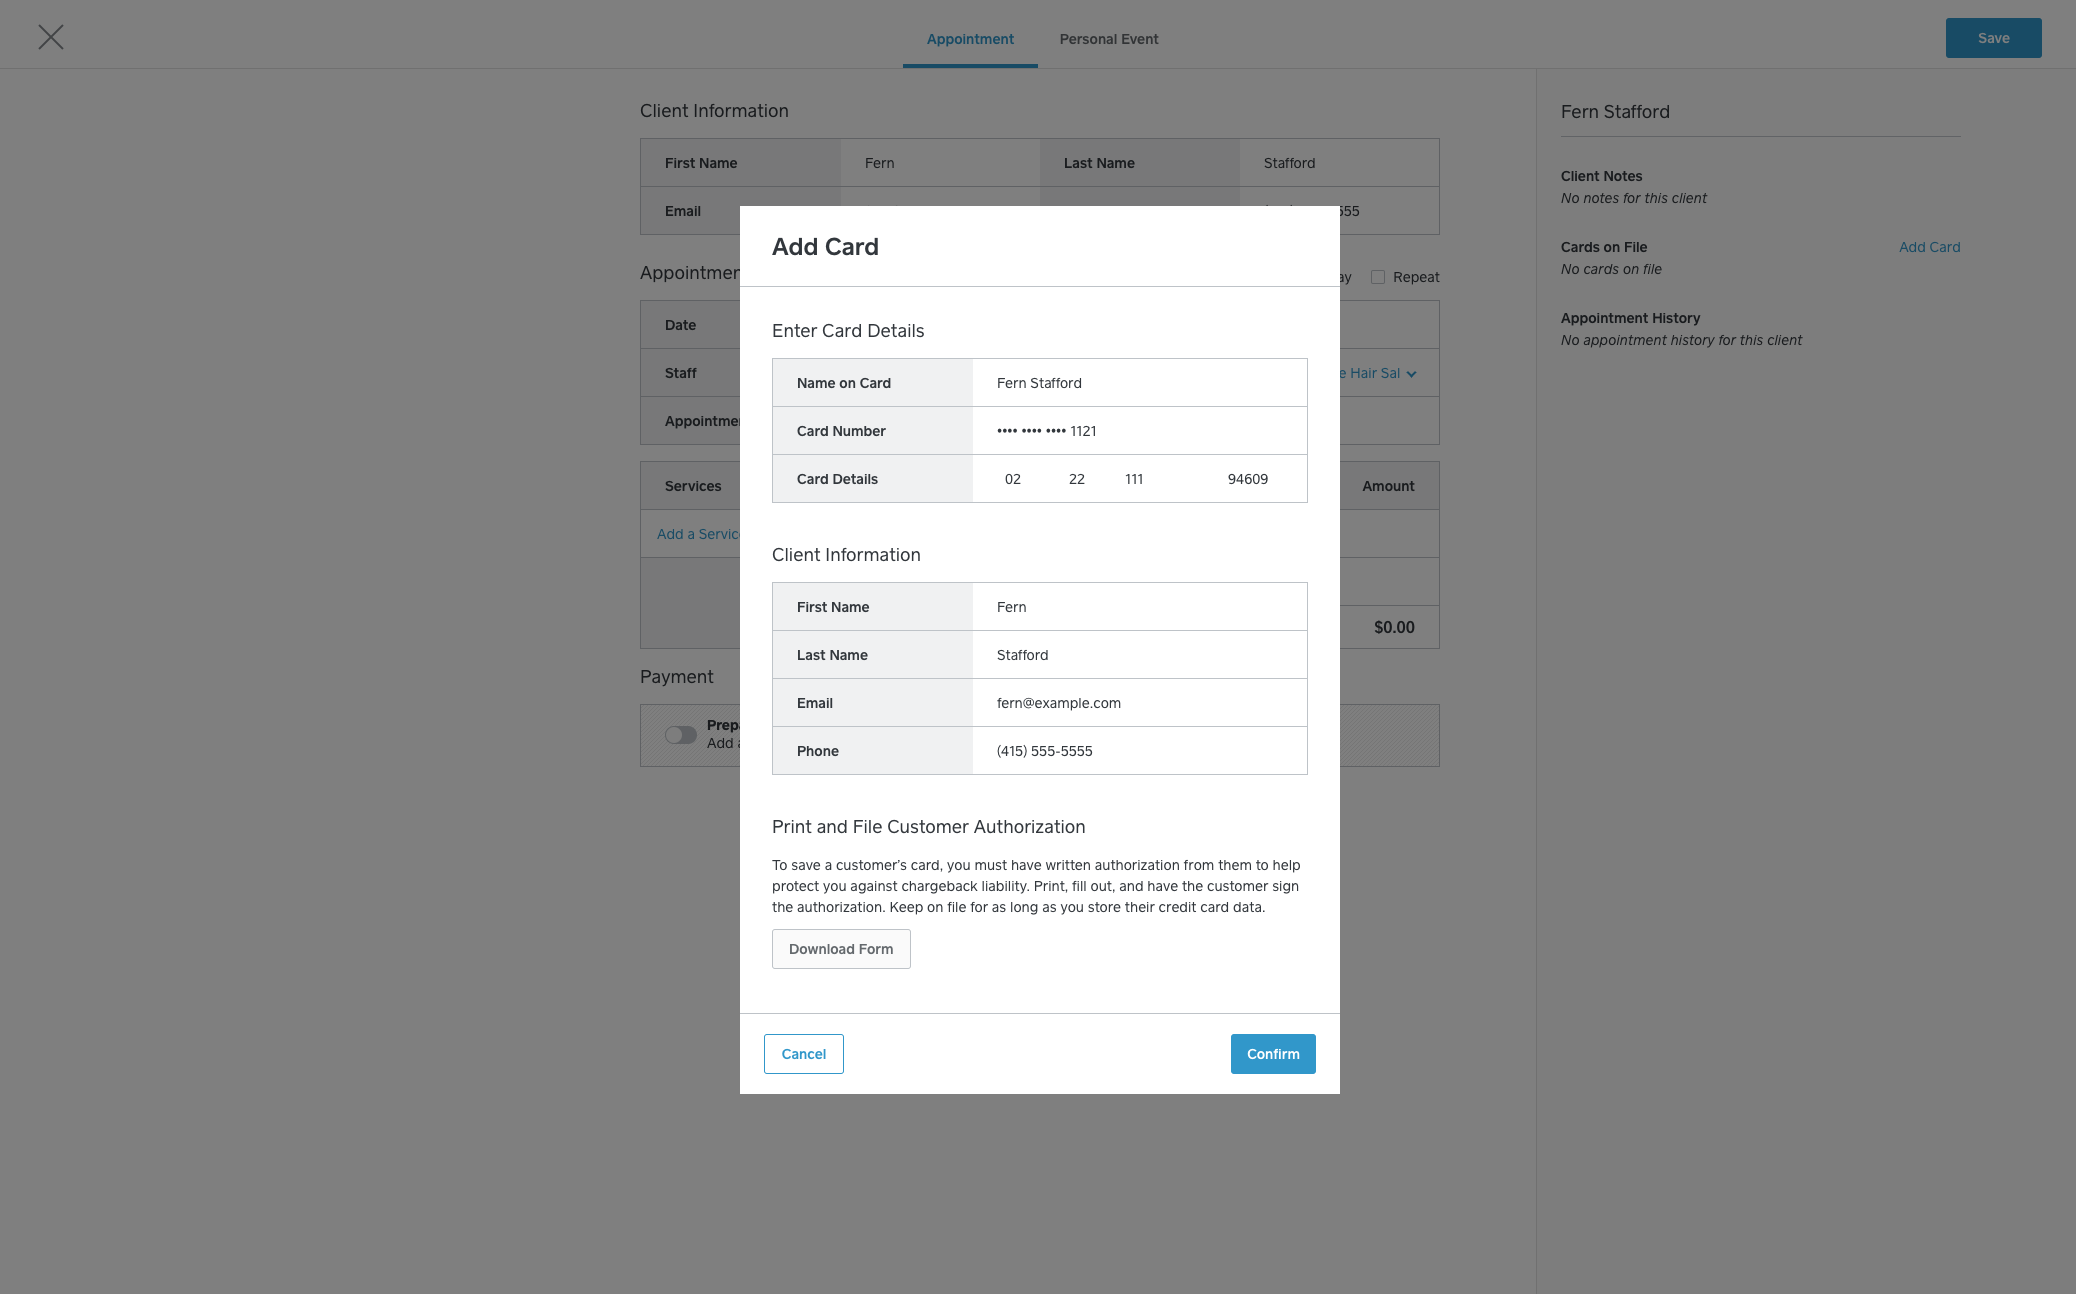
Add Card on File From Calendar
Add a customer’s card on when creating an appointment from your online Square Appointments dashboard.
To add a customer’s card on during the booking flow:
From the Calendar of your Square Appointments dashboard, click or drag the desired time slot.
Enter your customer’s name or create a customer on the spot. On the right, you’ll see Client Notes, Card on File and Appointments History. Note: You must have written authorisation from your customer to save their payment card.
Click Add Card > enter the card details and click Confirm.
Require Card on File for Online Booking
You can require clients to save a card on file when booking online and to authorise the card for future payments.
To require card on file for booking online:
Log in to youronline Square Dashboard and select Appointments > Settings > Payments and Cancellations.
Under Card on File, toggle on Require a Card on File to Book Online.
Once you toggle on Require a card on file to book online, your customers will see an error while booking online if they do not tick the box to authorise your business to save their card information.
Use Card On File To Create a Prepaid Appointment
If you’ve set your online booking site to require prepayment, the option to use a customer’s card on file will display when creating an appointment for them from your online Square Appointments dashboard.
From the Calendar of your Square Appointments dashboard, click or drag the desired time slot.
Enter your customer’s name. If their card is saved on file, it will be noted to the right of their name.
Under Payment, toggle Prepay for this Appointment.
Complete entering appointment details > click Save.
Use Card on File for No-Show Protection
If you’ve set up your online booking site to require a credit card for no-show protection, the option to use a customer’s card on file will display when creating an appointment for them from your online Square Appointments dashboard.
From the Calendar of your Square Appointments dashboard, click or drag the desired time slot.
Enter your customer’s name. If their card is saved on file, it will be noted to the right of their name.
Under Payment, toggle No-Show Protection.
Complete entering appointment details > click Save.
Learn more about managing your Customer Directory online.
Also, when your customer adds their card information to their Customer Account, you’ll be able to view and charge their card online or directly from the app.
Charge Card on File
Charge a Card on File From the Appointments App
Once you’ve saved your customer’s card on file, you can use it to charge their booked appointment directly from the Appointments app.
Tap the appointment in your calendar. Note: The sale will be associated with the staff member the appointment was booked with.
Tap Review and Check Out.
Add any additional items or services > select Charge. Appointment information will automatically carry over from the booked appointment.
Scroll down on the payment options screen. You will see your customer’s card on file along with the card type and PAN.
Tap Charge.
Confirm the payment by tapping Charge one more time.
Charge Card on File on Square Register
Once you’ve saved your customer’s card on file, you can use it to charge their booked appointment when using Square Appointments on Square Register.
Tap on the appointment in your calendar. Note: The sale will be associated with the staff member the appointment was booked with.
Tap Review and Check Out.
Add any additional items or services > select Charge. Appointment information will automatically carry over from the booked appointment.
Scroll down on the payment options screen. You will see your customer’s card on file along with the card type and pan.
Tap Charge.
Confirm the payment by tapping Charge one more time.