Mount and Secure Your Square Stand
Learn how to quickly set up your Square Stand, secure it to your countertop and connect hardware accessories. Square Stand can be secured to your countertop using the adhesive mount or drill mount included in the box.
Mount the Square Stand (2nd Generation)
Secure your Stand to a countertop using either a drill, a 3/16” drill bit and the included drill mount or with the included adhesive mounting plate.
Note: Because the Square Stand is a piece of electrical equipment, please make sure you mount it somewhere that is not frequently wet.
Adhesive Mount
Plug the USB hub into the Stand: Plug the cable from the USB hub into the bottom of the Stand. Note: If the cable exits the base of the Stand on the right side (when the screen faces you), the Stand will swivel clockwise. If the cable exits the base on the left side, the Stand will swivel anticlockwise.
Screw in the adhesive mounting plate: Make sure the cable is firmly pushed in, then screw in the adhesive mounting plate.
Remove the adhesive backing: Check that the plate is tightly screwed in and the base of the Stand is locked with the cable exiting from your preferred side, then remove the adhesive backing.
Mount the Stand to your countertop: Clean and dry the area where you want to mount the Stand, then firmly adhere the Stand into place. Press down for 30 seconds and wait 30 minutes for the adhesive to set.
Note: To remove the adhesive mount, pull the tabs on the mount slowly outwards. The adhesive will start to stretch until it detaches from the surface it was mounted on.
Drill Mount
Plug the hub into the Stand: Plug the cable into the bottom of the Stand. Note: If the cable exits the base of the Stand on the right side (when the screen faces you), the Stand will swivel clockwise. If the cable exits the base on the left side, the Stand will swivel anticlockwise.
Drill the hole for the drill mount: With a 3/16” drill bit, drill a hole into your counter. Make sure your bit will work on your counter material.
Line up Stand with the drill hole: Line up the screw hole in the base of the Stand with the hole in your counter. Double-check that the base of the Stand is locked with the cable exiting from your preferred side.
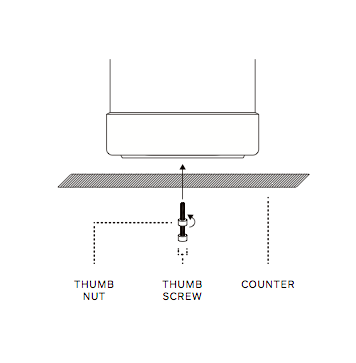
Mount Stand to your counter: Screw the drill mount into the base of the Stand through the bottom of your counter. Turn the nut until it’s firmly against the bottom of your counter. Make sure the drill mount and the Stand are secure and Stand can only swivel on a 180-degree axis.
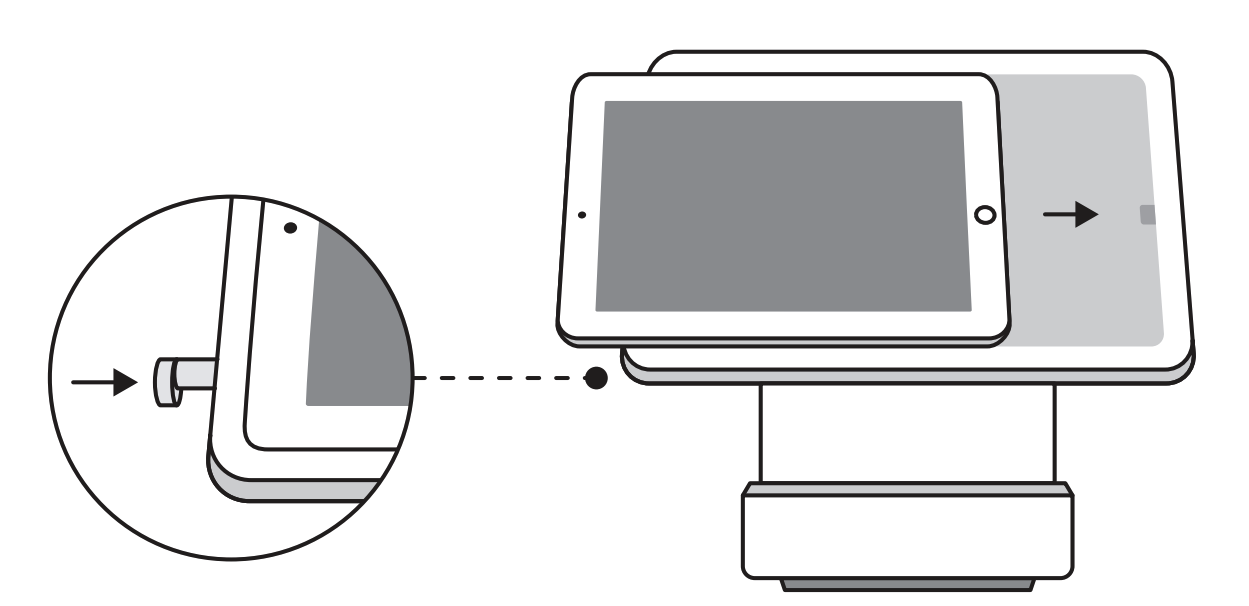
Insert or Remove the iPad from the Square Stand (2nd generation)
You can take your iPad out of Stand by pulling out then pushing down on the raised security latch located next to the iPad’s camera. That will disconnect the iPad for easy removal.
Mount the Square Stand (1st Generation)
Secure your Stand to a countertop using either a drill, a 3/16” drill bit and the included drill mount or with the included adhesive mounting plate.
Note: Because the Square Stand is a piece of electrical equipment, please make sure you mount it somewhere that is not frequently wet.
Adhesive Mount
Plug the USBhardware hub into the Stand:
Plug the cable from the USB hardware hub into the bottom of the Stand. Note: If the cable exits the base of the Stand on the right side (when the screen faces you), the Stand will swivel clockwise. If the cable exits the base on the left side, the Stand will swivel anticlockwise.Screw in the adhesive mounting plate:
Make sure the USB hardware hub cable is firmly pushed in, then screw in the adhesive mounting plate.Remove the adhesive backing:
Check that the plate is tightly screwed in and the base of the Stand is locked with the cable exiting from your preferred side, then remove the adhesive backing.Mount the Stand to your countertop:
Clean and dry the area where you want to mount the Stand, then firmly adhere the Stand into place. Press down for 30 seconds and wait 30 minutes for the adhesive to set.
Note: To remove the adhesive mount, pull the tabs on the mount slowly outwards. The adhesive will start to stretch until it detaches from the surface it was mounted on.
Drill Mount
Drill the hole for the drill mount:
With a 3/16” drill bit, drill a hole into your counter. Make sure your bit will work on your counter material.Plug the USBhardware hub into Stand:
Plug the cable from the USB hardware hub into the bottom of the Stand. Note: If the cable exits the base of the Stand on the right side (when the screen faces you), the Stand will swivel clockwise. If the cable exits the base on the left side, the Stand will swivel anticlockwise.Line up Stand with the drill hole:
Line up the screw hole in the base of the Stand with the hole in your counter. Double-check that the base of the Stand is locked with the cable exiting from your preferred side.Mount Stand to your counter:
Screw the drill mount into the base of the Stand through the bottom of your counter. Turn the nut until it’s firmly against the bottom of your counter. Make sure the drill mount and the Stand are secure and Stand can only swivel on a 180-degree axis.
Insert or Remove the iPad from the Square Stand (1st generation)
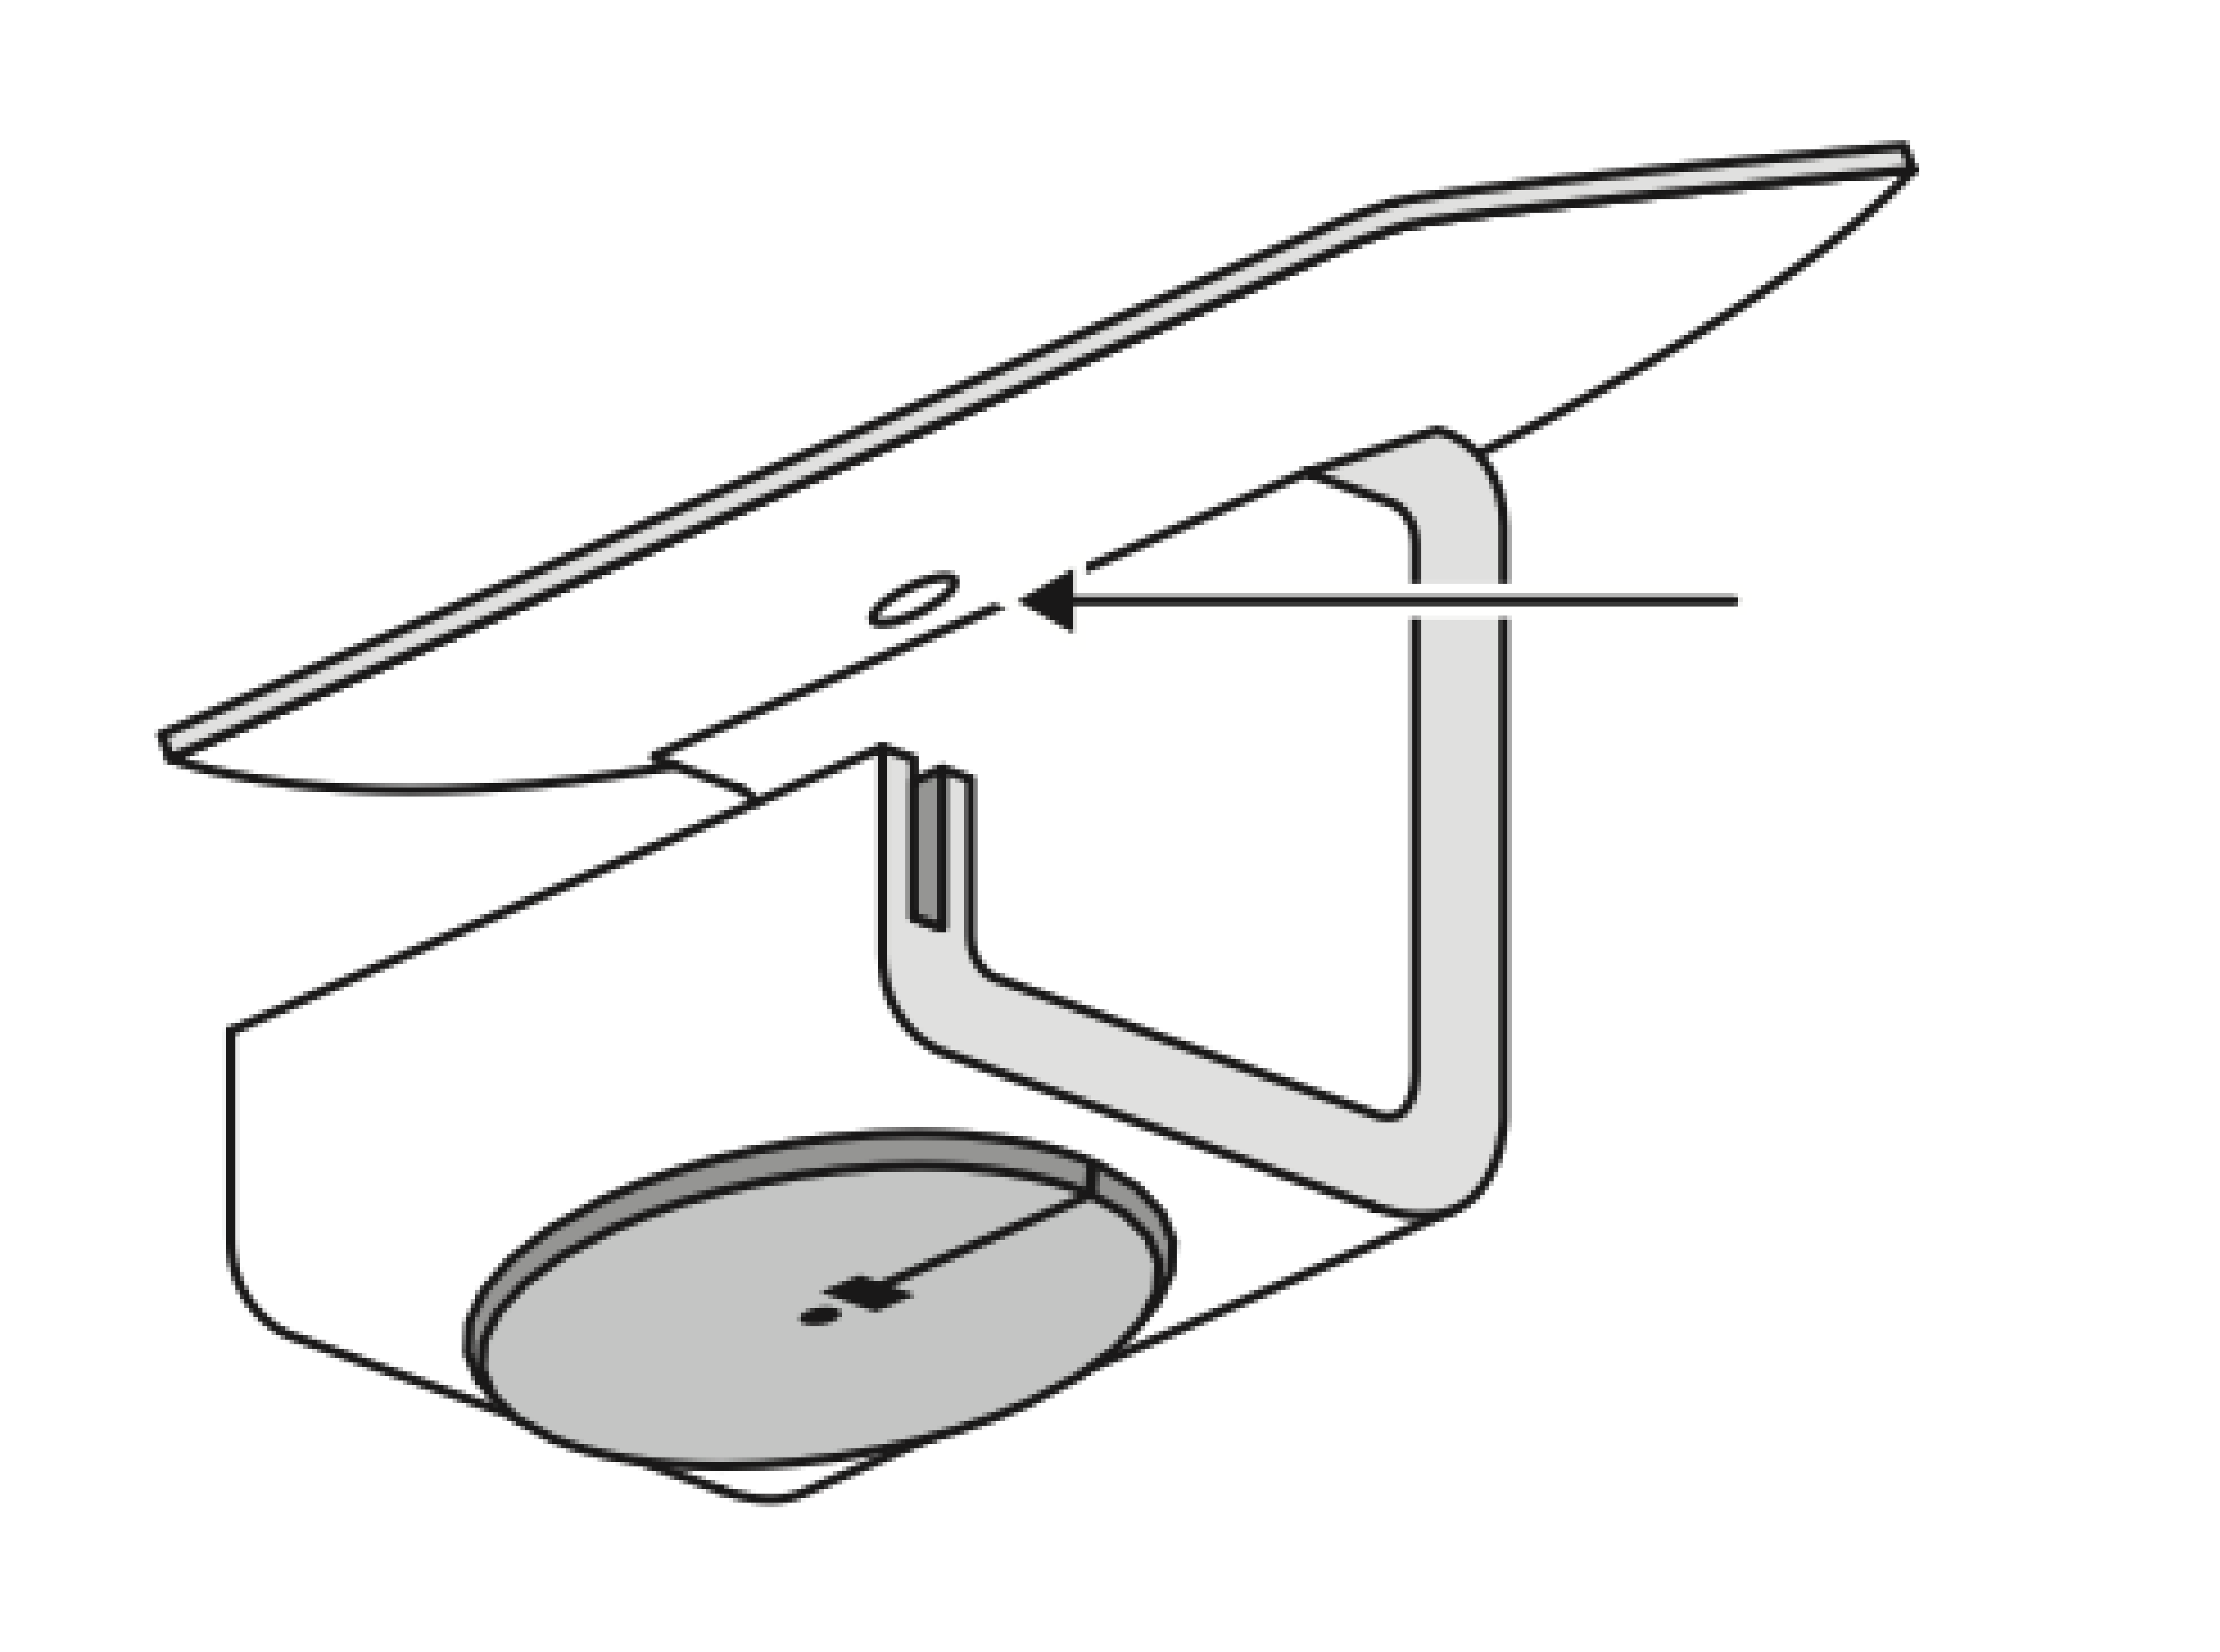
Remove the security pin from the headset port of your iPad.
Press the eject button located on the underside of the iPad enclosure.
Gently remove the iPad.