Get Started with Square Bill Pay
Square Bill Pay lets you organize and streamline outgoing payments by paying bills and vendors using your Square Checking account or any debit or credit card. You can access Bill Pay from your online Square Dashboard and Square mobile apps. More specifically:
On iOS devices, Bill Pay is available in the Square Invoices app, Square Appointments app, and in the add-on libraries for the Square Point of Sale app and Square for Retail app.
For Android devices, Bill Pay is available in the Square Invoices app, and in the add-on library for the Square Point of Sale app.
Bill Pay with Square Dashboard
From your Bill Pay Dashboard, you can use Bill Pay by uploading an existing bill, adding the bill manually, or utilizing email forwarding.
- Go to Payments > Bill Pay from your online Square Dashboard.
- Click Add bill.
- Click Upload a bill.
- Select a PDF or an image file.
- Square will then import the document as an attachment and automatically extract information such as the bill amount, due date, and vendor information (name, contact, and bank account, if available).
- Verify the bill information is correct.
- Configure your payment method and delivery settings.
- Click Schedule payment.
- Go to Payments > Bill Pay from your online Square Dashboard.
- Click Add bill.
- Click Add bill manually.
- Enter key information, such as the bill amount, due date, and vendor information (name, contact, and bank account, if available).
- Verify the bill information is correct.
- Configure your payment method and delivery settings.
- Click Schedule payment.
You can configure payment methods and notifications at any time from the Settings tab of your online Square Dashboard.
Use a unique bill pay email address to forward bills from your inbox or share it with your vendors to receive bills directly. We’ll scan the details and add them to your bill list for your review.
You set up email forwarding by either:
- Going to Pay bills, then click the Add bill drop-down menu > Forward from email.
- Going to Bill Pay > Settings > Email forwarding.
Once you click the Forward from email option, copy the forwarding email address and open your email inbox to forward the invoices. Forwarded bills will show up in the Pay bills list view once it’s processed.
To ensure that your bill scans correctly, verify that your email includes a bill attachment. Supported file types include PDF, JPEG, or PNG.
Bill Pay with Square Mobile Apps
From the mobile apps on iOS and Android devices, you can add a bill by taking a photo, adding the bill manually, or utilizing email forwarding.
Tap Enter manually to type in the details for a bill you want to pay, including the vendor name and bank details, bill due date, bill ID, and message. You can also add an attachment.
- Tap Bill Pay, then tap +.
- Tap Take a photo.
- Take a photo of the bill, then tap Use Photo. Square will import the photo as an attachment and automatically extract information, such as the bill amount, due date, and vendor information (name, contact, and bank account, if available).
- Verify the bill information is correct.
- Configure your payment method and delivery settings.
- If you want to schedule a payment, select the date the payment will be withdrawn from your account.
Use a unique bill pay email address to forward bills from your inbox or share it with your vendors to receive bills directly. We’ll scan the details and add them to your bill list for your review.
You set up email forwarding by either:
- Tapping Bill Pay, then tap + > Forward from email.
- Going to Settings > Bill Pay > Email forwarding.
Once you click the Forward from email option, copy the forwarding email address and open your email inbox to forward the invoices. Forwarded bills will show up in the Pay bills list view once it’s processed.
To ensure your bill scans correctly, verify that your email includes a bill attachment. Supported file types include PDF, JPEG, or PNG.
You can configure payment methods and notifications at any time by going to ≡ More > Settings > Bill Pay in your app.
Manage and Edit Vendors
You can add or edit vendor information in both the add and edit bill flow and in the Bill Pay vendor list.
- Start adding or editing a bill.
- Click Vendor name to edit or remove the vendor.
- Click Edit to start updating your vendor’s name, contact information, and bank account details.
- Go to Bill Pay > Vendors from your online Square Dashboard. From the Square Invoices app, go to ≡ More > Vendors.
- Select the vendor you want to edit.
In addition, you can connect to over 26,000 verified companies within our network when adding a new bill. Learn more about adding and paying vendors.
Select a Delivery Method
If your vendor’s bank account information is recorded, funds will arrive in your vendor’s bank account one to two business days after you initiate the payment.
If your vendor’s bank account is not recorded, Square will charge your payment source on the scheduled payment date, and your vendor will have 7 days to choose how they want to receive the payment. Your vendor or supplier can choose to receive payment one of two ways: by ACH bank transfer or by a digital check. A digital check is a check in PDF format that Square emails to your vendor. They can then download, print, and make a mobile check deposit.
Your vendor will receive a reminder email within four days if they haven’t chosen how they want to receive the payment. If your vendor does not respond in 7 days, the payment will be canceled and you will receive a refund to your original payment source.
If you connect to a verified company within our network when adding a new bill, Square will connect your account and send electronic payments directly. You can expect your account to be posted in one to two business days.
Send a digital payment
Square will send payment to your vendor or supplier via ACH bank transfer if their bank account details are on file. Funds will arrive in your vendor’s bank account in one to two business days after you initiate the payment.
There are three ways to obtain your vendor’s bank account details:
- If the vendor’s bank account information is on the invoice or bill, Square will automatically populate it in the “Vendor account details” section when you upload or take a photo of the document.
- If you have previously obtained your vendor’s bank account information, enter it manually in the “Vendor account details” section.
- You can also request vendor bank account details via Square. To do so:
- Click on the vendor name to edit.
- Click Vendor bank account details.
- Ask the vendor for payment details.
- Enter your contact’s email address and select Send.
- Your vendor will receive an email from Square that will direct them to a secure page to provide their bank account information.
Note: If you’re adding a new vendor, new vendor bank accounts are verified in two to three business days. Transfers can only take place after verification.
You can still schedule and initiate payment if your vendor’s bank account details are not on file. In this case, on your scheduled payment date (i.e., when Square will charge your payment source), your vendor will receive an email to either provide bank account details or accept a digital check.
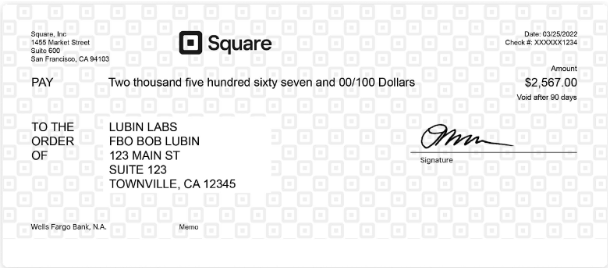
If your vendor chooses to accept a digital check, they will have 90 days from the date they first downloaded the check to deposit it. After 90 days, the check will be voided, and you will get a refund to your original payment source. If they choose to accept the payment via digital check, they can follow the steps below to deposit the check:
- Print the check on plain white paper.
- Verify that texts and bank numbers are legible.
- Cut on the dotted lines, sign the back, and make a mobile check deposit using a banking app.

You can choose to have Square mail a paper check on your behalf if you have your vendor’s physical address or P.O. Box. Square will charge your payment source on the scheduled payment date and then mail a paper check via USPS.
Mail a paper check
If you are concerned about vendors not responding to payment notifications or have vendors that do not want to handle modern digital payments, you may send a paper check.
Square will charge you first and issue a check to your vendor using a Square bank account. Square handles both check printing and mailing.
Checks will be delivered in four to six business days via USPS First Class Mail. As you select the paper check option, you must confirm the vendor’s address (and edit if necessary). If not already on file, you may add the address. Note: This will be offered at no cost for a limited time.
You will receive multiple notifications indicating the completion of an action, namely when Square issues and mails a paper check on your behalf, when a paper check is delivered to your vendor, and when the payment is cleared.
Note: A paper check shall remain valid for 90 days from the date it is issued.
Manage Payment Methods
When you’re adding or editing a bill:
- Go to Payment details > Payment methods.
- Select one of your existing payment methods to pay the bill or select Add a payment method to add a new one.
You can also set up payment methods by going to Bill Pay > Settings in your online Square Dashboard.

Schedule a Payment
When you’re adding or editing a bill:
- Scroll to “Schedule payment.”
- You can reference the due date and schedule when to initiate your payment.
- Click Schedule payment.
Note: When scheduling payments, you’ll need to choose a payment method. The payment will then arrive in your vendor’s account one to two business days after the selected date. Paper checks are expected to arrive in four to six business days after initiating the payment.

When you’re adding or editing a bill:
- Tap Next or •••, then tap Schedule payment.
- Scroll to “Schedule payment.”
- You can reference the due date and schedule when to initiate your payment.
- Tap Schedule.
Note: When scheduling payments, you’ll need to choose a payment method. The payment will then arrive in your vendor’s account one to two business days after the selected date. Paper checks are expected to arrive in four to six business days after initiating the payment.
Cancel Payment
You can cancel a payment pending vendor response on delivery destination (i.e., bank transfer or digital check) from your online Square Dashboard or via the Square mobile apps. Canceling a bill will initiate a refund and stop the payment from reaching your vendor. You will see the amount refunded back to your payment method in one to two business days.
To cancel a pending check (issued but not deposited), you should contact Square Support.
- Go to Bill Pay > Pay bills on your online Square Dashboard.
- Select a bill and click ••• > Cancel payment.
- Click Cancel payment to confirm.
Bill Pay Notifications
If you have added a bill but have not scheduled payment, you will receive an email 7 days before the due date as a reminder.
If you have scheduled a payment, you will receive an email 5 days before the payment initiation date that your Square Checking or your card will be charged in 5 days.
On the day when your payment is scheduled, both you and your vendor will receive an email from Square that payment has been initiated for this bill.
If your vendor is receiving payment by ACH bank transfer, you will receive an email in approximately 3 business days to inform you that your vendor is now paid. Note: Payment will generally arrive at your vendor the next business day (or the second business day if initiated after 5 p.m. PT). Because of how bank transfer works, we are just waiting for at least 3 business days to ensure there are no returns or errors on the receiving bank side.
If you choose to mail a paper check to your vendor, you will receive an email when the check is successfully delivered to the vendor's address, approximately four to six business days after payment initiation.
If your vendor chooses to accept and deposit either a digital or paper check, you will receive an email when Square confirms that the check has been successfully deposited.
Declined Checks
Bill Pay Reporting
From your Bill Pay Dashboard, you can download bill pay data.
Go to Payments > Bill Pay from your Square Dashboard.
Select one or more filters to apply to your report as needed.
Click Export to download your bill pay report as a CSV file.