Create and apply item modifiers with Square for Restaurants
Before you begin
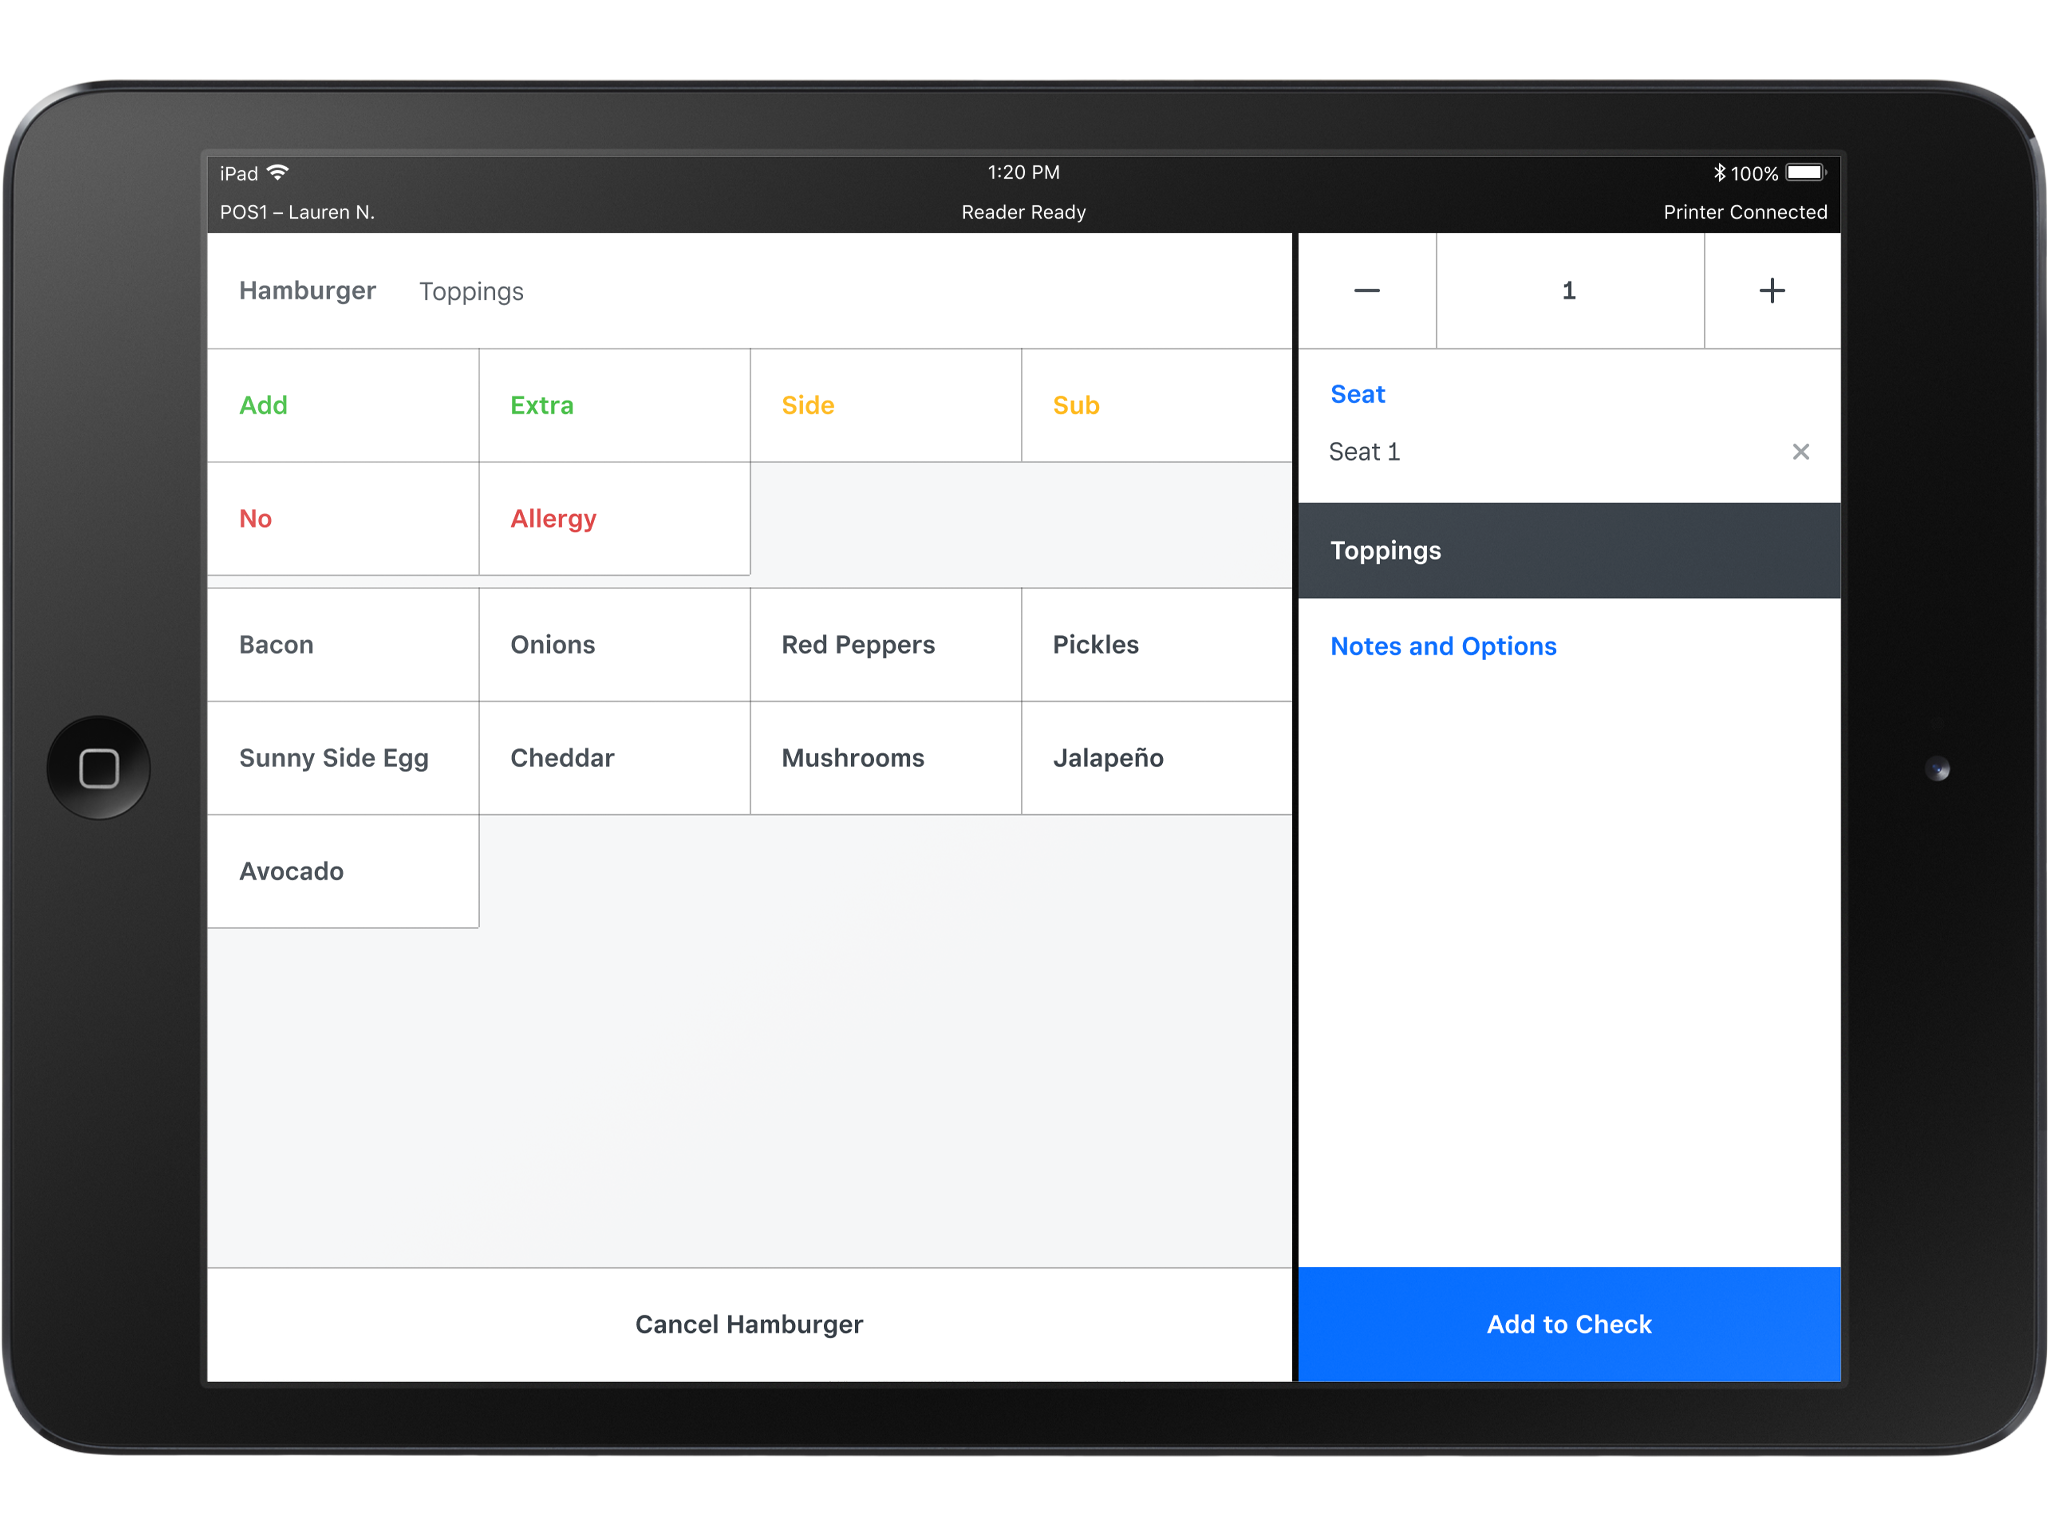
Modifiers are customizable options you can apply to an item at checkout, like different toppings for a hamburger or additions to a latte. You can use modifiers to edit an item and specify the item change to the kitchen. Modifiers live within a modifier set.
To create a modifier set and apply modifiers to items or display groups, you need access to your Square Dashboard.
Step 1: Create a modifier set
Log in to your Square Dashboard and click Items & Orders > Menus.
Click Add Modifiers.
-
Type the name of your new modifier set and click Add a new modifier.

Confirm your Modifier Set Name.
Under Modifiers, toggle on Customer can only select one modifier to set your first modifier as the default option.
Click the picture icon to add an optional image. Enter your modifier name in the New Modifier field, add a Kitchen name and Price, and toggle on In Stock if tracking your stock status.
Add any additional modifiers to your set.
To have modifier operators appear when view your modifier set on your Restaurants POS, toggle on Use Conversational Modifiers on POS.
-
Click Save.


Step 2: Apply modifiers to menu items
You can apply modifiers to your menu items from the menu editor. Once you apply a modifier, the modifier name appears beneath the item name.
Log in to your Square Dashboard and click Items & Orders > Menus.
Click Add Modifiers.
Search for the existing modifier set you want to use.
Select the display group or individual items to which the modifier will apply.
Click Apply to Items.
Next steps
Learn more about menus and items from one of these Support Center articles: